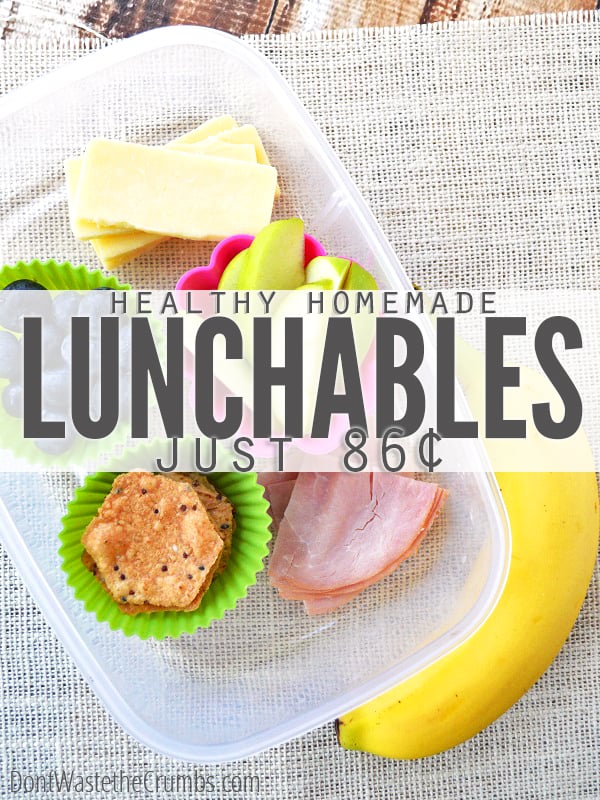
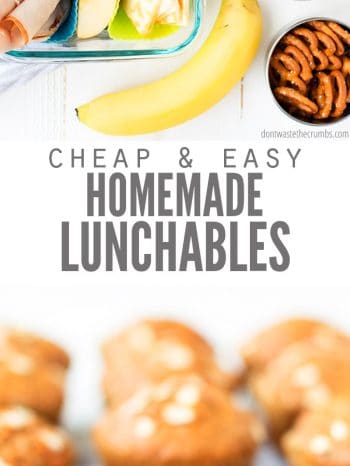
Ditch the processed boxes and make healthy homemade Lunchables instead. They cost less than $1 and contain nothing but 100% real food! Try out my recipe for DIY homemade lunch meat also!
As a kid, one of my favorite lunches to take to school was the Lunchable. The fact that my lunch could be stacked on a cracker and it WASN’T a sandwich made me the cool kid for like, 20 minutes.
We moved often in my elementary years and sandwiches were the norm, so my “cool kid” moments were few and far between. Unfortunately for my social status, the time my family settled in Texas was about the time I outgrew Lunchables. Still, I cherished those moments when they did come, because really, who doesn’t like cheese and crackers?
I remember Lunchables being very simple back then: Crackers, meat, and cheese. There were no drinks, no desserts, and definitely no smoothies.
Now Kraft has five different lines of Lunchables for a total of 45 flavor combinations, all with one common underlying theme: Extremely processed ingredients.
Have You Ever Read the Ingredients on a Lunchable?
If not, no problem. I’ll spare you the gory details and summarize it for you:
- It’s really, really long.
- You can’t pronounce most of the ingredients.
- There’s a 95% chance every item in the package has either high fructose corn syrup or hydrogenated oils – the two biggest additives you should be concerned about in terms of real food.
- You won’t find most of them in your kitchen (or the grocery store, for that matter).
Now that doesn’t mean you shouldn’t be concerned about other additives too, because there are PLENTY to choose from on the back of those little yellow boxes.
- Carrageenan
- Sodium nitrite
- Soy lecithin
- MSG (in more than one form),
- Annatto
- Three different types of artificial sugar
This should be enough to get your brain juices flowing, and your blood pumping too if you hate additives as much as I do.
So in addition to offering healthier, homemade options for soft pretzels and hot pockets, I’m offering a real food version of Lunchables too. As of today, you should be fully armed to get your kids through a full week of school without having to rely on convenience foods for either lunch or after-school snacks.
The fact that you can do it all without spending a lot of time, or a lot of money, is a nice little bonus too.
Healthy Homemade Lunchables
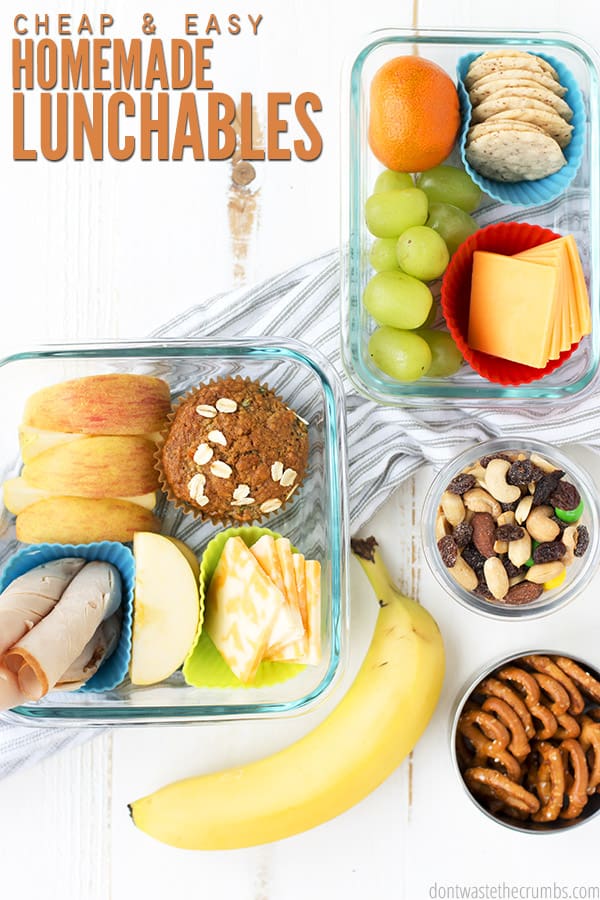
Coming up with a healthy Lunchable is not rocket science. I mean, if Kraft can put crackers, meat, and cheese together in a box and call it lunch, why can’t we? The key is to simply choose better ingredients.
Homemade Lunchables are incredibly easy to put together and in fact, we’ve been eating them for several years now. Recognize “snacky lunch” on the monthly meal plans?
Here’s the simple formula we use:
- (1) Starch
- (2) Protein
- (2) Fruit/Vegetable
- (1) Drink
As to what you want the starch to be or what type of protein is packed, the sky’s the limit! The easiest (and cheapest) way is to simply pack whatever you happen to have in the fridge, and that’s also a great way to use up leftovers. But of course, don’t let what’s in the fridge, or not in the fridge, hinder you!
If you’re stuck on what to pack, these healthy lunchables ideas can help. (They’re based loosely on what Lunchable currently offers, so if you need to, feel free to use that little tidbit to help you to convince your kids “it’s the same only better.”)
- Crackers/pretzels + ham + Swiss + mustard
- Crackers/pretzels + turkey + cheddar + mustard
- Pita + pepperoni + mozzarella + pizza sauce
- Crackers/pretzels + pepperoni + mozzarella + pizza sauce
- Mini-bun + chicken nugget + ketchup
- Chips/pretzels/crackers + chicken nugget + BBQ sauce
- Mini-bun + hot dog + mustard/ketchup
- chips/pretzels/crackers + hot dog + mustard/ketchup
- tortilla + hot dog + mustard/ketchup
- tortilla + sliced chicken nugget + shredded cheddar + salsa
I also polled fellow real foodie moms on their tried and true, kid-approved real food recipes, in case you’re needing more “what in the world should I pack” inspiration:
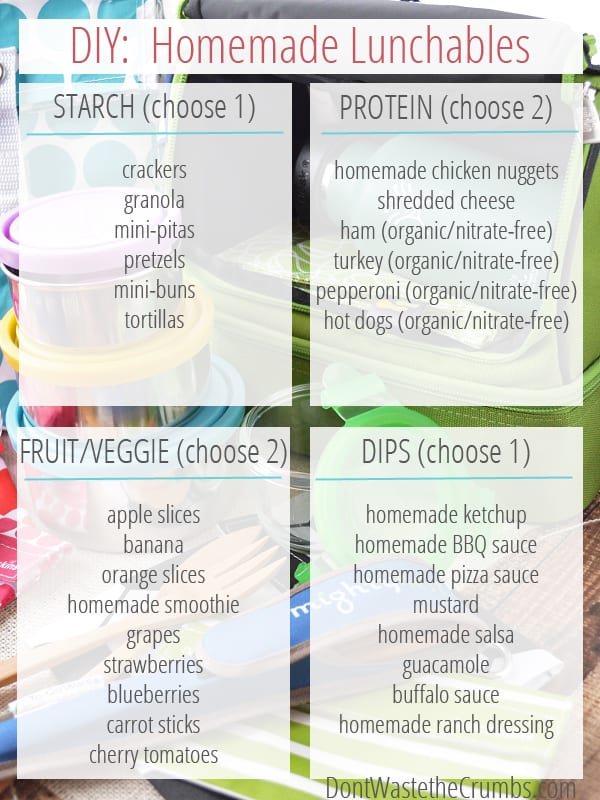
Starch (Choose 1)
- Homemade whole-grain crackers
- 1/2 homemade granola bar (grain-free recipe)
- Mini homemade pitas
- Homemade pretzels
- Homemade mini-buns
- Corn chips (organic or non-GMO)*
- Tortillas, corn or flour or gluten-free
- Homemade spaghetti-o’s
- DIY ritz crackers
- Homemade cheez-it cracker
Protein (Choose 2)
- Homemade chicken nuggets
- “Fried” chicken strips
- Grilled chicken slices (or leftover whole roasted chicken)
- Shredded cheese
- Sliced cheese
- Nuts (sprouted)
- Ham (organic/nitrate-free)*
- Turkey (organic/nitrate-free)* (make your own)
- Pepperoni (organic/nitrate-free)*
- Hot dogs (organic/nitrate-free)*
- Homemade nut butter
- Hummus
- Sweet hummus – chocolate chip cookie dough, cake batter, or chocolate
- Beans (whole or as a dip) (make ahead in the Instant Pot or slow cooker)
Fruits & Veggies (Choose 2)
- Apple
- Banana
- Orange slices
- Smoothies
- Grapes
- Strawberries
- Blueberries
- Carrot sticks
- Homemade root vegetable chips
- Cherry tomatoes
- Kale chips
- Sweet potato chips
- Homemade potato chips
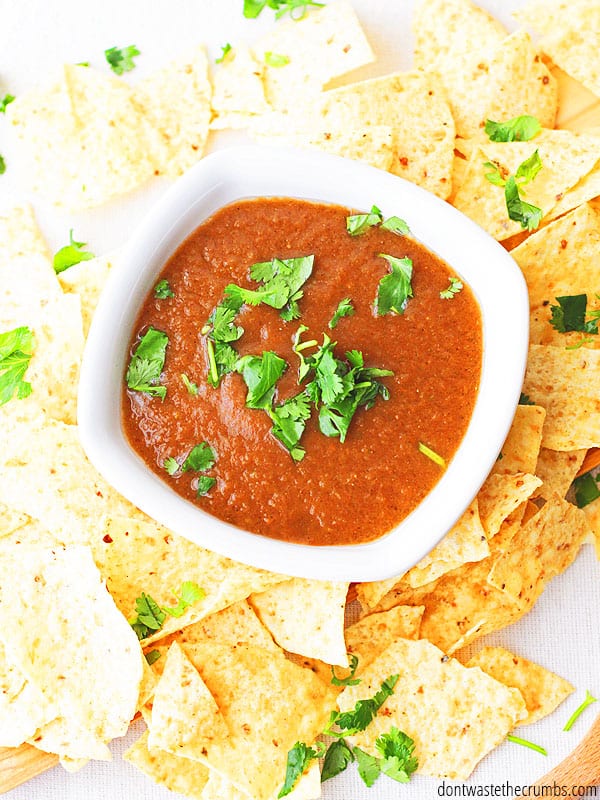
Dip/Condiments (Optional, Choose 1-2)
- Homemade BBQ sauce
- Easiest homemade pizza sauce
- Mustard (homemade recipe)
- Homemade salsa
- Homemade guacamole (and a simpler version)
- Hot sauce
- Homemade ranch dressing (dairy-free option)
- Homemade caesar dressing
Sides/Dessert (Optional)
- DIY sun pickles
- Homemade fruit leather
- Kombucha jello
- Immune boosting jell-o
- Homemade pudding cups
- Dark chocolate
- Homemade fruit snacks
- Chocolate hummus
- Homemade oreos
Drink (Choose 1)
- Plain water
- Flavored water
- Homemade kombucha (try these flavors too: strawberry lemonade, Hibiscus and rose hips, grapefruit ginger)
- Healthy homemade lemonade
*If organic, non-GMO, or nitrate-free items are not in the grocery budget, simply buy the best you can afford.
Storage
- The easiest way to pack homemade Lunchables is in a divided container like this one. It’s BPA free and leak proof!”
- These silicone muffin cups are a simple way to separate items that don’t need lids, like crackers, slices of cheese, or cuts of meat. They’re flexible and can easily fit into nearly any container you already own too. They double as – you guessed it – muffin cups, but I’ve also used them as molds for lotion bars and homemade fudge.
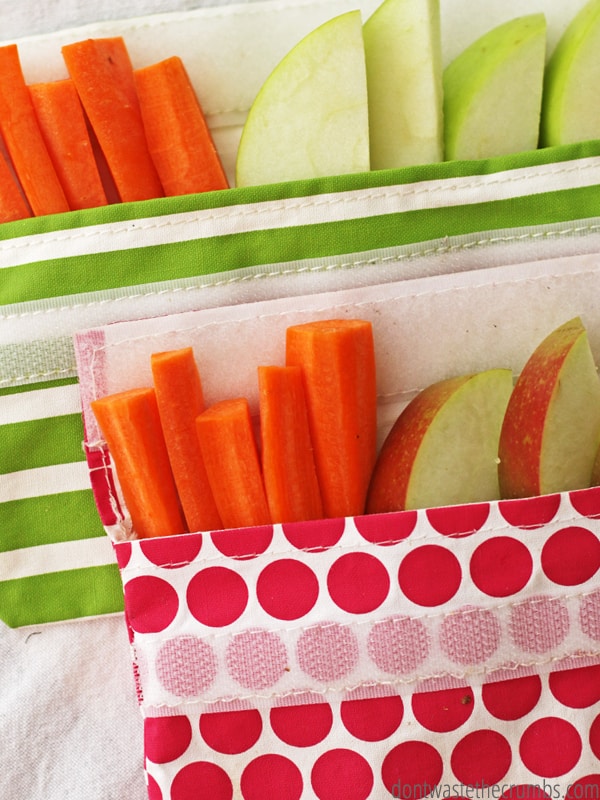
- The reusable bags you see in the photos are Lunchskins. I love using those for packed lunches instead of baggies!
Remember though, that you don’t need special equipment or storage in order to pack a healthy, frugal lunch. The most affordable route is always to use whatever you have on hand.
Just make a mental note to add these to the Christmas and birthday wish lists this year.
Update: As my kids have grown and they need a little bit more food for school, I’ve found that the PlanetBox LAUNCH box is our favorite. You can read all about my lunch box experiences HERE.
More Recipe Tips
- The key to keeping real food Lunchables affordable is by packing food you already accounted for in the grocery budget, like leftover chicken or fruit or items made homemade from scratch. Offer more of the frugal items (like bananas for just 20¢) and less of the higher-end items.
- Also, find creative ways to serve not-so-pretty-yet-very-frugal items like beans. Kid-friendly hummus (like this pizza variety) with lots of dippers is a great place to start, and the extra affordability of beans means you can splurge a bit on blueberries or other fun seasonal fruit.
- Of course, don’t forget to pack a drink too! Water or kombucha from home is free, but you can add frozen strawberries or flavored ice cubes for a fun treat.
For more school lunch ideas, check out “The Healthy Lunchbox” – it’s one of the best eBooks I’ve read on healthy lunches, including back-to-school!
Homemade Lunchables are a fun way to pack lunch or dinner, and we’re actually packing a grown-up version for dinner tonight: prosciutto with brie, sourdough & grapes.
More Lunch Ideas
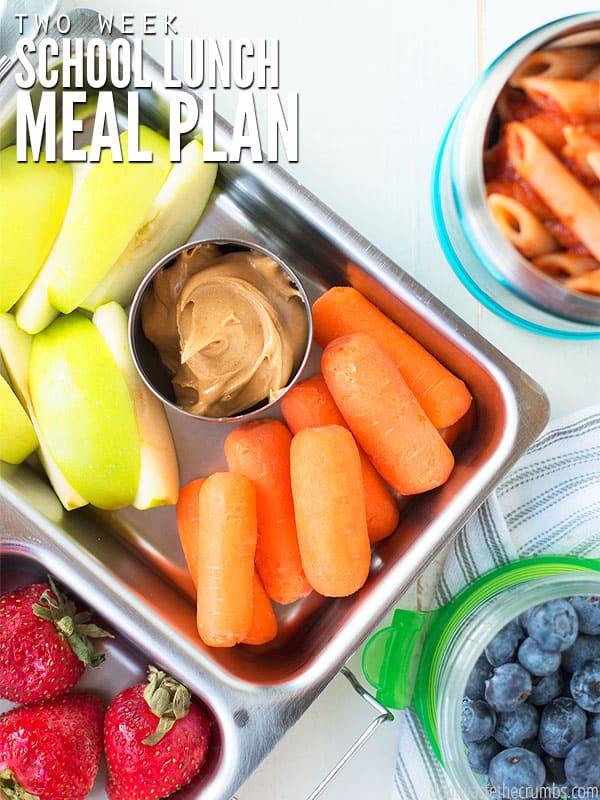
- Two Week School Lunch Meal Plan
- Five School Lunches in Less Than an Hour (Free Printable)
- DIY Homemade Lunch Meat
- 18 Hacks for Packing School Lunch – A Parent’s Guide


One kind of dish I like is orange chicken, like the kind that comes from Safeway. However, it’s really spendy! $10.00 for a large box! So that brings up my question. How would I be able to make this from scratch?
I’ve seen several orange chicken recipes on Pinterest. The ones I’ve made from scratch haven’t been hard at all!
The one I’m thinking of kind of looks like chicken nuggets, but they’re coated in an orange glaze, and they’re crunchy like Chinese sweet n sour chicken. I asked someone at Safeway what the recipe was, but they didn’t tell me. Either they didn’t know what the ingredients were, or perhaps it’s top secret. I’d like to make a recipe that tastes like the orange chicken at Safeway, but I’m not sure where to start. Usually you can find it at their deli counter, and it’s the one where a large box is $10. Do you have Safeway in Texas where you live? Maybe you can buy some of that at their deli and try it. Once you do, believe me, you’ll be hooked! Maybe even the kiddos will like it too. I know I do!
My grandson is SO picky an eater, that he will ONLY eat one brand of lunchables….the other doesn’t have the ‘right’ shapes/sizes. I tried keeping the containers, and cutting lunchmeat and cheese as close as I could. Can’t fool him…It will prove to be interesting when he starts kindergarten this fall and can’t eat what he ‘likes’ to eat. I’m hoping it will expand his horizons a bit. If he gets hungry enough, maybe he will start to explore more….
That’s been our theory Gramyprepper – if the kids are hungry enough, they’ll eat what’s given to them. 😉
I’m not lactose intolerant, but I don’t eat cheese, so if I was to make a homemade version of a lunchable, I wonder what an acceptable substitute would be to put in there?
Annabelle, you can put whatever you want into a homemade lunchable – that’s the beauty of them! Most people put cheese as protein, but use this formula:
2 protein + 1 starch + 2 fruits/veggies 🙂
The kind of veggies I like are lettuce, corn, peas (the frozen kind), and French cut stringbeans. As for fruits, I like mangos, kiwifruit, peaches, pears, strawberries, and bananas. With dried fruits, I like mangoes, kiwifruit, peaches, pears, strawberries, raisins, and cherries. For protein, I like yogurt, and creamy peanut butter. When I told my mom about your recipe for chocolate hummus, she found it rather interesting. Chocolate and garbanzo beans, she thought, makes kind of a strange combination. I like to make a lot of stuff from scratch now, since I have a Kitchenaid mixer at home. For example, I make an egg-free, oil-free version of mayonnaise, which I like to call “Magnificent Mayonnaise”. Usually I make a mild version, but I’ve also made “Medium” and “Sweet ‘N’ Savory” options. The main ingredients are: plain white vinegar, stevia, mustard, and the most important ingredient of them all … Plain Greek yogurt! For the mild version, I use 1 tablespoon of plain white vinegar (More would make it too sour), 1 packet of stevia (the Sweet N Savory version has 5), 6 tablespoons of yellow mustard (the Sweet N Savory version has Dijon mustard), 64 ounces plain Greek Yogurt (I use the whole milk version, as I like the resultant mayonnaise to be nice and thick). You can use nonfat or low fat if you like. My preferred brand of Greek yogurt for this recipe is Zoi. 1-½ teaspoons of Salt grinds (I use Morton Seasalt), and 1/8 teaspoon of pepper grinds (the Sweet N Savory version has ½ teaspoon!). I strain the yogurt in a fine mesh strainer covered with a towel in the fridge, then I use the leftover whey for things like smoothies and protein snacks. Then I mix the vinegar, stevia and mustard in my mixer, along with the solids from the Greek yogurt, and the salt and pepper grinds. I then scoop the mix into an old mayonnaise jar, cover and let set in the fridge for up to four hours, and voilà! You’ve got a nice jar of Magnificent Mayonnaise! I know this isn’t what most people would call “traditional mayonnaise”, but it’s less fattening! And on top of that, it’s actually something that’s good for you! I even eat eggs more often now, since I just bought a Dash Go egg machine recently (http://www.storebound.com/dash/dash-rapid-egg-cooker), and I wanna tell you, the scrambled eggs I make taste amazing! I tell my mom that they look like “Scrambled Eggburgers”! They got that nickname from me because they actually take the shape of the pan when they’re cooking. The cool thing about this machine is you can make eggs any way you like, and all you have to do is add a little water to the bottom of the machine, put the boiling tray on (always do this otherwise if you put the other components on without it, they’ll melt and burn!). For hard-boiled, medium-boiled, or soft-boiled eggs, pierce the fat side of the egg with the pin attached to the measuring cup provided with the machine. Be careful, it’s sharp! Otherwise, put any other components on if needed. For scrambled eggs, use the round “scrambling pan”) (which also doubles as an “omelet pan”, Or for poached eggs or even personalized omelets, use the “poaching tray”. plug the power cord into a socket, and push the button on the front to turn it on! Then the magic happens when the water turns into steam and cooks your eggs, along with any fillings and fixings you add to them. Depending on how you like your eggs, the machine lets you know when they’re cooked with a beeper. The beeper goes off when the water has evaporated from the bottom of the machine. I gotta warn ya, it’s a bit loud! Depending on the amount of water you put in the machine, eggs can take anywhere from 6 to 12 minutes to cook. Less time than it takes water on the stove to come to a rolling boil! I usually measure the water in one of my measuring cups first, since they have Braille on them, which is engraved on the top of the handle, and a convenient pour spout on the other side, then I pour the water into the measuring cup that comes with the machine. Then I pour the water into the heating plate, on the main body of the machine, put the boiling tray on, then the scrambling pan with all the scrambled egg fixings. Then I put the cover on, with the steam hole in the back so I don’t get burned, lock it in, plug in the power, then push the button to turn it on! Easy as pie! I even have an Air Fryer made by Farberware, and I cook frozen French Fries in there, without any extra fattening oils, with no problems at all. I even make bacon in there, and it cooks in 10 minutes! I can even reheat Shake N Bake pork chops and chicken in that machine, without anything smoking or burning! I recently started making a homemade version of ranch dressing, because when I used to buy the store bought version of Hidden Valley Ranch dressing, both in packets and in bottles, I had no idea what most of the ingredients were, as I believe you’d have to have a Ph.D. in science just to figure out how most of them are pronounced! I make my ranch dressing mix with ingredients I buy in bulk from places like Winco and Market Of Choice. Here’s my recipe for homemade ranch dressing.
Original Ranch Dressing
You’ll Need:
¾ cup dried buttermilk
3 Tablespoons dried parsley flakes
1 Tablespoon dried chives
1 Tablespoon garlic powder
1 Tablespoon onion powder
1 Tablespoon dried chopped onion flakes
2 Teaspoons dried dill weed
2 Teaspoons salt
2 Teaspoons pepper
1½ cup Magnificent Mayonnaise
¼ cup milk
You Do:
1. Combine all the dried ingredients in an airtight jar or container, will keep for up to 1 year
2. To make ranch dressing, mix ranch dressing seasonings into mayonnaise until combined
3. Stir in milk, then refrigerate for 20 minutes
4. Store in air tight container in the fridge, preferably for 7 to 10 days
5. Squeeze on a salad and enjoy!
Thank you for these great ideas! My daughter has been asking for Lunchables and I love having these alternatives. One question: do you find that the guacamole turns brown by the time lunch rolls around? I tried packing it once and it was pretty unappealing by the time she found it.
It probably will Emily, as the avocado oxidizes. One tip is to blend in peas to keep the green color, or include the pit of the avocado with the guac. Keeping to cold helps too. Usually just the top layer turns brown, so if she can quickly stir it up with one eye closed, maybe she can look past it. 😉
Hi Tiffany,
We just bought the divided bento containers and the silicone muffin cups.
The kids and I have a great time creating their own lunchables at home.
The little one eats alot more of her lunch now.
Thanks, Tracy
My kids do the same when they help me pack and use bento-style lunches! It’s strange, but I’ll take it if it works! 🙂
Thank you for some great ideas! I’m wondering, though, do you have to trust that if you send an ice pack to keep things, like protein, cool, that your kids won’t end up throwing it in the garbage? I’ve been frustrated when my kids toss my small Tupperware containers, so I tend not to send lunches that need to stay cool for that reason.
I guess you would have to trust that your kids not throw reusable items away… I’ve read other moms who have a “no trash” rule, where EVERYTHING comes home, trash and all. It might be gross, but your dishes avoid the trash can. Another option is to freeze some items and let them thaw as the day goes on. They can be a natural ice pack for the items that need to be cool.
Hi, I used to get frustrated also. Trying to keep lunches cool and not loose the containers.
I have found lunch bags that you freeze over night and then pack in the morning.
They really do keep the lunches cool for up to 10 hours. There are a few different brands of these
lunch bags. I have been using the Pak It ones for the last five years. I have found that each lunch bag
lasts my children at least two years.
Hope this helps,
cheers, Tracy
Thanks for sharing a great tip Tracy!
My older kids have made their own lunches for years but now I have a Kindergartener — this has inspired me to try this. 🙂 Thanks! Going to share on my social media too!
I’m happy it’s inspired you Hilary! I’m sure your Kinder will love it – mine does! Thanks so much for sharing!
Yum! I’m thinking I need to make lunches like this for myself, as well! Thanks for the ideas!
You’re most welcome!
LOVE this, Tiffany! So helpful. I’ve been making homemade lunchables for years and totally agree with you – more economical and of course, far more nutritional value! I did a round-up of my recipes and others at KOTH and will try to get this in there. Love how you did the chart for what to include and then made recommendations! Brilliant! Blessings, sweet friend! xo
Thanks Kelly! I really like the freedom to mix/match with what I have on hand too. Makes it easy to tailor to each kid’s favorites, while not needing too much of any one thing at a time. Thanks for sharing!!
I was able to get the link in to the KOTH post which will be up sometime next week. Yay! Hope it sends lots of new friends your way. xo
Thank you!!
Thanks for the post, just in time for the start of school!! My kids are always asking for Lunchables because their friends have them for lunch.
You’re welcome! I have a feeling that many parents are in the same shoes as you, so hopefully this makes the “no, you can’t eat junk for lunch” talk a bit easier!