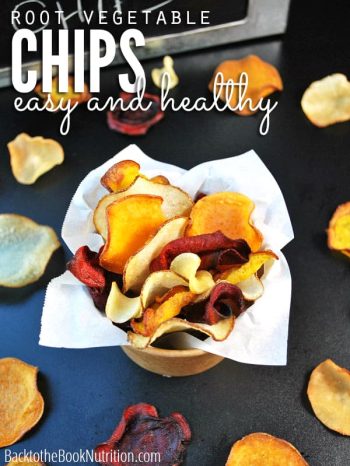
Crispy homemade root vegetable chips that are just like Terra, only much healthier and cost up to 50% cheaper! Save some cash and make them yourself! Try my other homemade snacks like homemade honey-roasted almonds and homemade apple sauce.
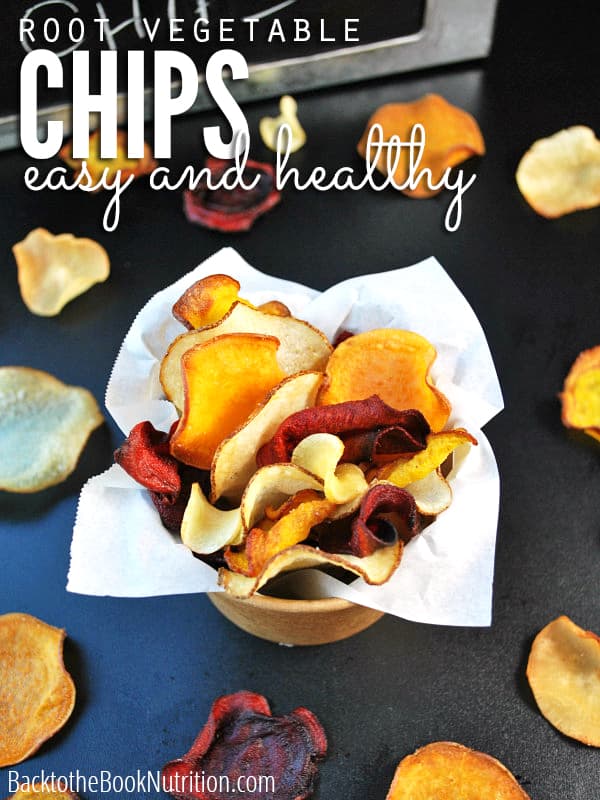
Does anyone else love Terra chips, but absolutely cringe at the price as I do?
No doubt about it – those things are really good. But they’re also expensive! It’s a snack we enjoy among others such as homemade tortilla chips, high protein trail mix, and homemade cheezits.
Since I like to make snacks from scratch, I decided to make them myself…and, if I may say so, Move over, Terra!
Reasons to Make Homemade Root Vegetable Chips
1. They’re delicious.
My first attempt at frying chips at home was when I made homemade sweet potato chips a few weeks ago. The sweet potato chips were such a raving success, I instantly began brainstorming about what I could fry up next.
With all the fall roots and tubers in season right now, it seemed only right to make a batch of homemade root vegetable chips. Boy, was that the right move. These things are amazing!
2. They’re cheaper.
It’s not very hard to beat $4 a bag, which is what Terra’s Exotic Vegetable Chips cost at my local grocery store, and even easier to beat the insane price on Amazon.
3. They’re healthier.
For me, the quality of our food is just as important as keeping to the budget. These homemade root veggie chips are fried in pastured lard, as compared to the canola, safflower, or sunflower oil used in the store-bought variety.
Most of you are aware that saturated fat from animals allowed to roam and graze as God intended is healthy, despite what we’ve been told for decades.
4. Nostalgia.
There’s something very gratifying about cooking from scratch over a pot of bubbling lard that came from pigs I visited on the farm – like I’m getting a taste of my great grandmother’s life and moving one step closer to a “nose to tail” approach to eating.
Recipe Notes
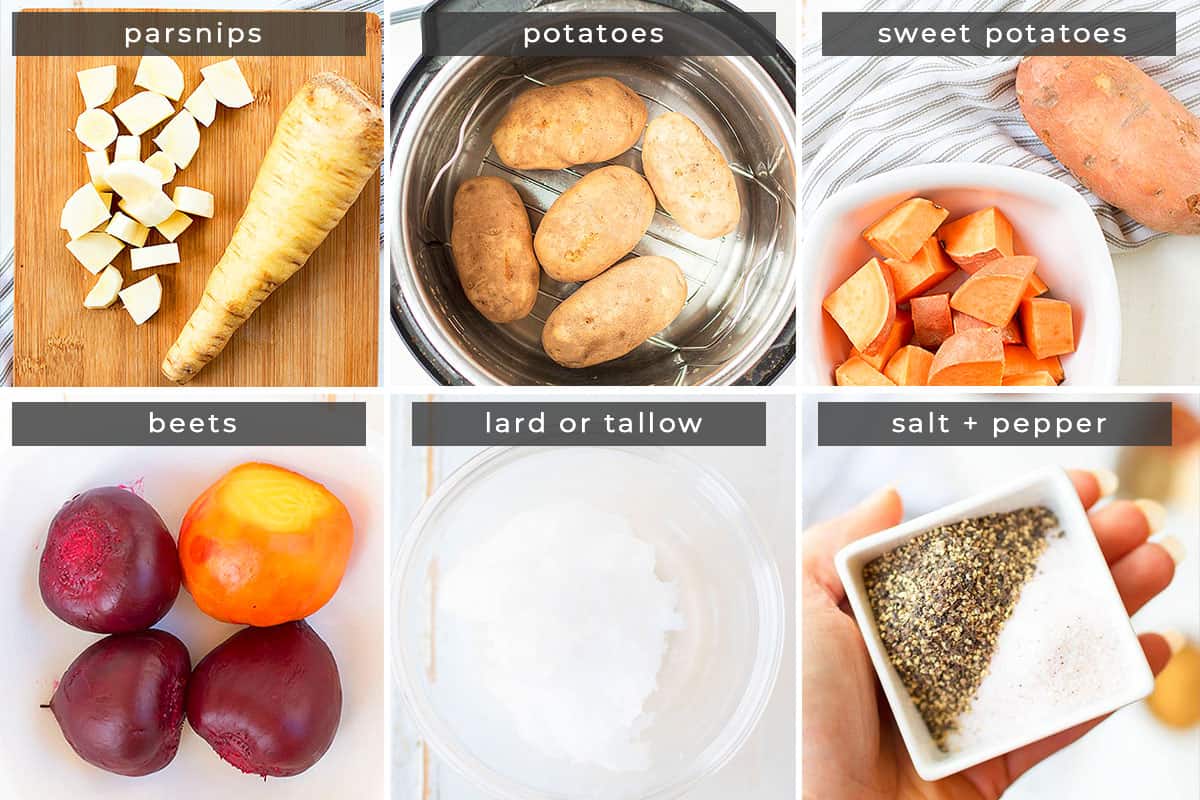
- These chips can be fried in lard, tallow, or red palm oil. The more affordable of those options are lard and tallow, ranging from completely free (if you reserve portions of fat from beef or pork and store them in the freezer until you have a few pounds to render as lard), up to around $2/pound. Never rendered before? It’s a cinch – I render pork on the stove-top and it is excellent.
- To slice the vegetables evenly, I recommend either a mandolin or a food processor with the blade set at 1/16″ for thinner chips and 1/8″ for thicker, kettle-style chips. A knife will also get the job done and if you have the skills and patience for that.
How to Make Root Vegetable Chips
Step 1. Wash and trim ends/stems from all vegetables.
Step 2. Heat lard/tallow in a large-diameter pot or Dutch oven over medium-high heat. (If it begins to bubble before the veggies are sliced, reduce the heat a tad to prevent burning).
Step 3. Meanwhile, slice the vegetables in small batches and in the order listed above to minimize oxidation while they wait their turn to be fried (start with just the yuca and parsnips – when those are almost done frying, slice the potato, and so on). The red beets can also discolor the lard, so be sure to fry them last.
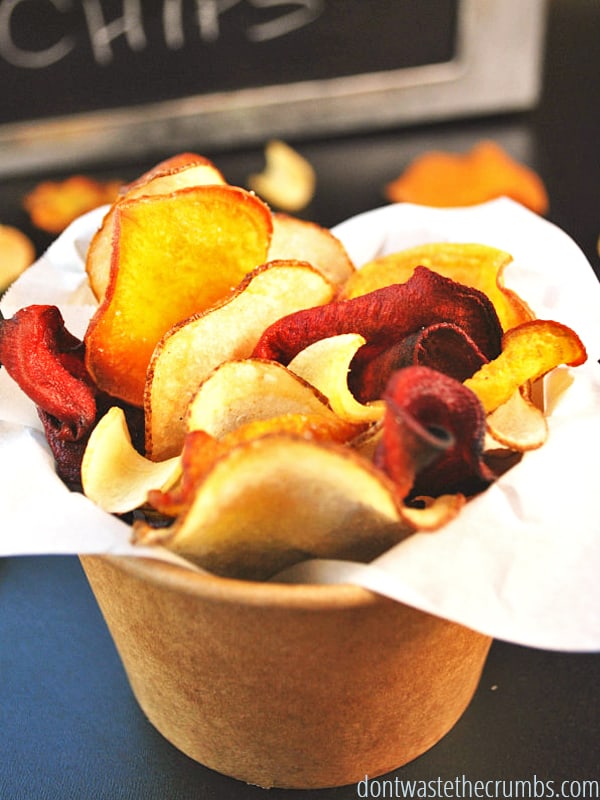
Step 4. When the melted lard is 350-375 degrees or when a test slice crackles when dropped in, it’s ready. Drop enough slices to create a single layer on the surface of the lard. Cook for 2-3 minutes, using metal tongs to stir/flip chips as needed to ensure even cooking.
Step 5. Use tongs to transfer cooked chips from the pot to a large surface line with a double layer of paper towels to absorb moisture. Sprinkle both sides with sea salt immediately.
Step 6. Continue slicing and cooking in batches until all are done.
Step 7. Transfer cooled chips to a serving bowl.
Additional Recipe Notes
- Cooked chips can be stored in a paper sack for up to a few days. If they lose their crisp, pop them in a 425-degree oven for just a few minutes before serving.
- I included parsnip and yuca in this recipe, but don’t sweat it if you can’t find these. We thought the potato, sweet potato, and beet chips were the best!
- To speed up the process, consider using two large-diameter cooking pots. Doubling the surface area will reduce your cooking time by half!
- If you’ve ever fried anything before, you know that the temperature of the fat is key. Not hot enough, and the chips will absorb too much fat and won’t crisp. Too hot, and they’ll burn. I highly recommend using a thermometer if you have one. It really makes high-heat cooking easier, but I use it for homemade yogurt and salted caramel too. If you don’t, just be sure to test-fry one or two veggie slices before adding more.
FAQs
Yes, when you choose a vegetable chip over a potato chip, you will be getting less sodium and more fiber!
This root vegetable chips recipe consists of yuca root, parsnips, russet potato, sweet potatoes, and beets.
The Bottom Line
If you’re intentional about reserving beef or pork fat when cooking, storing it in a freezer-safe container, you’ll enjoy an almost 50% discount off of the price of root vegetable chips!
For those of you, like me, who purchase your fat from a farmer or organic butcher, you’ll only pay a few cents less than you would for Terra brand chips at the grocery store. However, your homemade version will be much healthier than the store-bought varieties fried in cheap oils that contain GMOs and less healthy omega-6 fats.
Note: If you don’t have access to these stores OR your local stores don’t carry grass-fed ground beef, I recommend Butcher Box. You can read my honest review of their products here, and my post on how to make Butcher Box worth the cost!
The search for high-quality meat ends here. Amazing taste. Humanely raised and delivered to your door. Sign up today! Click this link to claim the current offer!
More Snack Recipes
- 24+ Best Hiking Snacks (Easy, Healthy, Family-Friendly)
- Oatmeal Peanut Butter Energy Bites
- Easy Homemade Crackers
- Kitchen Sink Homemade Granola Bars
Fight Inflation Workshop
Sign up for my FREE Fight Inflation Workshop and learn simple strategies to save money, even with rising food costs!Homemade Root Vegetable Chips
Crispy homemade root vegetable chips that are just like Terra, only much healthier and cost up to 50% cheaper! Save some cash and make them yourself! Try my other homemade snacks like homemade honey-roasted almonds and homemade apple sauce.
- Prep Time: 10 minutes
- Cook Time: 10 minutes
- Total Time: 20 minutes
- Yield: 16 oz 1x
- Category: Snacks
- Method: Stovetop
- Cuisine: American
Ingredients
- 1 yuca root
- 2 parsnips
- 1 russet potato
- 2 sweet potatoes
- 1 gold beet
- 1 red beet
- Approximately 26oz lard or tallow (rendered from about 2 pounds of fat)
- sea salt
Instructions
- Wash and trim ends/stems from all vegetables.
- Heat lard/tallow in a large diameter pot or Dutch oven over medium-high heat. (If it begins to bubble before the veggies are sliced, reduce heat a tad to prevent burning).
- Meanwhile, slice the vegetables in small batches and in the order listed above to minimize oxidation while they wait their turn to be fried (start with just the yuca and parsnips – when those are almost done frying, slice the potato, and so on). The red beets can also discolor the lard, so be sure to fry them last.
- When the melted lard is 350-375 degrees or when a test slice crackles when dropped in, it’s ready. Drop enough slices to create a single layer on the surface of the lard. Cook for 2-3 minutes, using metal tongs to stir/flip chips as needed to ensure even cooking.
- Use tongs to transfer cooked chips from the pot to a large surface line with a double layer of paper towels to absorb moisture. Sprinkle both sides with sea salt immediately.
- Continue slicing and cooking in batches until all are done.
- Transfer cooled chips to a serving bowl.
Notes
- Cooked chips can be stored in a paper sack for up to a few days. If they lose their crisp, pop them in a 425-degree oven for just a few minutes before serving.
- I included parsnip and yuca in this recipe, but don’t sweat it if you can’t find these. We thought the potato, sweet potato, and beet chips were the best!
- To speed up the process, consider using two large-diameter cooking pots. Doubling the surface area will reduce your cooking time by half!
- If you’ve ever fried anything before, you know that the temperature of the fat is key. Not hot enough, and the chips will absorb too much fat and won’t crisp. Too hot, and they’ll burn. I highly recommend using a thermometer if you have one. It really makes high-heat cooking easier. If you don’t have one, just be sure to test-fry one or two veggie slices before adding more.
Nutrition
- Calories: 470



Hi there, just an FYI, that the link for the Sweet Potato chips at top of this post results in a 404 error. Thx
Hi i was just wondering how long they last in an airtight container? Also will they stay crispy?
Hi Naomi,
These can be kept in an air-tight container lined with parchment or paper towels. You can also store them in a paper sack for several days. They do lose some crisp when stored, but that’s easily fixed by popping them in a 350 degree oven for just a few minutes right before serving. Hope that helps!
if looking to avoid animal products, maybe peanut oil will work best. Rated for high-temp cooking.
Thank you for this–I don’t cook with lard because I’m a vegetarian, so it’s helpful to have a non-lard option. Thanks!
Hi. These look amazing. Just wondering if there is another type of oil that I could use for frying the chips. I am not big on using the lard. Do you think that Grapeseed or another type of healthy oil would work?
Thanks for the kind words, Teresa!
The answer to your question can get complicated. As I mentioned in the body of the post, many of the “healthy” (vegetable) oils are actually more harmful for us than saturated fats derived from pastured animals. I chose the lard here because of it’s higher saturated fat content and higher smoke point (it’s healthy and it holds up well to the heat of the frying). Red palm oil could also be used, though I’ve not tested it in this recipe myself.
Among the various vegetable oils, grapeseed has one of the highest levels of omega-6 fats (approximately 70%, versus around 10-15% in olive or avocado oils). Because of this, I definitely would not use grapeseed oil.
If you haven’t already, I’d really encourage you to take a look at this very eye-opening post debunking some of the myths about healthy and unhealthy fats: http://www.backtothebooknutrition.com/making-friends-fat-part-2-fat-is-healthy/.
I hope that’s helpful – please let me know if you have further questions. I’d be happy to take a stab at them! 🙂
Yes, carrot chips should work, Celeste. I envy you having so many varieties right in your own garden! 🙂
What slicer and blade size do you use? Or did I miss that somewhere in your recipe notes 🙂
Hi Robin. You can us 1/16″ for thinner chips (similar to those pictured) or 1/8″ for thicker, kettle style chips. Hope that helps!
These look great–I make sweet potato chips all the time, but I bake them on a cookie sheet using olive oil, and top them with rosemary and sea salt. I’ve got lots of lard–we butchered two of our own hogs recently, so I want to give these other veggies a try!
Thanks for the comment, Ana – I love your idea of adding rosemary! And how wonderful to have your own hogs to ensure the quality and affordability of the fat you render for lard!