Learn how to make yogurt with this tutorial. Skip the yogurt maker and try this super easy heating pad method or even an Instant Pot! You can always adjust the tartness and flavor to your liking! For a snack that the kids will love, use our recipe for chocolate peanut butter granola to make our peanut butter and jelly granola parfait!
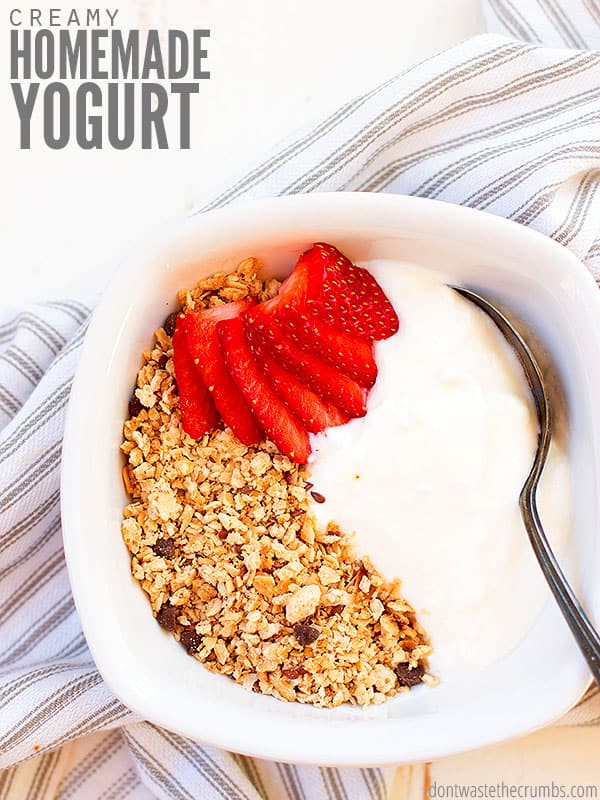
Have you ever heard someone say they made something, and you thought to yourself, “Wow, I didn’t know you could make that!”
That’s what I thought when I heard you could make yogurt. That’s something you can DO?! I can use this for my delicious yogurt popsicles.
For anyone who is looking to save money should consider learning how to make yogurt because it can save you TONS of money!
Reasons To Make At Home
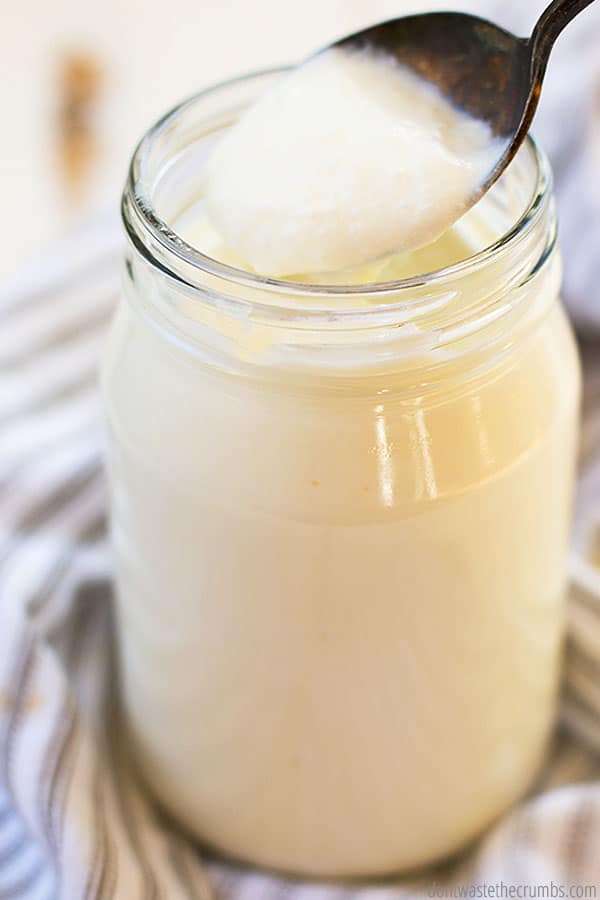
Once you get over the shock that you can actually make this at home, there are several reasons why you consider making this at home:
- It’s really easy (heat + stir + wait)
- It’s mostly hands-off (so you’re not stuck in the kitchen!)
- You can adjust the level of tartness.
- You can flavor it however you want.
- It’s much cheaper to make it yourself!
- Plus, there are several ways to make it. Find which method works for you and run with it!
Here’s What You Need

You only need two basic ingredients:
- Warm Milk (preferably whole cow’s milk)**
- Yogurt Starter. This can be an actual starter like this or existing cultured yogurt.
** You can make a non-dairy milk version, but the process is different. Please don’t follow this tutorial and expect it to be non-dairy because it won’t!
How to Make Yogurt
My favorite method.
There are a few different ways to make this recipe, but I think the heating pad method is the easiest. The only catch is that you need a heating pad that has a MANUAL on/off switch like this one, not an auto-off function.
You certainly can work around this by being home to turn the heating pad back on, but that makes it a little more hands-on. If that doesn’t bother you though, or if you have a heating pad that doesn’t automatically turn off, here’s a great method!
Here are some photos for those who are visual learners.
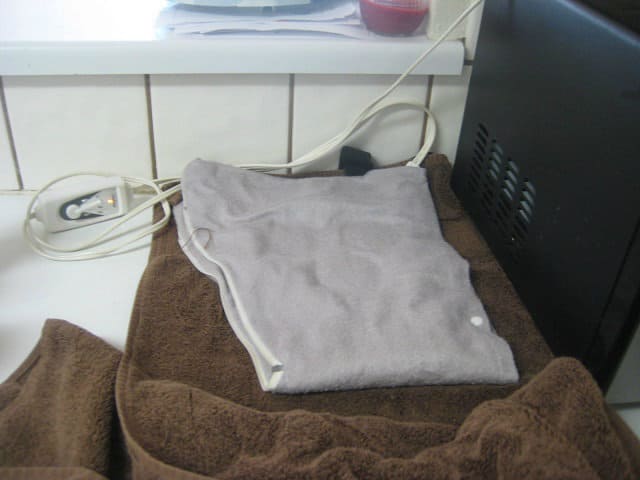
Step 1. The heating pad is set up on the counter. I took a bath towel, folded it lengthwise (hot dog), and placed one end on the counter. The heating pad is plugged in and on low, folded on top of the towel. I don’t know if the heating pad could burn the countertops, but since we’re renting, I didn’t want to risk it.
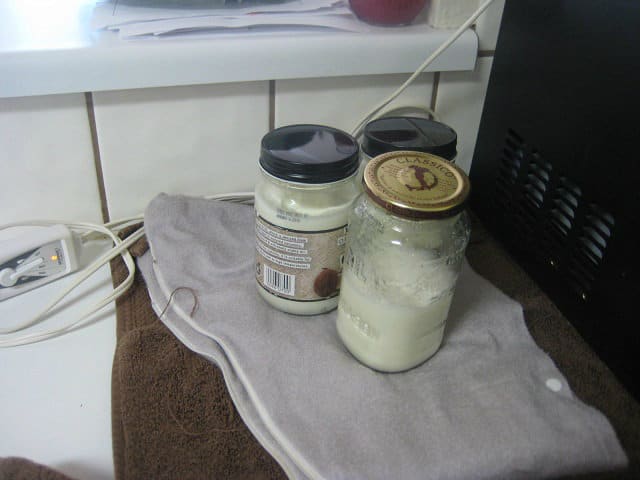
Step 2. My three jars on the heating pad are filled with cooled milk/yogurt.
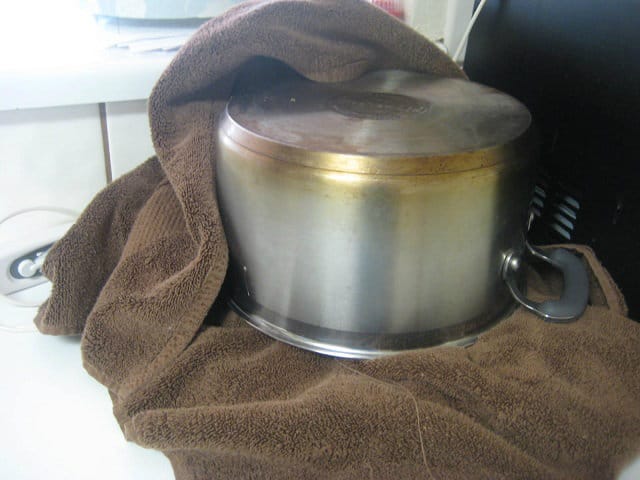
Step 3. I folded the towel over the jars first, then covered them with the pot. The term “incubate” from the recipe made me think of “warm” and I thought another layer of towel would help the process.
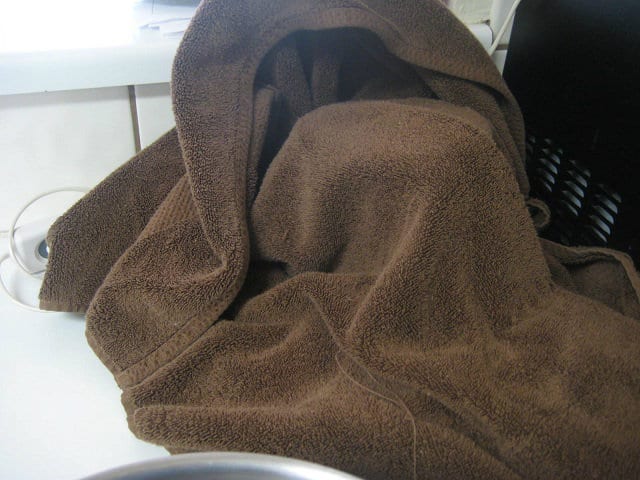
Step 4. I wrapped the towel over the inverted pot.
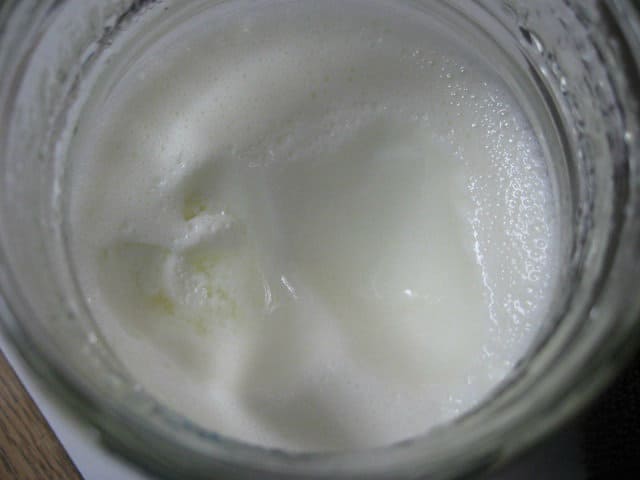
Step 5. Ta-da! The final product, 8 hours later! As you can see, the yogurt is really thick. I scooped some out and it didn’t fill in the hole – and this was right after incubation. It firmed up even more after being in the fridge!
How to Make Yogurt Using Other Methods
If you don’t have a heating pad, you can make this recipe using one of the following:
- cooler
- oven
- slow cooker
- Instant Pot
- dehydrator
The recipe is basically the same:
Step 1. Warm the milk.
Step 2. Add the starter and stir well.
Step 3. Divide into jars (optional) and let it culture for 8-24 hours.
**Step 3 – WHERE your yogurt cultures – is the only thing that’s different:
- Cooler. You’ll want to use a large cooler and add a pot of boiling water. That’s what will keep the temperature steady and warm.
- Oven. Keep the oven light on. (The same reason why I use the oven light for the first rise in my einkorn sourdough.)
- Slow cooker. The lowest setting possible will keep it warm. Do be careful that your low setting isn’t medium heat… if the temperature is too warm, it won’t thicken and could burn.
- Instant Pot. Follow the directions that came with your machine. Many models like this one come with a specific “yogurt” function where it does the whole process for you, from start to finish!
- Dehydrator. Place the jars inside and set the temperature to 100-105F. I have this dehydrator that won’t work for this recipe, but if you have a model similar to this one where you can remove the trays, you can easily fit the jars inside!
FAQs
The longer the culture, the longer homemade yogurt will last. I usually make four quarts size batches of yogurt at a time and it lasts me a month.
You only need 2 ingredients. Milk and yogurt starter. That’s it!!
The longer ferment, the thicker it will be. If you want it to be super thick, make sure you let it culture for a full 24 hours!
You can change the taste by adding flavors to homemade plain yogurt, this happens AFTER the initial culture. You can easily add fresh fruit or sweeten it with maple syrup or honey. If you like vanilla yogurt, consider vanilla bean powder or vanilla-flavored stevia!
If you eat a lot of it, yes! One gallon of homemade yogurt costs as much as a gallon of milk and one cup of yogurt. I can get a gallon of whole milk for $2 at ALDI, and a cup of yogurt for about $1. That means I can make one gallon of yogurt for $3.
Compare this to the $3 it costs to buy one 32-ounce of yogurt at the grocery store. You can save 75% – or $8 – every month!
How to Make Yogurt for Other Recipes
We like making 3-ingredient yogurt popsicles and homemade Caesar dressing (without using mayo). I also use it to make the dressing for my Costco-copycat Sweet Kale Salad and of course, making Greek yogurt, and in our favorite green smoothie!
More Kitchen How-to’s
- Easy Sourdough Starter
- How to Keep Fruit Fresh Longer
- Stretch Ground Beef
- How to Make Bread Machine Recipes by Hand
How to Make Yogurt
Learn how to make yogurt with this tutorial. Skip the yogurt maker and try this super easy heating pad method or even an Instant Pot! You can always adjust the tartness and flavor to your liking! For a snack that the kids will love, use our recipe for chocolate peanut butter granola to make our peanut butter and jelly granola parfait!
- Prep Time: 20 minutes
- Cook Time: 24 hours
- Total Time: 24 hours 20 minutes
- Yield: 4 quarts 1x
- Category: Snacks
- Method: Bowl
- Cuisine: American
Ingredients
- 1 gallon of whole milk
- 1 cup whole yogurt
Instructions
- Pour 1 gallon of milk into a large pot.
- Heat milk on medium high heat until the milk reads 160F on a thermometer.
- Meanwhile, line the counter with a folded towel and heating pad turned on low.
- Line four clean glass jars on the heating pad. Measure 1/4 cup of whole yogurt into each glass jar.
- Remove the milk from the heat when it reaches 160F and allow it to cool to no cooler than 115 degrees. Pour into glass jars and stir well to combine warm milk with warmed yogurt.
- Cover the jars with 2 towels, creating an incubation station.
- Allow yogurt to culture for a full 24 hours before moving the jars to the fridge to cool.
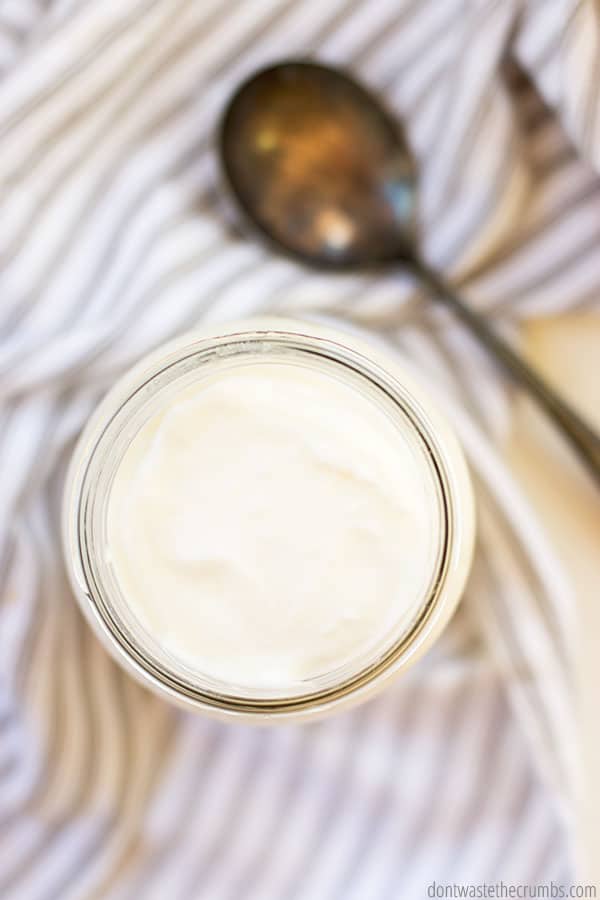
- Enjoy thick, creamy, and delicious homemade yogurt!
Notes
How to make yogurt using other methods:
The recipe is basically the same:
1. Warm the milk.
2. Add the starter and stir well.
3. Divide into jars (optional) and let it culture for 8-24 hours.
**Step 3 – WHERE your yogurt cultures – is the only thing that’s different:
- Cooler. You’ll want to use a large cooler and add a pot of boiling water. That’s what will keep the temperature steady and warm.
- Oven. Keep the oven light on. (The same reason why I use the oven light for the first rise in my einkorn sourdough.)
- Slow cooker. The lowest setting possible will keep it warm. Do be careful that your low setting isn’t medium heat… if the temperature is too warm, the yogurt won’t thicken and could burn.
- Instant Pot. Follow the directions that came with your machine. Many models like this one come with a specific “yogurt” function where it does the whole process for you, from start to finish!
- Dehydrator. Place the jars inside and set the temperature to 100-105F. I have this dehydrator that won’t work for making yogurt, but if you have a model similar to this one where you can remove the trays, you can easily fit the jars inside!
Nutrition
- Calories: 118




I love your site and all the great recipes and tutorials!! I’ve been doing the yogurt for a while now, so easy and so delish!
I’m wondering: have you done DIY sour cream or cream cheese?
Thank you Tess! I haven’t made my own sour cream or cream cheese yet, but I’d like to someday!
The very very easiest way to make yogurt is with ultra filtered Natrel milk & an Instant pot. Whisk a couple of scoops of yogurt with probiotics with 3 qt. cold milk. Push yogurt button leave it alone for 6-12 hours (depending on how strong you like it). Strain out the whey (the longer you strain it the thicker it gets). That’s it that’s all. No heating-no cooling & no babysitting it
I am excited to try your recipe, but I have a question:
Can I use cream to make yogurt?
I have frozen raw cream stored in the fridge. Being alone, I can’t use the large containers of milk my farmer sales. So I stored this away last week to make kefir, but would rather have yogurt!
Thanks for your help
I am so happy to have found this heating pad method, and I can totally see how easy it might be once I try it! I actually have a yogurt maker, but it uses five 6oz jars. My kids can eat it all up in a day, so I have to make it daily! If I’m too tired or I forget, there’s no yogurt for school lunches and they get home hangry. The yogurt maker uses just a very gentle, barely there sort of heat. I can definitely recreate that with a heating pad and a pot! – and then maybe I can make three or four 1-litre mason jars at a time. So excited!
I’m so excited for you, Cindy! I hope this makes it all easier for you! ♥
I love these ideas!!! My daughter first got me into the natural, healthy thinking, and I’m slowly being converted. lol It takes me a while to make changes, but this method of heating pad, and oven light sounds right down my alley of simple, tried and true!!
Really want to make homemade yogurt! I am wondering why heat the milk to 160 degrees when it has to be about 115 to incubate?
Hi Greta,
We’re not 100% sure – that’s been the industry standard for quite some time. You could try the lower temp and see what happens. Circle back to let us know. 🙂
My family makes Greek yogurt all the time and it is delicious! Our recipe is similar to this but differs in two ways:
First, we use the oven light to cook the yogurt! It’s so simple! We make ours in the evening, and then line the oven rack with a couple of towels, and wrap the pot too. The power of just the oven light cooks the yogurt to perfection overnight. Second, we strain our yogurt. Once it comes out of the oven, we plop it into a strainer lined with a non terry cloth towel, and set it in a bowl in the fridge for a couple of hours. Our favorite toppings are honey and homemade granola!
I love the oven light method Mandy! I would totally to this, except our lightbulb went out, lol.
I learned how to make yogurt about a year ago. I make a gallon of it at a time. I use the heat pad method in my utility sink in the laundry room. I put down a folded towel the heat pad and then surround my full jars with pillows and even top it off with a pillow. I make sure I use quality yogurt with as many cultures as possible and it has never failed. A smoothie is about the only way I can get my husband to eat both yoghurt and fresh / frozen fruit! I like mine for breakfast with a little homemade jam stirred in.
I know this is an old post, but I’m just getting into the homemade bread, yogurt, and butter. Do you know if I can use milk that is about to go out of date or do I need fresh milk? Does the fermenting help preserve it? If so, this would be even better since we hardly ever finish a whole gallon of milk.
Hi Janell! Yes, you can use milk that’s about to expire. The fermenting changes the bacteria in the milk, so “bad” bacteria is replaced with “good” and it’ll be good in the fridge for 3-4 weeks (at least mine is). When I first started making yogurt, I’d buy a gallon, make yogurt with half (for smoothies & general eating) and leave the rest for drinking & coffee. That method worked great – just when it was about to go bad, we’d finish it up!
I don’t suppose you can make this with already spoiled milk? I have 3/4 gallon of raw milk that just turned because my milk-loving son (would go thru a gallon a week himself!) overnight decided he didn’t like the taste of milk. AAARGGHH!! Such a waste! I’m pretty sure I can’t use it, but thought I’d take a long shot.
I’ve never made it with spoiled milk before, but you could turn it into buttermilk or just make a big batch of something that uses milk. 🙂
I’d like to start making my own yogurt! The heating pad method seams great, however I live on a boat and during the winter I would not want to give up that much electricity (only have 30 amps- enough to run 2 electric heaters). My oven has no light (propane oven). Anyone out there have some creative ideas for me? I’m going to try both the heating pad and crockpot methods while it’s warm out 🙂
What about putting the culture near the heaters? You can also use the cooler method: http://www.kitchenstewardship.com/2012/05/29/making-homemade-yogurt-easy-picture-tutorial/
Side note – My husband would LOVE to live on a boat!
I am not on the grid, so making yogurt using electric would not be the best way to do it. Some mention doing it in the oven. Where will I find the directions for making it that way?. I love yogurt and would love to try making my own.
Barbara, I make yogurt in the oven, it’s really easy. I make my yogurt as usual and then put it in either a quart jar or split it between pint jars. I put the lids on the jars and place it in the oven as close to the oven light as I can get them. I leave them in the oven over night with ONLY the light on. The next morning I move them to the fridge. If I want Greek yogurt I strain it for a few hours before putting it in the fridge.
I need to be on low fat diet due to health issues. I use 1% milk for cooking & drinking. I buy 32 oz containers of non-fat Dannon yogurt & add my own fruit. Would like to try making my own yogurt. Can you use 1% milk to make your own yogurt?
Aww making yogurt seems so simple. I believe I will get my husband to help me this weekend and make a batch using the heating pad. He has a Poultry Science degree and has made yogurt and sour cream while in college, so I will be putting him to the test of helping me. 🙂 Can’t wait to try homemade yogurt, I love the stuff.
I think your honey has earned another do on his “honey-do” list. 😉
I’ve been making yogurt for almost a year now. I began with an Easiyo yogurt maker which quit working after a few months, I don’t think it was maintaining the needed warmth. Then I went to the heating pad method. About a month ago I switched to the oven method. I also switched to using pint Mason jars instead of quart jars. I fill my jars and set them on a baking sheet on the center rack of the oven as close to the oven light as I can get them. I leave the light on (oven OFF) over night and in the morning I have yogurt. I can then strain it but I really don’t need to, after refrigerating for a few hours, the yogurt is so firm I think I could hold the jar upside down without it pouring out, but I don’t want to take the chance that I spill any.
Most other tutorials I have read recommend heating only to 110 degrees. Seems like 180 would kill the good stuff???
Hi Jennifer,
If you’re starting with raw milk, heating to 110 preserves the healthy enzymes. If your milk is pasteurized, it’s already been heated high enough to kill the enzymes anyway, so heating it again to 180 won’t matter. 🙂
Aha. Thanks!!
On making your own yogurt, you mention milk powder in your method of preparation, but do not mention milk powder in your ingredients. How much milk powder do you use also?
I stopped used powdered milk in the prep and removed it from the ingredients, but forgot to take it out of the instructions. Thanks for the catch Willi!