Learn how to make yogurt with this tutorial. Skip the yogurt maker and try this super easy heating pad method or even an Instant Pot! You can always adjust the tartness and flavor to your liking! For a snack that the kids will love, use our recipe for chocolate peanut butter granola to make our peanut butter and jelly granola parfait!
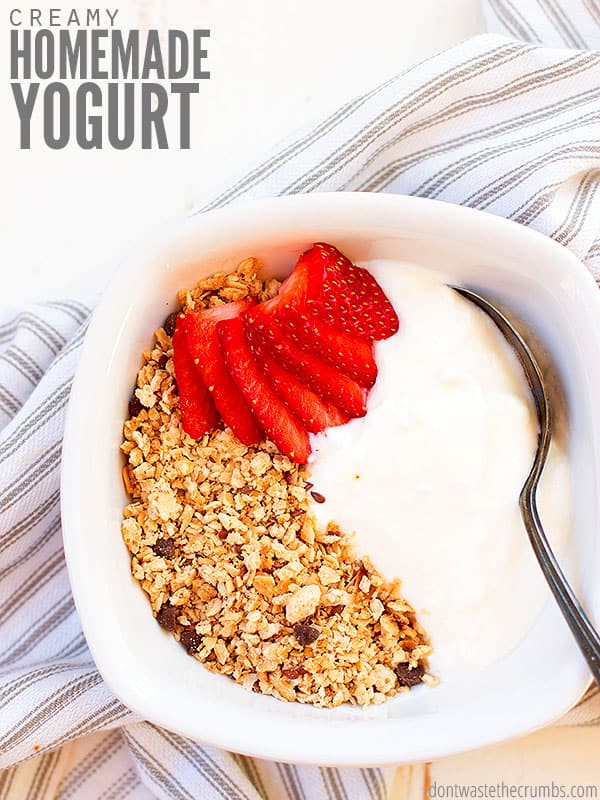
Have you ever heard someone say they made something, and you thought to yourself, “Wow, I didn’t know you could make that!”
That’s what I thought when I heard you could make yogurt. That’s something you can DO?! I can use this for my delicious yogurt popsicles.
For anyone who is looking to save money should consider learning how to make yogurt because it can save you TONS of money!
Reasons To Make At Home
Once you get over the shock that you can actually make this at home, there are several reasons why you consider making this at home:
- It’s really easy (heat + stir + wait)
- It’s mostly hands-off (so you’re not stuck in the kitchen!)
- You can adjust the level of tartness.
- You can flavor it however you want.
- It’s much cheaper to make it yourself!
- Plus, there are several ways to make it. Find which method works for you and run with it!
Here’s What You Need

You only need two basic ingredients:
- Warm Milk (preferably whole cow’s milk)**
- Yogurt Starter. This can be an actual starter like this or existing cultured yogurt.
** You can make a non-dairy milk version, but the process is different. Please don’t follow this tutorial and expect it to be non-dairy because it won’t!
How to Make Yogurt
My favorite method.
There are a few different ways to make this recipe, but I think the heating pad method is the easiest. The only catch is that you need a heating pad that has a MANUAL on/off switch like this one, not an auto-off function.
You certainly can work around this by being home to turn the heating pad back on, but that makes it a little more hands-on. If that doesn’t bother you though, or if you have a heating pad that doesn’t automatically turn off, here’s a great method!
Here are some photos for those who are visual learners.
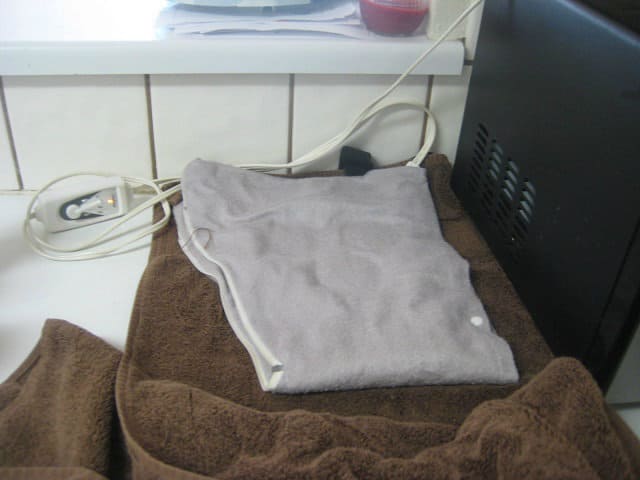
Step 1. The heating pad is set up on the counter. I took a bath towel, folded it lengthwise (hot dog), and placed one end on the counter. The heating pad is plugged in and on low, folded on top of the towel. I don’t know if the heating pad could burn the countertops, but since we’re renting, I didn’t want to risk it.
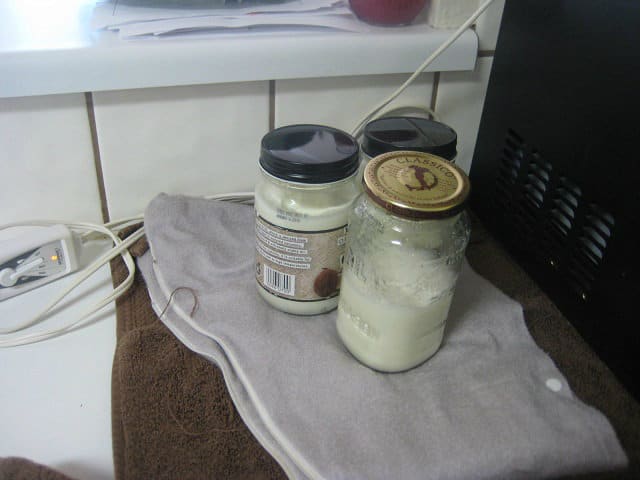
Step 2. My three jars on the heating pad are filled with cooled milk/yogurt.
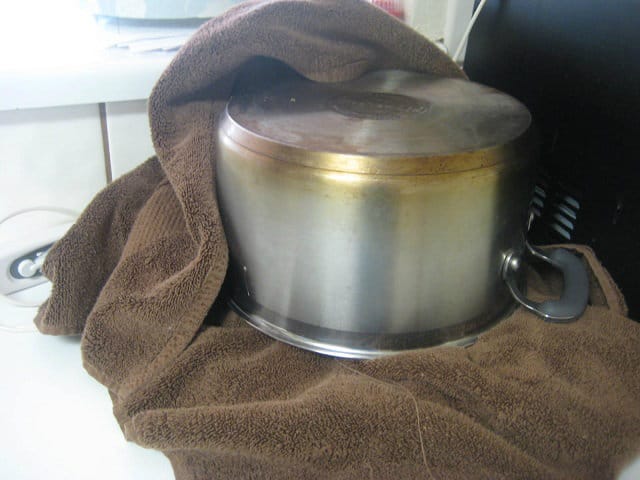
Step 3. I folded the towel over the jars first, then covered them with the pot. The term “incubate” from the recipe made me think of “warm” and I thought another layer of towel would help the process.
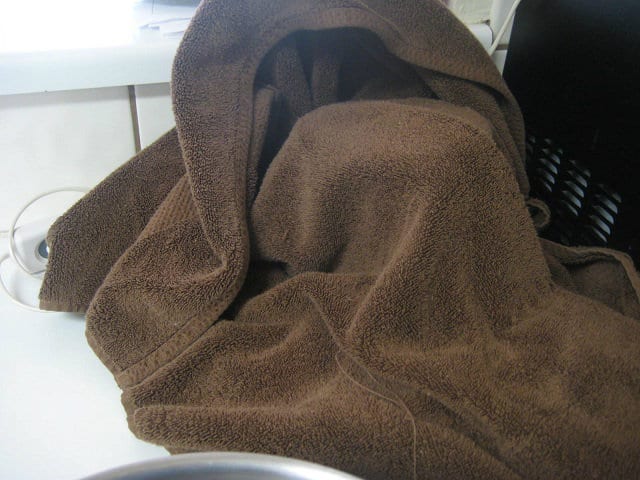
Step 4. I wrapped the towel over the inverted pot.
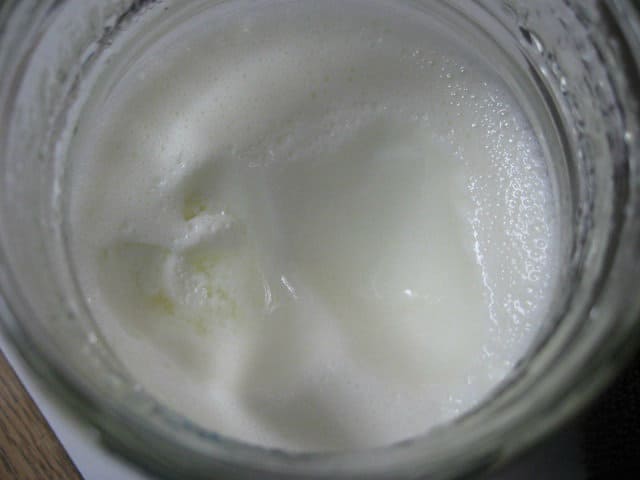
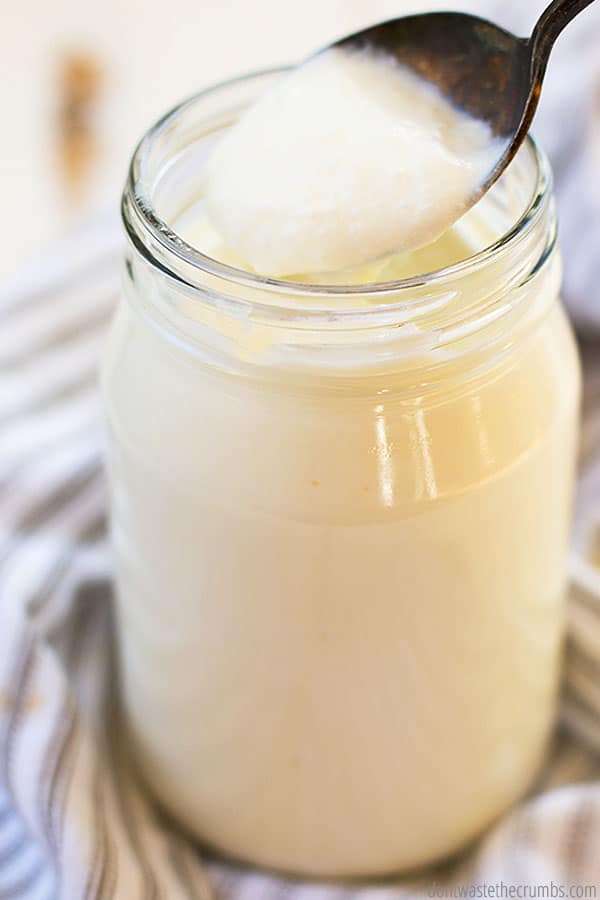
Step 5. Ta-da! The final product, 8 hours later! As you can see, the yogurt is really thick. I scooped some out and it didn’t fill in the hole – and this was right after incubation. It firmed up even more after being in the fridge!
How to Make Yogurt Using Other Methods
If you don’t have a heating pad, you can make this recipe using one of the following:
- cooler
- oven
- slow cooker
- Instant Pot
- dehydrator
The recipe is basically the same:
Step 1. Warm the milk.
Step 2. Add the starter and stir well.
Step 3. Divide into jars (optional) and let it culture for 8-24 hours.
**Step 3 – WHERE your yogurt cultures – is the only thing that’s different:
- Cooler. You’ll want to use a large cooler and add a pot of boiling water. That’s what will keep the temperature steady and warm.
- Oven. Keep the oven light on. (The same reason why I use the oven light for the first rise in my einkorn sourdough.)
- Slow cooker. The lowest setting possible will keep it warm. Do be careful that your low setting isn’t medium heat… if the temperature is too warm, it won’t thicken and could burn.
- Instant Pot. Follow the directions that came with your machine. Many models like this one come with a specific “yogurt” function where it does the whole process for you, from start to finish!
- Dehydrator. Place the jars inside and set the temperature to 100-105F. I have this dehydrator that won’t work for this recipe, but if you have a model similar to this one where you can remove the trays, you can easily fit the jars inside!
FAQs
The longer the culture, the longer homemade yogurt will last. I usually make four quarts size batches of yogurt at a time and it lasts me a month.
You only need 2 ingredients. Milk and yogurt starter. That’s it!!
The longer ferment, the thicker it will be. If you want it to be super thick, make sure you let it culture for a full 24 hours!
You can change the taste by adding flavors to homemade plain yogurt, this happens AFTER the initial culture. You can easily add fresh fruit or sweeten it with maple syrup or honey. If you like vanilla yogurt, consider vanilla bean powder or vanilla-flavored stevia!
If you eat a lot of it, yes! One gallon of homemade yogurt costs as much as a gallon of milk and one cup of yogurt. I can get a gallon of whole milk for $2 at ALDI, and a cup of yogurt for about $1. That means I can make one gallon of yogurt for $3.
Compare this to the $3 it costs to buy one 32-ounce of yogurt at the grocery store. You can save 75% – or $8 – every month!
How to Make Yogurt for Other Recipes
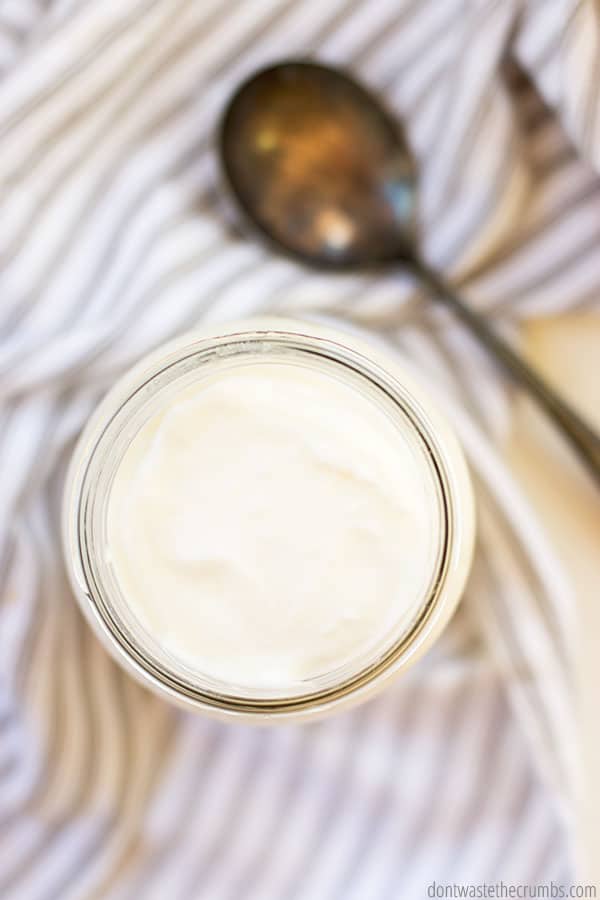
We like making 3-ingredient yogurt popsicles and homemade Caesar dressing (without using mayo). I also use it to make the dressing for my Costco-copycat Sweet Kale Salad and of course, making Greek yogurt, and in our favorite green smoothie!
More Kitchen How-to’s
- Easy Sourdough Starter
- How to Keep Fruit Fresh Longer
- Stretch Ground Beef
- How to Make Bread Machine Recipes by Hand
How to Make Yogurt
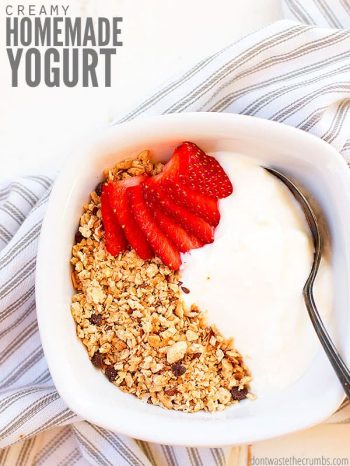
Learn how to make yogurt with this tutorial. Skip the yogurt maker and try this super easy heating pad method or even an Instant Pot! You can always adjust the tartness and flavor to your liking! For a snack that the kids will love, use our recipe for chocolate peanut butter granola to make our peanut butter and jelly granola parfait!
- Prep Time: 20 minutes
- Cook Time: 24 hours
- Total Time: 24 hours 20 minutes
- Yield: 4 quarts 1x
- Category: Snacks
- Method: Bowl
- Cuisine: American
Ingredients
- 1 gallon of whole milk
- 1 cup whole yogurt
Instructions
- Pour 1 gallon of milk into a large pot.
- Heat milk on medium high heat until the milk reads 160F on a thermometer.
- Meanwhile, line the counter with a folded towel and heating pad turned on low.
- Line four clean glass jars on the heating pad. Measure 1/4 cup of whole yogurt into each glass jar.
- Remove the milk from the heat when it reaches 160F and allow it to cool to no cooler than 115 degrees. Pour into glass jars and stir well to combine warm milk with warmed yogurt.
- Cover the jars with 2 towels, creating an incubation station.
- Allow yogurt to culture for a full 24 hours before moving the jars to the fridge to cool.
- Enjoy thick, creamy, and delicious homemade yogurt!
Notes
How to make yogurt using other methods:
The recipe is basically the same:
1. Warm the milk.
2. Add the starter and stir well.
3. Divide into jars (optional) and let it culture for 8-24 hours.
**Step 3 – WHERE your yogurt cultures – is the only thing that’s different:
- Cooler. You’ll want to use a large cooler and add a pot of boiling water. That’s what will keep the temperature steady and warm.
- Oven. Keep the oven light on. (The same reason why I use the oven light for the first rise in my einkorn sourdough.)
- Slow cooker. The lowest setting possible will keep it warm. Do be careful that your low setting isn’t medium heat… if the temperature is too warm, the yogurt won’t thicken and could burn.
- Instant Pot. Follow the directions that came with your machine. Many models like this one come with a specific “yogurt” function where it does the whole process for you, from start to finish!
- Dehydrator. Place the jars inside and set the temperature to 100-105F. I have this dehydrator that won’t work for making yogurt, but if you have a model similar to this one where you can remove the trays, you can easily fit the jars inside!
Nutrition
- Calories: 118





I use UHT or UHP (ultra high temperature or ultra high pasteurized) milk because it has already been pasteurized and is shelf stable. Why heat it more when it has already been done? Regular milk from the dairy case is not high temp pasteurized and therefore it is necessary to heat it before using for yogurt as far as I know. When you heat the milk you are already doing what has been done for UHT or UHP milk. The other way to go is powdered milk and Organic Valley has organic powdered milk. I use Nestle’s Nido because it has been fortified with vitamins. I don’t heat this type either.
My yogurt comes out great and I have never had problems. I actually learned the UHT technique from a Hare Krishna member on You Tube. I have even cultured my thermophilic yogurt outside when the heat was in the triple digits. Think about it. How do you think yogurt is cultured by desert nomads? I don’t think they bring their yogurt makers with them. : )
Those in the cooler climates often use mesophilic cultures that require no device to heat them and culture at temperatures of 68 to 78 degrees.
Hi there,
The ultimate goal of eating real food is to consume less processed foods and eat more foods that are as close to the original source as possible. With that said, I do not consider UHT milk real food. It’s extremely processed, to the point of being shelf stable, as you pointed out – yet that alone should cause us to question it! It’s not normal for milk to be able to sit on a shelf for months without going bad… to think of what was done to the milk in order to get to that point is scary. Here’s a site with more information that may help you sort through the UHT milk issue:
http://www.westonaprice.org/modern-foods/ultra-pasteurized-milk
The article also questions the ability of UHT milk to adequately support microbial life. You may be making ‘yogurt,’ but I wonder if any of the good bacteria is truly surviving in its newly created environment. Powdered milk is also highly processed, even if it’s labeled organic. Don’t let that word fool you – organic does not necessarily equate healthy. I have seen plenty of organic junk food on store shelves and even with the magic word it still doesn’t offer any more nutrition than the conventional item next to it.
I’d steer clear of fortification as well. Here’s a post I wrote on fortified flour. A different item, but same concept:
https://dontwastethecrumbs.com/2013/05/what-is-enriched-flour/
I can’t offer much in the way of Hare Krishna (other than what a quick search on Wikipedia can provide), but I can say that there has only ever been one true incarnate and that was when God was born into the flesh as Jesus Christ. I would never follow the teachings of anyone who believed otherwise, even in simple concepts such as making yogurt.
~Tiffany
Thanks Tiffany for all the links responding to UHR & fortification…that’s my next read?!
Amen to your gracious reply & reference to God, our Heavenly Father! Good food for thought????
Have you tried this yet without the powdered milk?? I have wanted to try making my own for some time now. I think I will finally give it a try but would rather not use powdered milk if its possible to do without it.
Dawn! I hadn’t realized that portion was still there – thank you SO much for asking!
The only time I made this WITH powdered milk was the first time. #2 was an experiment without and since it turned out fine, I never looked back!! I only use milk and yogurt to make more yogurt. Sometimes I use my own homemade yogurt as the starter, but more often than not I use store-bought Greek yogurt. I’ve found it comes out thicker that way. I’m updating the post to reflect this now! 🙂 ~Tiffany
Ok so we splurged (and I mean splurged, like it took 15 minutes for us to pick the thing up and pay for it splurge) on the new heating pad with no auto shut off. Now my next question is how do we flavor this stuff? My older kids don’t mind adding the fruit and granola to it but, the picky one won’t touch it unless it is strawberry with no fruit chunks. Help.
Who knew buying a heating pad would be such an ordeal, lol!
Flavors should come post-incubation and pureeing fruit and combining it with the yogurt is the easiest way to go about it. I’d recommend straining the yogurt first so it’s extra thick, then adding puree. This way the yogurt doesn’t become runny, unless the kids don’t care about that. Keep the strained whey for other fermentation or use it in smoothies. 🙂
Heather, try essential oils to flavor your yogurts. Food grade essential oils of course. Lemon or orange are fantastic! I use about 15 to 20 drops EO to a pint of yogurt. I add the EO to the cooled milk/starter when I’m filling my jars before the incubation process. Depending how well you stir the EO into the milk will determine how much EO comes to the top of the jar during incubation. Just whisk any EO back into the yogurt before serving. Lemon yogurt with a little agave syrup and blueberries is one of my favorites, but orange, with agave syrup and dark chocolate chips is pretty darn tasty.
we tried this the other day and it worked. I think my husband stood there for a minute before we realized it worked and then we did the happy dance. The other thing we found out was our heating pad has an automatic turn off after one hour. Not good since we started at night thinking it would cook over night. Love that husband of mine that got up once an hour to turn the heating pad back on. Totally worth it. Just have to find a new heating pad.
Wonderful news Heather!
You know, I think I had a similar reaction the first time too, lol. Your husband is SO sweet! A heating pad w/o an automatic turn off is a must, and definitely worth the investment with all the money you’ll save on making your own yogurt!! Let me know if you need a recommendation. 😉 ~Tiffany
Thanks so much for linking up to Creative Thursday. Can’t wait to see what you share this week! Have a wonderful week.
Michelle
This looks wonderful! We eat so much yogurt but i never thought of making my own…I would love you to link this up to our recipe linky at Katies Language Cafe! ~~Katie
Thanks Katie!
Thank you for your submission on Nourishing Treasures’ Make Your Own! Monday link-up.
Check back tomorrow when the new link-up is running to see if you were one of the top 3 featured posts! 🙂
I’ve never made my own yogurt but I have several friends who do. Your post is a great resource to get anyone started making homemade yogurt. Thank you for sharing it.
I love making my yogurt in a yogurt machine. Turns out every time (well, unless I use non-dairy milks. That’s a different story!) and it’s SO easy. They cost about $30 and TOTALLY worth it. Thanks for linking up to Healthy 2day Wednesday; come back next week to see if you were featured. 🙂
My friend shared some with me that she made in the crockpot and then put in her icecream maker with some fruit. I definitely need to try this! If you haven’t already, I’d love for you to visit my Gluten-Free Monday party at OneCreativeMommy.com and link up this and any other GF idea you would like to share. I hope to see you there.
Thanks Heidi!
Love this. I’ve made yogurt on and off for years, and to incubate it I usually put it in the oven with the light on overnight, but I’ve recently moved into a new place with an oven with no light!! The heating pad is a good idea 🙂
I’d love it if you shared this over on my blog’s new link up – Waste Not Want Not Wednesday, it’s a perfect fit for the theme.
this is awesome! i love it!!
Have a great night! Stop by nichollvincent.blogspot.com and say hello! xo
I did try the jars in the pot of water. I used ball jars. One of the jars bottom cracked clean off! What a flippin mess! And a waste of expensive raw organic milk. Now I make it the simple bites way, except I have a yogurt maker that holds small or large jars. My yogurt comes out delicious, creamy, and with very low tanginess. What a money saver making your own yogurt is.
Oh thank you for linking up! I love this and pinned and shared all around –
A heating pad! I like this idea. I gave up on the crockpot after the runny issue too. Fresh yogurt is simply THE best tasting yogurt in the world, so I’m happy to have another method to try!
Sooooo … how did it taste? Do you notice a difference in your fresh yogurt compared to the store bought stuff??
I’ve made yogurt in the past, even invested in a yogurt maker complete with a bunch of little jars and an incubator. I’ve been thinking about taking the plunge again, but now all I buy is raw milk from up the dairy farm up the street. Making homemade yogurt from raw milk has me a wee bit nervous.
The homemade version tasted like store-bought, but with less tang. I think reducing if not eliminating the powdered milk next time will fix that. Mixed with other stuff though, can’t tell the difference.
Making yogurt with raw milk CAN be done, and Kitchen Stewardship has a fantastic write-up on it. It requires a little more watching I believe, but I think you’ll be a pro after one attempt!
I have been making my own yogurt for years and just love the taste. So much better than what you buy from the stores. Hillary, RE: raw milk you need to pasturize it first….sort of. I know it has to be heated up to a certain temp. for a certain period of time. I believe the temp. is 180 degrees. Check on the internet and you can find the info. Tiffany, if you let you yogurt set longer than the eight hours, it will thicken more or you can double or even triple the amount of yogurt you are using for your starter. Also, if you let it incubate longer it will be tangier. I usually let my yogurt incubate for 12-14 hours and I don’t have any problems. One word of caution to anyone making their own yogurt,make sure containers and lids are thoroughly washed and rinsed..the hotter the water the better!
Thank you for all the wonderful tips Mary! I plan to make another batch this month and I’ll be sure to come back to this!
I use the crock pot method too, and it is so easy. Starting with Greek yogurt definitely helps and if it’s still too runny for you just pour off some whey or run it through cheese cloth.
Thank you for the idea!
Ok seeing you have sucess makes me want to try one more time. My kids are addicted to Mountian High Yogurt. We love supporting a local company but wow it has gotten expensive. What kind of starter did you use?
I used either Trader Joe’s plain organic yogurt, or the Fage from Costco. We had both in the fridge at the same time, but I took from the one unopened. Now that one is gone and one is open, I’m not sure which it was! Based on another comment, I’d go with the Fage for thick yogurt though.
I used Mountain High yogurt as my starter. After that you can just keep using 1/2 cup from your last batch as a started. I love the idea of using a heating pad because hot water is very tricky. If your yogurt gets hotter than 120 degrees it will kill the culture. It might still taste good but, it will not have the health benefits of fermented yogurt.
Thank you–so you use 1/2 a cup from each previous batch every time you make a new batch? (Just use store bought for the first batch?) I was wondering how long this yogurt lasts in the fridge? Do you need a special thermometer? I only have a meat thermometer, will that work? Also, can you double this batch? Seems like a fair amount of work for only a couple quarts…? Thanks! This will be my first time trying to make yogurt 😊
I’ve been making my own yogurt for a few months now and actually do the method from KitchenStewardship. I’ve never had a milk jump out of my jars so don’t be too intimidated! Sometimes if I have too much water and don’t turn down the temp a bit after it’s boiled I have water spill out of the pot but it’s never negatively affected anything.
Your method looks easy enough, maybe I’ll give it a try.
The best ever yogurt treat is a bit of berry freezer jam mixed in homemade yogurt with some granola on top… it’s almost better than ice cream!
Thanks Elizabeth, hearing that water jumps out, instead of milk, is a bit reassuring. Your yogurt treat sounds delicious! I’ve heard of people taking out entire pints of freezer jam in one sitting. That may be a dangerous temptation!
We’ve been making our own yogurt for a few months now and it has been a huge budget saver! I do use the crockpot method (which I had previously given up on because of the runny yogurt issue), but I’ve found this go-round that if you start with a greek yogurt starter the yogurt comes out MUCH firmer. Happy with it, so that’s what we do- cause I don’t have a heating pad!
Aha! Thanks for sharing that tip Jennifer! I wonder if that’s the key to removing milk powder from this recipe – supposedly it adds to the thickness. I’ll have to experiment on the next batch!
We use the crock pot method for yogurt as well. Our first batch came out runny, but the kids enjoyed drinking it with a straw. After that, we have added 1 small envelope of unflavored gelatin to the mix, right after adding the yogurt starter to the warmed milk. Turns out perfect!
Hi! Has anyone tried pure clay yogurt makers. I was looking all over to get a decent yogurt maker and stumbled upon mecware.US and to my surprise these MEC yogurt makers are amazing and gives you a naturally silky thick yogurt, no need to add any thickeners or strain. My family and i are enjoying the delicious thick yogurt thanks to this amazing product (yogurt maker).
I haven’t heard of a CLAY yogurt maker so far, but I have heard of yogurt makers in general. I’ve heard they do the trick, but it’s nice to know they do it well! 🙂
I’ve been making yogurt for over a year now. I started with an Easiyo yogurt maker. Which is basically a large thermos that you put the yogurt in a quart size plastic jar and then into the thermos which you then fill with boiling water. After awhile that quit working, sort of like it wasn’t keeping the heat in, I didn’t care for the thought of hot liquids in a plastic container either. So I tried the heating pad method, worked well, but I wanted something that didn’t use much electricity and that my cat wouldn’t try to take over while we were sleeping (she loves sleeping on a heating pad.) That’s when I discovered what I call the Oven Light method. I make my yogurt like you, milk, yogurt (sometimes I add 1/2 cup powered lowfat milk) heat it up same as you. Then once it’s cooled I put it into pint jars and set them in my oven over night with ONLY the oven light on, I place the jars as close to the light as I can get them. NO HEAT. At first I tried a quart jar but it was a little runny for me so I began using pint jars. The last time I made yogurt I used my small Weck jars. You would not believe how thick the results were. I tried to drain some to make yogurt cheese and it didn’t even fall out of the jar when I turned it upside down overnight! I think using the smaller jars allows the yogurt to “make” quicker too. You won’t need to leave it over night. When people see my yogurt they can’t believe I make it myself, and the taste!!!! Unbelievable, just add fruit and honey or agave syrup or maybe a drop of lemon essential oil…. out of this world.