Make apple cider vinegar at home, using apple scraps or whole apples, with this easy tutorial. Save money, reduce food waste, and make ACV in under 5 minutes!
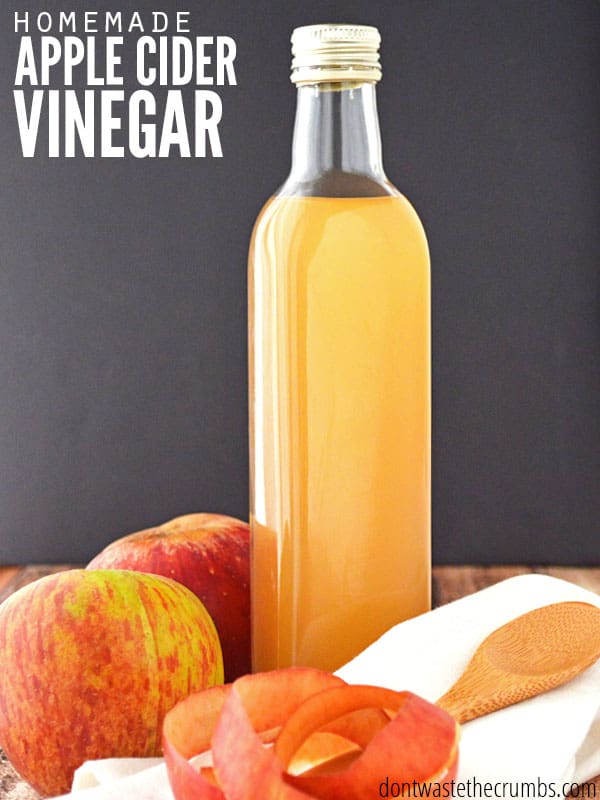
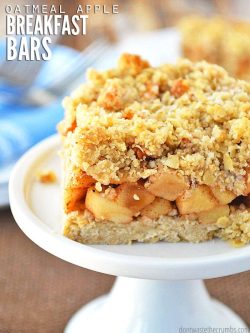
My kids absolutely LOVE apples. They’ll eat them fresh, dipped in Chocolate Hummus, or in their favorite make-ahead breakfast Apple Oatmeal Breakfast Bars (which also passes for dessert!).
But what do you do when you have a bunch of apples that go bad? Or have you ever wondered if there’s something you can do with the apple cores and apple peels, other than throw them away?
You can make apple cider vinegar!
Apple Cider Vinegar
There are two important things to know when you make ACV:
First, it’s free. There’s nothing special to buy just to make apple cider vinegar. You can use apple scraps (cores and peels) from any other recipe, OR you can use apples that don’t look very appetizing. In either case, you were going to throw the apple bits and pieces away anyway, so turning it into vinegar is a free bonus! (Here are more ideas for cooking with food scraps).
Second, making apple cider vinegar is VERY easy and VERY fast. You only need 3 ingredients and the entire process takes only 5 minutes from start to finish. The only downside is that your apple scrap vinegar is not officially ready until it’s sat for about 6 weeks.
If you need apple cider vinegar ASAP, the healthiest option is to purchase a brand that is raw, unpasteurized and has the mother. I really like Braggs, and you can get the best deal by buying in bulk.
You can still benefit from pasteurized apple cider vinegar though, so if that’s what’s in your budget, go for it!
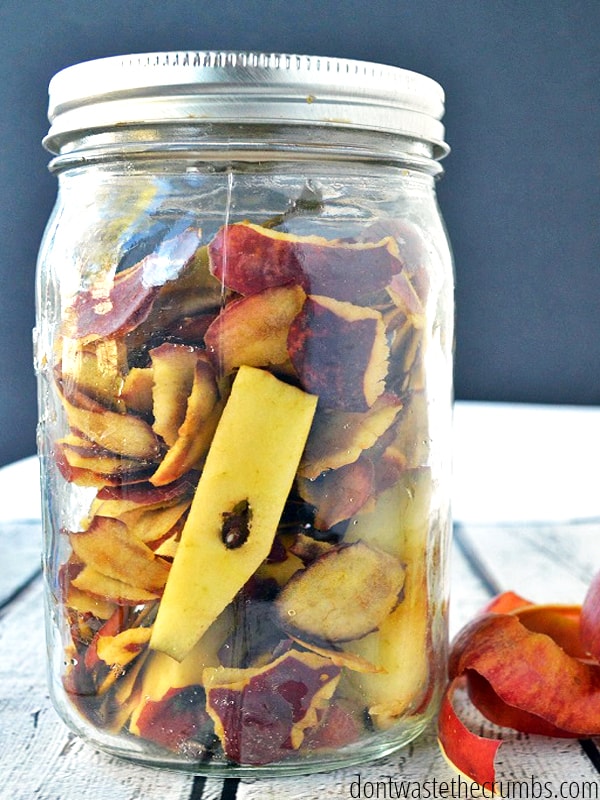
ACV Benefits
ACV benefits include reducing high cholesterol, stabilizing blood sugar, and improving heart health. It also aids in detoxing the liver and lymphatic systems.
Raw, unpasteurized apple cider vinegar will also have “good” bacteria (like yogurt) and enzymes that improve gut health. I want all of these health benefits, but store-bought can be pricey, which is why I learned how to make my own apple cider vinegar!
Supplies for Making Vinegar
- One wide mouth quart mason jar (or reuse a glass jar from spaghetti sauce or peanut butter)
- One canning lid ring (if using a canning jar) OR a rubber band
- Coffee filter OR paper towel
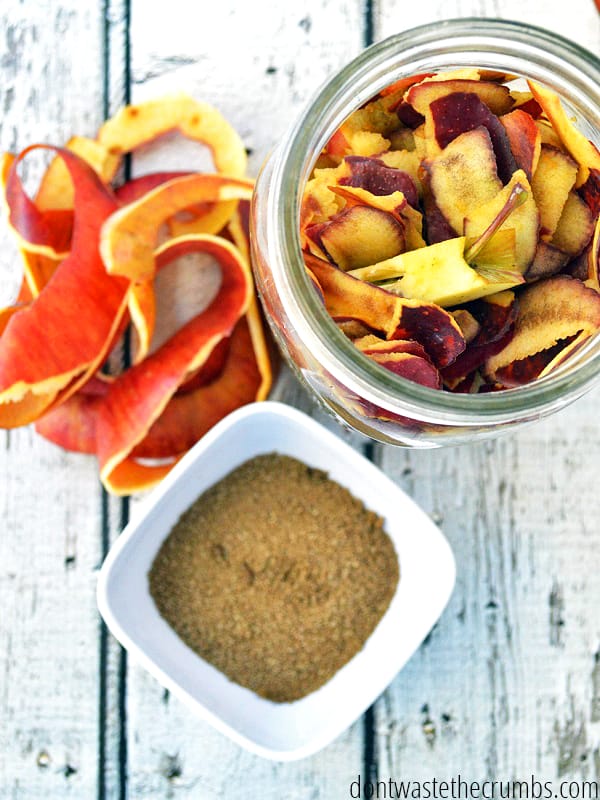
Homemade Vinegar Ingredients:
- Apple scraps from approximately 6 large apples (NOT moldy or rotten apples)
- 2 Tbsp granulated sugar (white granulated sugar is best)
- 2 cups water, boiled and allowed to cool
Tip: If you don’t have enough apple scraps to make ACV, freeze the cores and peels until you do! Place them in an airtight container that’s safe for the freezer. Label the container, and simply add additional cores and/or peels to the container as you have them. When you have about 6 apples worth, make homemade vinegar!
How to Make Apple Cider Vinegar at Home
Step 1: Measure 2 Tbsp of granulated sugar and ¼ cup of water into the quart jar. Stir until the sugar is dissolved.
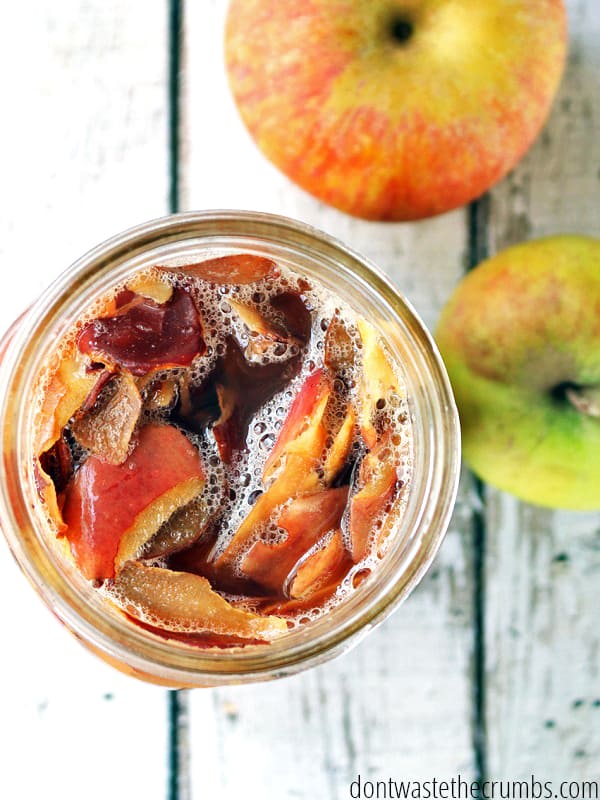
Step 2: Fill the jar with apple pieces, filling no more than ¾ full. The apple scraps need room to expand and stay under the liquid.
Step 3: Add the remaining 1 ¾ cups of water to the jar. The apples should be completely submerged. Mold can grow on any portions of apples that are not covered and ruin your batch of vinegar. If your scraps float to the top of the jar add fermentation weights, fermentation springs, or a smaller jar on top (or a shot glass) to keep them submerged.
Step 4: Cover the top of the jar with a coffee filter and secure it with a canning lid or a rubber band.
Step 5: Allow apples to sit in a warm, dark place for two weeks. Above the refrigerator or on the top shelf of a cupboard are great places. Just don’t forget you put it there!
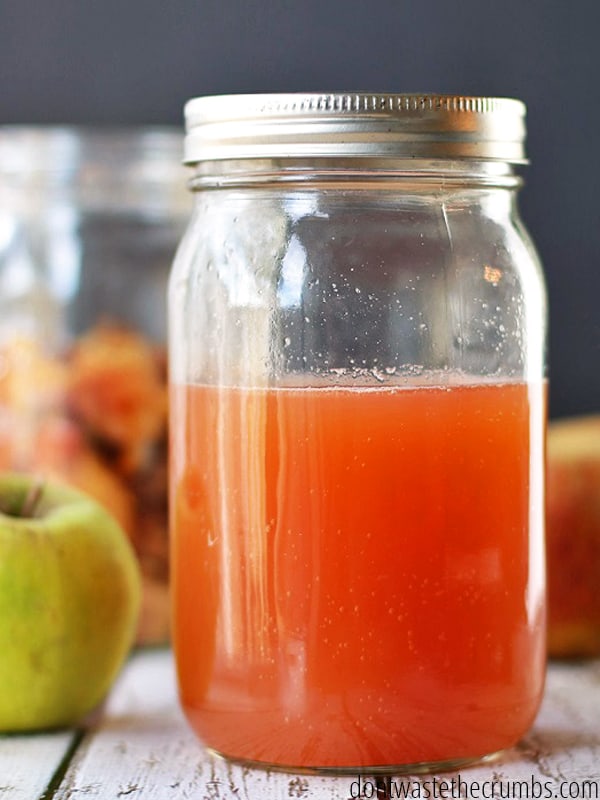
Step 6: After 2 weeks, you might notice some fizz or bubbles. That’s good news! Strain out the apple pieces and discard them. Cover the apple cider vinegar again with a filter and canning lid ring (or rubber band). Allow the vinegar to continue to sit at room temperature for another 2-4 weeks.
Step 7: The vinegar may become cloudy, or a SCOBY could form on the top, both of which are normal. At the 4-week mark from first initially making the vinegar, taste test the vinegar once a week until it’s fermented to your liking. You can stop the fermentation process by replacing the filter with a canning lid and storing it in the refrigerator.
For longer storage, I highly recommend swing-top glass jars like these. They keep the apple vinegar sealed to prevent further fermentation, and they’re easy to pour from. Plus, it frees up your mason jar for other things.
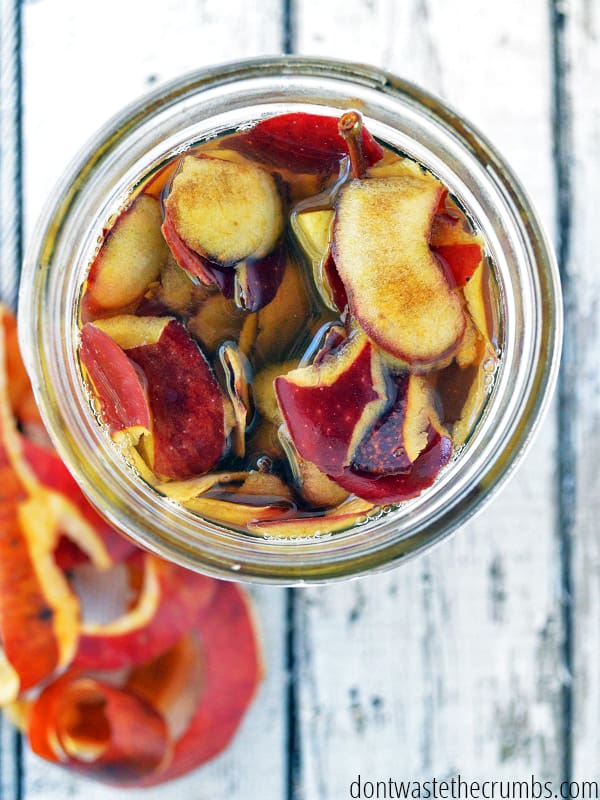
How to Make ACV (Using Whole Apples)
Follow the steps above for making apple cider vinegar using apple cores and apple skins, except use apples that are past their prime or not best for eating fresh, like mealy apples, wrinkly apples, or apples with bad spots. Simply cut out any bruises or bad spots from the apple and follow the tutorial as written to make ACV!
Does Apple Cider Vinegar Go Bad? ACV Storage Tips
Refrigerator: Store finished apple cider vinegar in the fridge to stop the fermentation process. You can keep it out on the shelf, but it will continue to get stronger in taste.
Freezer: I have not tried freezing ACV before, but I think you can! Use these tips to freeze liquids without breaking the jars.
Shelf-Life: Homemade apple cider vinegar will last up to a year when refrigerated. You should be able to tell by smell and taste if it has gone bad. The smell should always be vinegary with a hint of sweetness. If it smells sour, toss it, and start a new batch.
How to Make ACV: Troubleshooting and Tips
Make sure ALL of your supplies are clean. Dirty dishes can contaminate your homemade apple scrap vinegar, so be sure to start with a clean kitchen and a sterilized jar, clean bowls, and utensils.
Avoid chlorinated water. Most cities use chlorine to combat bacteria in water, but this small amount of chlorine can react with fermentation and vinegar. Be sure to use filtered water or boiled water that has cooled.
Don’t use metal containers. Metal containers will also react with fermentation and vinegar, so make sure you’re using only glass jars. (Silicone, wood, and plastic utensils are fine to use.)
Speed up the process: You can use apple cider vinegar as a “starter” and add 1 ½ Tbsp raw apple cider vinegar for every 2 cups of water to help kick start and speed up the fermentation process. If you do this, strain the apples after just one week and taste each week after that.
Make sure your jar is covered well with a coffee filter or paper towel so fruit flies can’t get inside!
FAQs to Make ACV
What apples are best for making homemade apple cider vinegar?
The best apple types for homemade apple cider vinegar are the ones you already have at home! Seriously, there’s no right or wrong apple variety to make ACV. I think a combination of apples tastes best, but you could use a different fruit altogether – pear cider vinegar, pineapple vinegar, permission, fig, or anything else that sounds good to you!
Can I use honey instead of granulated sugar for fermentation?
You can substitute raw honey for sugar, but it will cause slower fermentation. Any sweetener you use will be eaten by the yeast anyway, so I prefer to use the least expensive sweetener possible. You can also omit the sweetener altogether, but the total fermentation time will be up to six months.
Can I make ACV from the mother?
Yes! You can use the vinegar mother from an existing ACV or a SCOBY as the starter in your next batch of ACV. Or you can give it to a friend to start her own batch of ACV!
How do you make apple cider vinegar at home?
Follow the tutorial above for making apple cider vinegar from entire apples or using apple cores and apple peels. Keep reading for ways to use your homemade apple cider vinegar in recipes and around the house!
My vinegar is moldy. Is it still good?
You will usually find white scum at the top when you make ACV, but you shouldn’t find mold. Be sure your apples stay submerged using fermentation weights, fermentation springs, or a smaller jar on top (or a shot glass). If you find mold in your apple vinegar, toss it out and try again.
What color should homemade apple cider vinegar be?
There are a lot of factors that affect color when you make ACV. It could be the apples you use, how long it ferments, and the temperature of where you store it! Mine typically stays a light color but has a distinct vinegar smell and taste.
What if my ACV turns slimy or thick?
Apples naturally contain a lot of pectin. This is what is used to thicken jellies and jams. If your ACV becomes thick, you can continue to ferment and then thin with water later. Organic homegrown apples tend to contain more pectin!
How Do You Use Homemade Apple Cider Vinegar?
Personal Use:
- As a detox elixir. Use this recipe for a short-term detox or an everyday start for your digestive system.
- An immune system booster. In addition to these immune-boosting fall foods, a tablespoon of ACV contains polyphenols and polysaccharides, which help your immune system.
- A facial toner. After using a homemade face wash like this, you can use apple cider vinegar as a toner. Top off with homemade lotion bars and your skin will thank you!
- To remove moles. I know this seems strange, but my husband tried it and it worked! Here’s his story.
- Homemade conditioner. Naturally condition hair with homemade ACV!
In the kitchen:
- To soak grains. Here is my method for soaking whole grains. Adding some apple cider vinegar helps the process work faster.
- To make salad dressing. This delicata squash salad recipe is one of my favorites that uses an apple cider vinegar dressing.
- Substituting for plain vinegar in recipes. Apple cider vinegar works really well in most recipes!
- Make bone broth. Whether you use the slow cooker chicken stock method or the Instant Pot chicken stock recipe, add 1-2 Tablespoons of ACV. This helps pull the nutrients out of the bones creating a true bone broth.
- In homemade mayo. My recipe for fail-proof mayo uses lemon juice. But if you’re out or don’t have fresh lemons on hand, ACV works in a pinch! The flavor is slightly different but still makes great mayo.
- Washing produce. Using vinegar is one of the natural ways to wash vegetables!
Around the house:
- To catch stray fruit flies. I tried this not long ago and it really works! The flies didn’t stand a chance in our homemade trap.
- To clean the house. You can take your finished apple cider vinegar and infuse it with citrus peels. This creates a nice-smelling cleaner you can use anywhere in the house.
Apple Recipes to Make Before You Make ACV
- Homemade Applesauce
- Apple Butter (plus 7 variations)
- Slab Apple Pie
- Homemade Apple Crumble Ice Cream
- Dehydrated Apple Chips
- Cranberry Apple Spinach Salad

No Cook Meal Plan
Sign up to get instant access to my No Cook Meal Plan, complete with recipes and shopping list!How to Make Apple Cider Vinegar
Make apple cider vinegar at home, using apple scraps or whole apples, with this easy tutorial. Save money, reduce food waste, and make ACV in under 5 minutes!
- Prep Time: 6 weeks
- Total Time: 6 weeks
- Yield: 32 oz 1x
- Category: Kitchen Hacks/Tutorials
- Method: Fermentation
- Cuisine: American
Ingredients
- Apple peels, cores and any browning/discolored flesh from pesticide-free apples (approx 6 large apples)
- One quart jar like these (or whatever you have on hand)
- One canning lid ring OR a rubber band
- Coffee filter OR paper towel
- 2–2 ½ Tbsp granulated sugar (I like Turbinado raw sugar)
- 2–2 ½ cups water, boiled and allowed to cool
Instructions
- Cover the bottom of your jar with apple scraps, filling no more than ¾ full. The apples need room to expand and stay submerged.
- Add 2 Tbsp of granulated sugar and 2 cups of filtered water to the jar. The apples should be completely submerged. Mold can grow on any portions of apples that are not covered and ruin your batch of vinegar. If your scraps float to the top of the jar add a smaller jar on top to keep them submerged.
- Stir the apples, sugar, and water and cover with a coffee filter. Secure with a canning band, or a rubber band.
- Allow apples to sit in a warm, dark place for 2 weeks. Above the refrigerator or on the top shelf of a cupboard are great places. Just don’t forget you put it there!
- After 2 weeks, you might notice some fizz or bubbles. That’s good news! Strain out the apple pieces and compost. Cover the apple cider vinegar again with a coffee filter and canning band. Allow continuing to sit at room temperature for another 2-4 weeks.
- The vinegar may become cloudy or a SCOBY could form on the top, both of which are normal. Taste test the vinegar once a week until it’s to your liking. You can stop the fermentation process by replacing the coffee filter with a canning lid and storing it in the refrigerator.
Notes
- Avoid chlorinated water. Most cities use chlorine to combat bacteria in water, but this small amount of chlorine can react with fermentation and vinegar. Be sure to use filtered water or boiled water that has cooled.
- Don’t use metal containers. Metal containers will also react with fermentation and vinegar, so make sure you’re using only glass jars. (Silicone, wood, and plastic utensils are fine to use.)Speed up the process: You can use apple cider vinegar as a “starter” and add 1 ½ Tbsp raw apple cider vinegar for every 2 cups of water to help kick start and speed up the fermentation process. If you do this, strain the apples after just one week and taste each week after that.
- Make sure your jar is covered well with a coffee filter or paper towel so fruit flies can’t get inside!
Nutrition
- Calories: 23




If a scoby forms can it be used to make kombucha?
I don’t know, Audrey, I’ve never tried that before!
I’m making them in gallon jars, do I use the same amount of sugar and such or increase according?
Increase proportionately!
To overcome mold, I stir the mix every couple of days for about two weeks then leave it until all sinks. I also wait to bottle until it tastes how I like. This can mean a mother of 1/2 an inch at times. I use 25 liter plastic buckets and buy bulk apples from the market here in South America. Also use brown sugar with no problems. Two bottles of one batch were very thick, syrupy and sweet like balsamic vinegar. Absolutely delicious. But I have no idea why . Would love to be able to replicate it.
Hey, I’ve been making acv for a little but now, and has always been great. I’ll bottle it in an air tight glass bottle and stash it away. Previously had no trouble but the last batch I made, I went to pop open a bottle to use it and it was very very carbonated.. Still tasted like vinegar though not very strong. What have I done and can I rid the carbonation and save them?? I don’t know what to do haha. Thanks
Hi Natalie! The carbonation is a natural by-product of fermentation and doesn’t make it bad at all! I’d burp the vinegar now and then (opening and closing it) and just let it keep sitting to make it stronger. 🙂
Using an airlock protects against contamination and allows the materials to create the ideal environment for fermentation. I use the Perfect Pickler, but you can also easily and inexpensivly make your own if you are a bit handy.
Thanks for this post. For the many commenters who have ‘failed’ making the fermented apple scrap vinegar due to mold, I suggest they try using an airlock which will allow air to leave the jar, but keep the contents protected from molds, bacteria, dust and pests. They are not hard to make yourself, or there are companies selling them all ready to just screw onto your wide mouth Mason jars. A food safe bag filled with water and rested on top of the apple scraps will also cut down on molds, etc., but an airlock is the best in my experience. It’s also fun to watch how the water in the airlock responds to the pressure of the fermentation process in the jar.
So, I started and after the first two weeks with the scraps, my mixture turned very syrupy. Is this normal?
I don’t recall mine being syrupy… how does it smell?
It smells like vinegar. It’s just much thicker than the normal kind you’d get at the store. I wonder if it would help if I added more water?
It might – let us know how it works out for you!
I love making ACV. always have at least 1 gal going. I get used pickle jars from local places that sell the full pickles, like the Farmers Market.
I’ve also made a pineapple vinegar that was delicious. Used the meat cut off inside of peelings. Never trust the pineapple peelings, unless you grow them yourself. Exact same process.
1/2 c of acv w/mother, pineapples bits, 1/2 c br sugar, (can also use honey, but takes longer), dist. water, & 2 Tbsp of lemon juice. Strain after 2 wks. Then after 2 more wks, start tasting & cap off, when you like the taste, then bottle.
Another vinegar hack I love is citrus cleaning vinegar, (wht vinegar & citrus peelings). I clean everything w/vinegar. Peelings gives wonderful citrus smell. Having 2 Meyers lemon, a tangerine, a pink lemon, & a Ponderosa lemon.
Citrus peelings in any size jar, (can keep in fridge for a wk, until you have enough), fill w/reg white vinegar, & cap. Put in dk cool place, remembering to shake at least every other day. After 1 mth, strain & keep in same jar, or put into spray bottle. I clean mirrors, tables, floors, etc w/it.
Thanks for the wonderful ideas Tosh!
Hello!
SOS!I will move in there weeks and even if I start today it will not be read until then.Can I pause the procedure for one day and put the lid?
Absolutely!
Can I use brown sugar? Will the molasses be a problem?
I don’t think I’d recommend brown sugar Sarah. In all the ferments I’ve seen, white sugar is nearly always used.
Hi is it ok to apply on my hair, Henna and make a Conditioner of it? cuz i really like everything home made and if i can use this vinegar for my hair it will be great, and can i make other blends of it?
Thanks.
I’m not sure Julian, but if you try it and are successful let me know!
Hi! I also tried to make one at home my self! But the color of the vinegar was really cloudy and pale… did i do wrong?
Thanks!
I used this recipe and it has been sitting for about 2 months. I had another batch of homemade act with the mother, so when I started this I added that mother in with the apple scraps. After a few weeks I strained the apples and the mother was all grown into the apple pieces. Now it looks great with more mother growing on top and it’s super cloudy, but very light in color, almost white. It smells right, but I havnt tasted. Do you think I should leave it a lot longer and hope the color gets darker? I was hoping to jar it in clear glass growlers soon. Any suggestions??
If it smells right, I’d judge by that over color (personally). Taste, and see if it needs more time, and get it bottled up!
Im just wondering if anything can be made from apple peels after using to make vinegar.
I think once you make vinegar, you won’t want to use them for much other than compost. MAYBE you can dehydrate them into dog treats, but the vinegar soaked flavor likely won’t be enjoyable by humans. 🙂
So I’m at 2 weeks minus 1 day and my apple peels closer to the top of the jar are browning. They are *mostly* submerged (has been a few peels that have come out of the liquid maybe a milimetre at most) but even ones that are completely submerged are starting to brown. The second half at the bottom look the same as they did when I first started the process. I don’t see any mold, just discoloration. Is this normal? Has anyone experienced this? Any solid advice or even just pondering would be helpful 🙂
Hi Chelsea! Discoloration is fairly normal, as it takes only a little oxygen to react w/the apples. You definitely don’t want mold, and you don’t want an off smell. As long as it smells good and the color is the only issue, I say you’re doing great!
I have tried this a few times now with different contraption involving jars and lids. But I still struggled to keep the apple scraps down and mold kept ruining my batches. This last time, I used a coffee filter pot and a piece of paper towel. I just cut a slit in the paper towel so it would slide in around the shaft. I was going to use a rubber band over the paper towel, but I thought I might brake the pot. So I just let. The lid hold the paper towel down. Perfect results and no mold!
Wonderful – thanks for sharing Merrilee!
Hi, could you please enlighten me, what is a SCOBY. I have made the apple water part and it smells pleasantly sour. I am going to remove the apples now at day 16. At the edges where i couldnt completely submerge the apples, there is a skin that has formed that looked like a congealed scum that is a milky colour. I am assuming that i am to toss this out? Can i use the rest of the cloudy looking liquid and keep following your instructions? if i can skim off the milky skin on the side?
Thank you,
Hi Michelle – that is technically an MOV – mother of vinegar! It is VERY similar to a scoby (Symbiotic Culture Of Bacteria and Yeast), but technically speaking, scoby’s are created in kombucha (fermented tea) while MOV’s are created in a vinegar solution. I have an MOV too, which I honestly haven’t done anything with yet, BUT I do plan to use it to make more ACV. You can do that, instead of using the mother from raw ACV when you make vinegar. If you don’t want to use it for awhile, store it in a jar w/some of the homemade vinegar – maybe 1/4 cup, depending on how thick it is. Cover w/thin cloth and secure w/rubber band. It’ll continue to thrive, but you won’t be forced to do anything with it right away. Congrats! It’s not a super common occurrence to grow an MOV, but it means making more ACV easily going forward!!
This pertains to my question, about whether I can strain away a lot of the apple cider vinegar from the peels/cores. It seems that I am throwing a lot of GOOD STUFF away, but if I try to strain out the “cider”, it will be really thick. And I think that will all be good stuff, but just inordinately thick.
I really hate to throw all the SEEMINGLY good stuff AWAY!!
I had been thinking to strain out the vinegar, but drilling it down in a food processor, and then straining it in a sieve. I just want to get every good bit out — and not throw it away in the compost!!
I tried this. I got 2 thick layers of what assume to be mother, but it smells sour not vinagery. Should I toss it. It’s been over a month
April – does it smell bad? Or just sour? Sometimes “sour” is mistaken for vinegar, especially in home fermentation. If you don’t see any mold, then you’re probably fine.
Thank you all for the interesting advice making acv. I used to make Kombicha years ago and enjoyed making it, I gave the extra ‘mother’ to our local health shop, they were most appreactve.
I have never made acv but am going to give it a go. I have been using bought acv for years, I put it in a spray bottle and after showering I spray it in the air and ‘walk’ through it, I’ve used it as an u/arm deodorant for years. It works. Ps. I’m 80 yrs young. 🙂
BerylH
I don’t eat enough apples to have enough scraps. Could i just save the apple scraps by freezing them until i have enough to use?
Yes!