This creamy homemade mayo recipe is even better than store-bought, and with just 4 ingredients, you’ll be able to whip up a batch of mayonnaise in less than 5 minutes following this fail-proof recipe! Perfect on a sandwich with my Homemade Lunch Meat and Homemade Sandwich Bread!
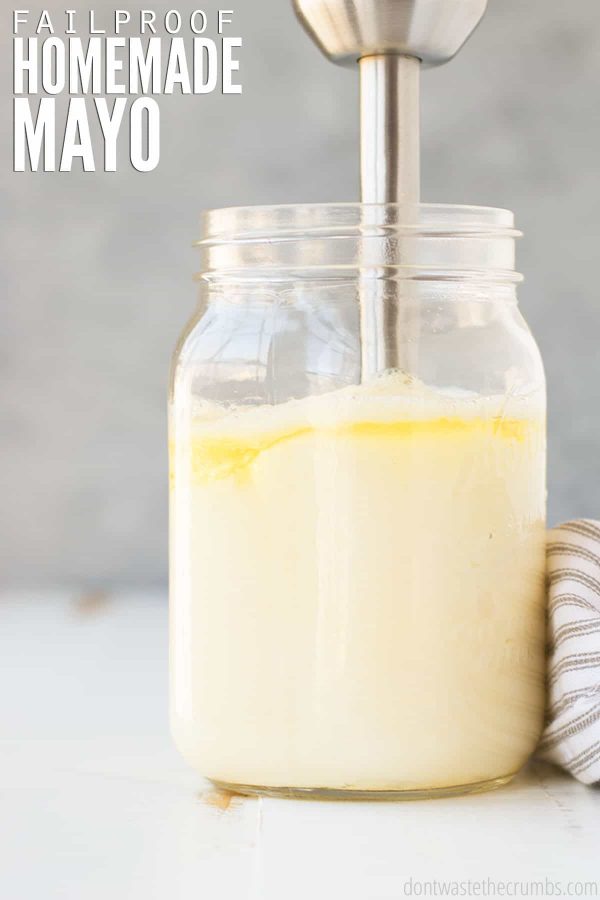
Over the years I have learned how to make several condiments from scratch, but something about homemade mayo has always daunted me.
Maybe it was the raw egg. Or maybe it was my worry about the mayo not mixing properly. I mean, it had to be difficult to make this creamy, tangy sandwich spread turn out correctly, right?
As it turns out, all those myths about how hard it is to make homemade mayonnaise were wrong! With one amazingly simple recipe (and a couple of tricks), you’ll have delicious homemade mayo ready in less than 2 minutes!
HOMEMADE MAYO RECIPE
Not only does homemade mayo taste way better than store-bought, but it’s also:
- Quick. Make it in a total time of 5 minutes!!!
- Easy. It’s so easy that after you make it, you will wonder why you haven’t been all along.
- Frugal. With only a handful of pantry ingredients, homemade mayo is much cheaper than store bought.
I’m going to show you how to make mayonnaise at home!
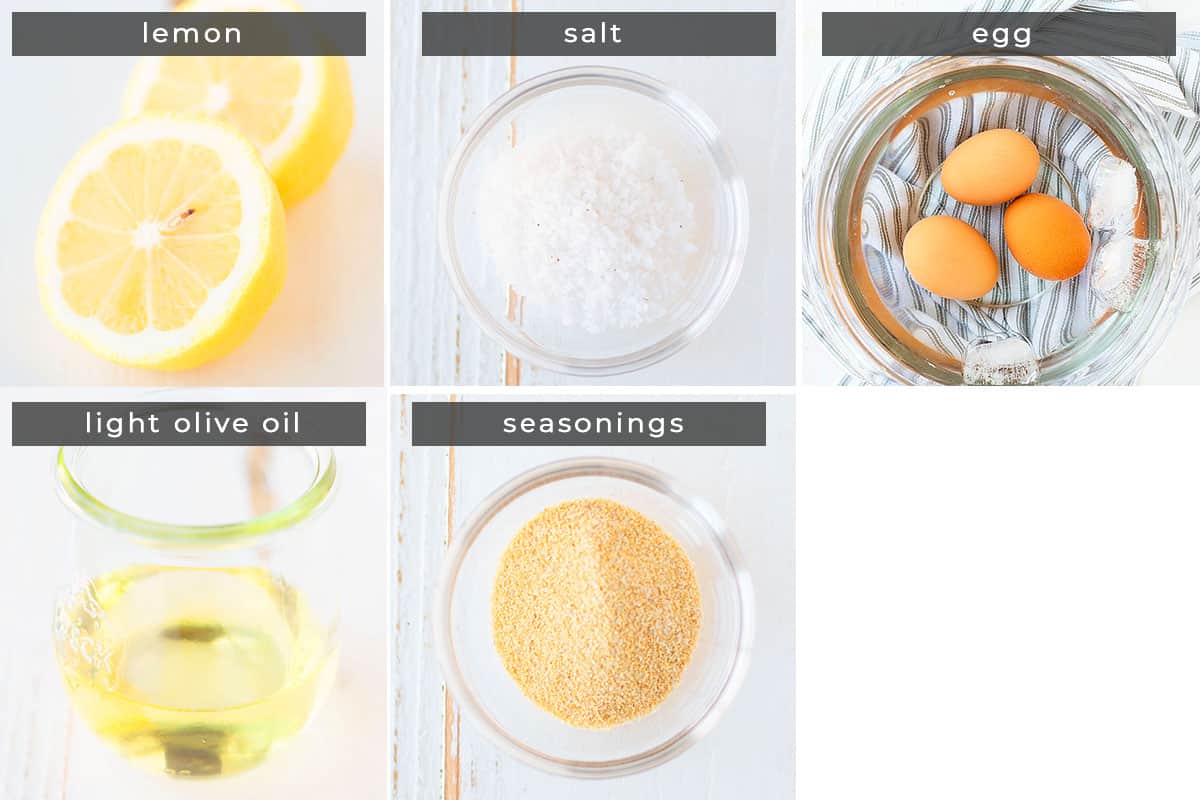
HOMEMADE MAYO INGREDIENTS
- Lemon
- Kosher salt
- Egg
- Extra light olive oil
- Flavors/seasonings (optional)
- Whey (optional)
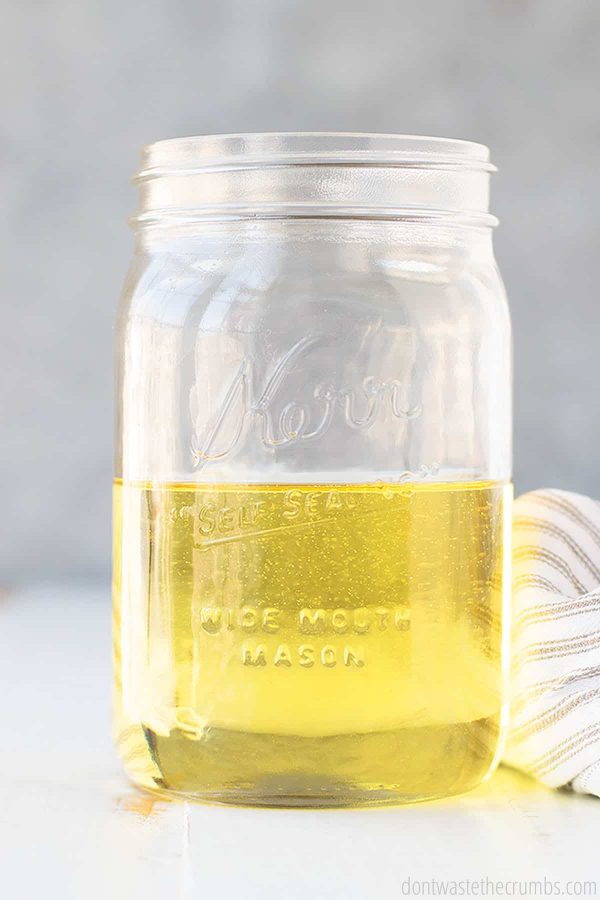
You need an Immersion blender for this homemade mayo recipe.
You need EXTRA LIGHT olive oil. Extra light virgin olive oil is absolutely delicious in dressings, or with freshly baked artisan bread, but it does NOT taste good in homemade mayo (been there, done that).
- If you’re REALLY feeling fancy, you can also use neutral-flavored oil like walnut oil, macadamia oil, bacon grease, or ghee (but not individually, nor all together). I haven’t tried many of these specifically, but they are options if you don’t have extra light olive oil on hand.
- I don’t use canola oil or vegetable oil because canola is chemically extracted using hexane. Cold-pressed canola oil exists, but it is usually very expensive and hard to find. It’s better to avoid, and just use different oils instead.
- I tried 50/50 extra virgin olive oil and avocado oil, which didn’t taste very good at all. Both have too strong of a flavor for homemade mayo.
- Extra light olive oil produced an amazing mayo that tasted better than any store-bought I’ve ever had, I stopped there. Feel free to branch out and experiment, and if you do, please leave a comment sharing with us what worked and what didn’t!
HOW TO MAKE MAYONNAISE
Step 1. In a wide-mouth jar, layer your ingredients as follows.
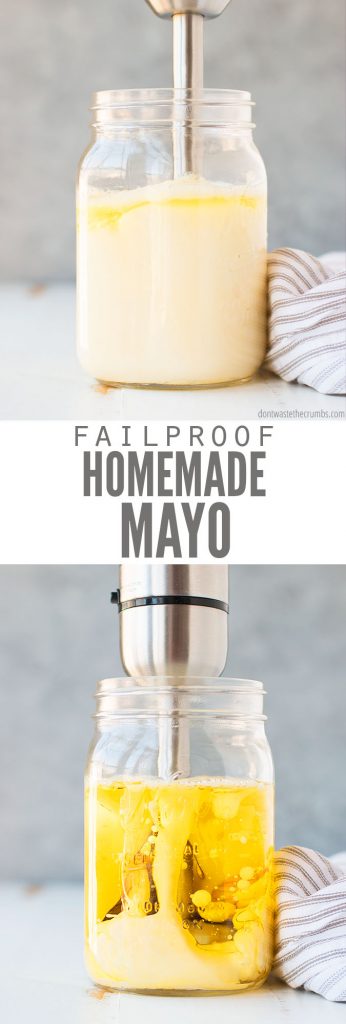
Step 2. Wait about one minute, or until the egg is at the bottom of the jar and the oil is sitting at the top of the jar.
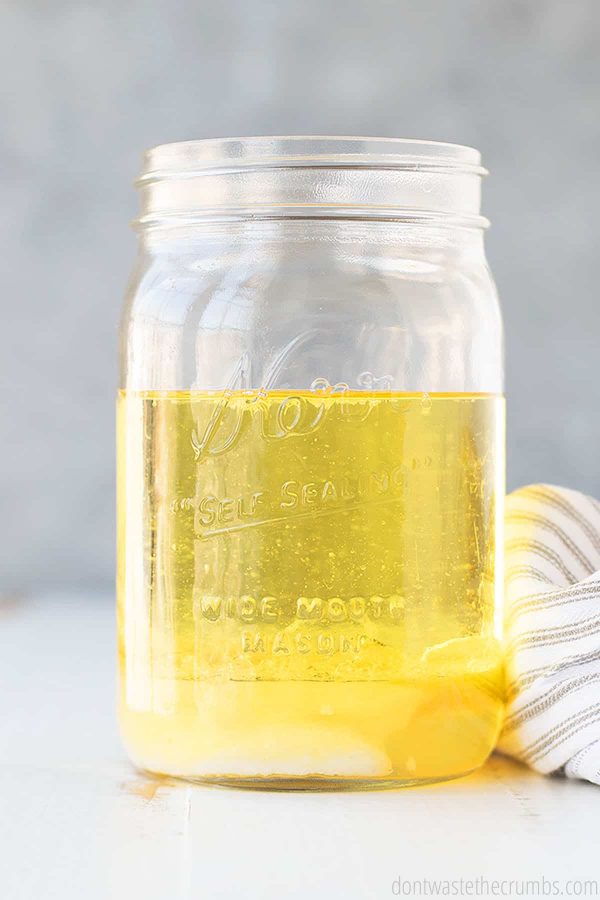
Step 3. Place the immersion blender in the jar, all the way to the bottom.
Step 4. With the immersion blender at the bottom of the jar, press the button to “go” and let it blend for 20 seconds, keeping the blender sitting at the bottom of the jar.
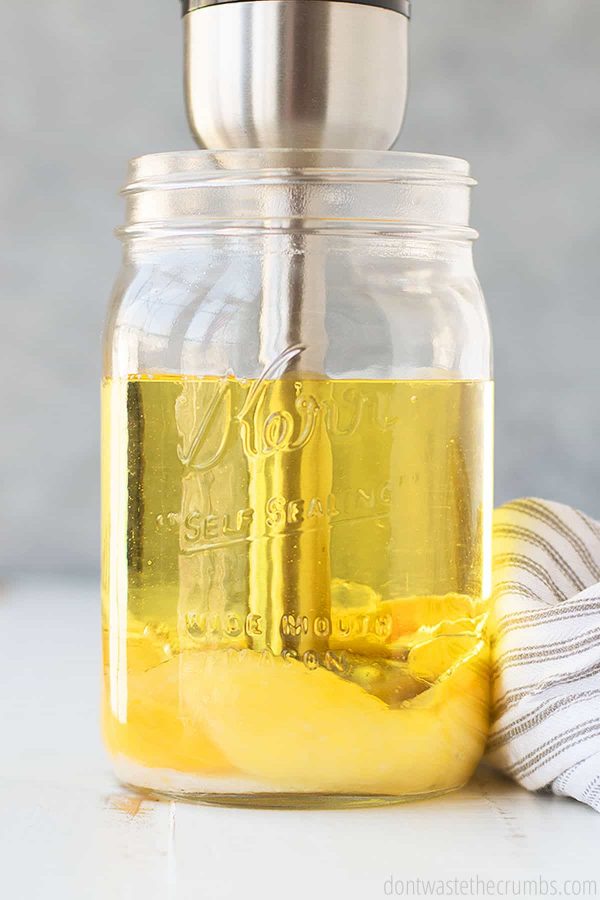
Step 5. After 5 seconds, you’ll have mayo at the bottom.
Step 6. At the 10-15 second mark, you’ll notice the mayo creeping to the top.
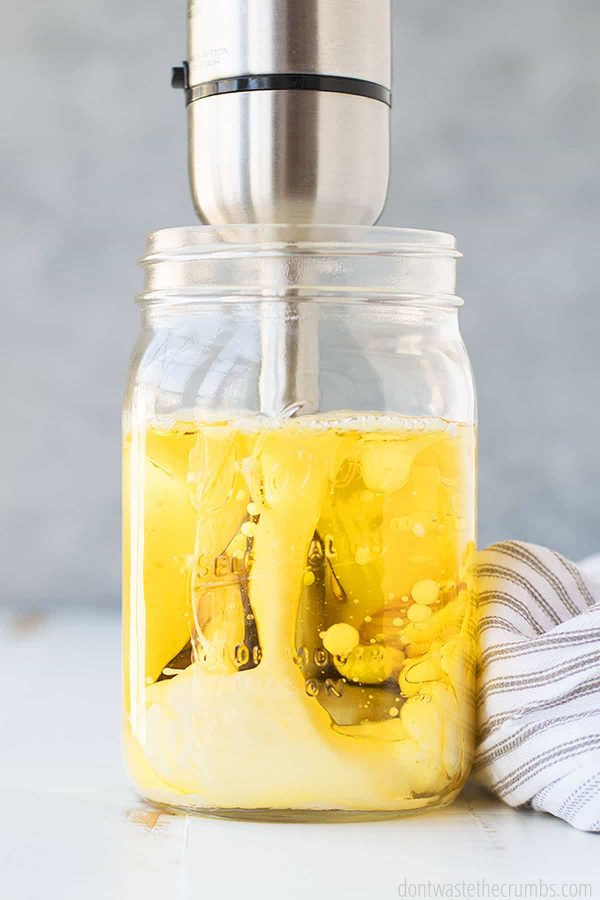
Step 7. In about 20 seconds, you’ll have mayo near the top of the ingredients with a very thin layer of oil right on top.
Step 8. Very slowly (and carefully), bring the immersion blender up the side of the jar while still blending. As you do this, the thin layer of oil on the top will slowly drizzle down the side of the jar and blend with the mayo underneath.
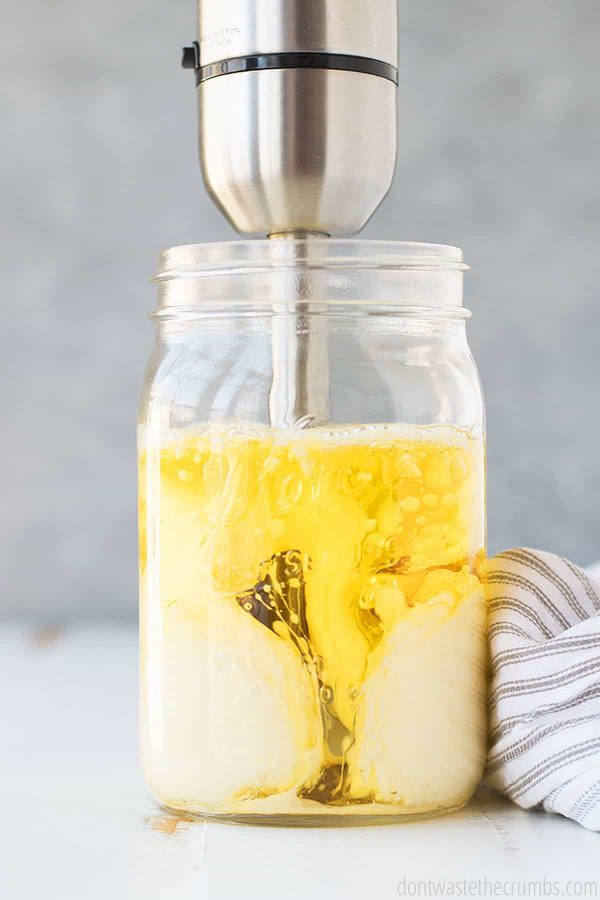
Step 9. Keep bringing your immersion blender almost to the top, stopping just short so you don’t splatter mayo everywhere. Your homemade mayo is done when all the ingredients are incorporated together!
Step 10. Taste your mayo and adjust your salt and/or lemon juice if desired.
HOMEMADE MAYONNAISE RECIPE TIPS
This homemade mayonnaise recipe is good in the fridge for about one week. However, by lacto-fermenting the mayo you can make it last for several months.
To do this, add 1 tablespoon of whey to the finished mayo and stir well. Allow the mayo to sit on the counter overnight, or for up to 24 hours. Afterward, put the mayo in the fridge and you’ve got mayo that will be good for 2 months or more!
For best results, use a jar that is just a bit wider than your immersion blender. That allows the blades of the immersion blender to be all the way immersed in the egg and lemon juice at the start of blending, helping the mixture come together.
I’ve never had this homemade mayo recipe break, but if yours isn’t coming together, try adding an additional egg yolk or a teaspoon of mustard (both act as emulsifiers and help keep everything mixed together) and whisking it back together.
HOW TO MAKE MAYO WITH A FOOD PROCESSOR
Using an immersion blender is the fastest way to make mayonnaise. But you can make it in a food processor too.
Follow these instructions to make mayo in a food processor:
- Place egg, salt, and lemon juice in the bowl of the food processor. Place the lid on top.
- Turn the food processor on high and slowly drizzle the oil in. This takes some time so hum a tune or march in place to keep busy!
- Once all the oil is added, turn off the food processor. Now you have a fresh batch of mayo ready to eat!
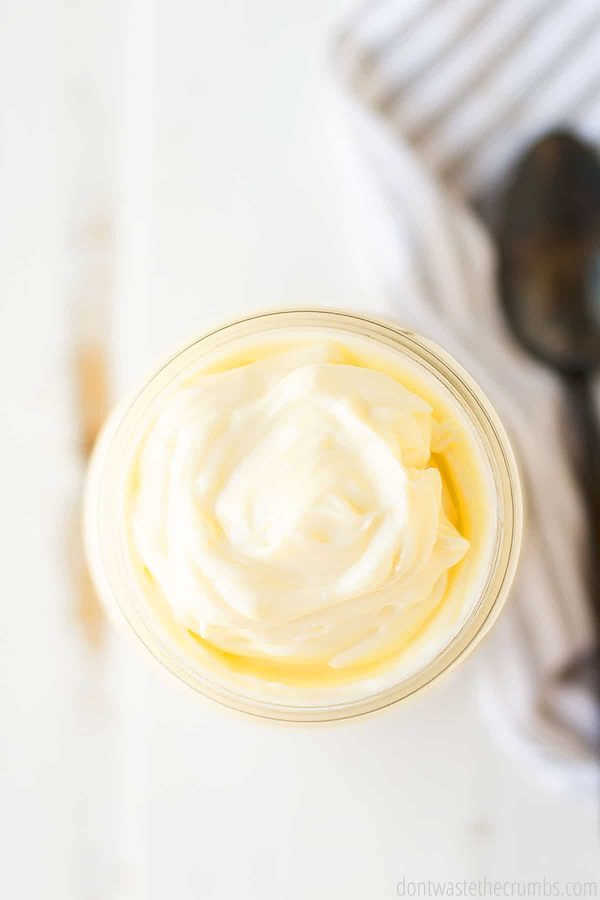
TO SERVE HOMEMADE MAYO
This is a basic homemade mayo recipe. It’s absolutely stunning and delicious and has the perfect balance of tangy and creamy. But some people prefer their mayo to be a bit fancier. If that’s you, consider the following additions to your homemade mayo (add these just after the egg):
- Pinch of white or black pepper
- Dry mustard OR prepared Dijon mustard (in any flavor you’d like)
- Using vinegar (apple cider vinegar, white wine, white balsamic, etc.) instead of lemon juice, or using lime juice too
- Sweetener (honey, sugar, maple syrup, etc.)
- Garlic
- Horseradish
- Sriracha
- Fresh herbs
- Paprika
- Garlic powder
- Crushed red pepper
Start with just a bit of your added ingredient of choice, and taste after blending. You can always add more, but you can’t take the ingredient out!
WAYS TO USE YOUR HOMEMADE MAYONNAISE
Now that you’ve made a batch of mayo, what are you going to do with it?
- My favorite is to just use it as a sandwich spread. There’s nothing like a classic sandwich with Homemade Lunch Meat and mayo on a couple of slices of Homemade Sandwich Bread.
- Use the mayo to make dressing or dip, like this Ranch Dressing or Caesar dressing.
- Make Broccoli Salad or Creamy Coleslaw for a delicious side dish.
- Enjoy these yummy Spicy Salmon Tacos with Slaw for this week’s taco night!
- Make a batch of perfect hard-boiled eggs and mix with mayo and mustard for a quick and easy egg salad or add to chicken salad.
MAYO RECIPE FAQS
What is mayonnaise made of?
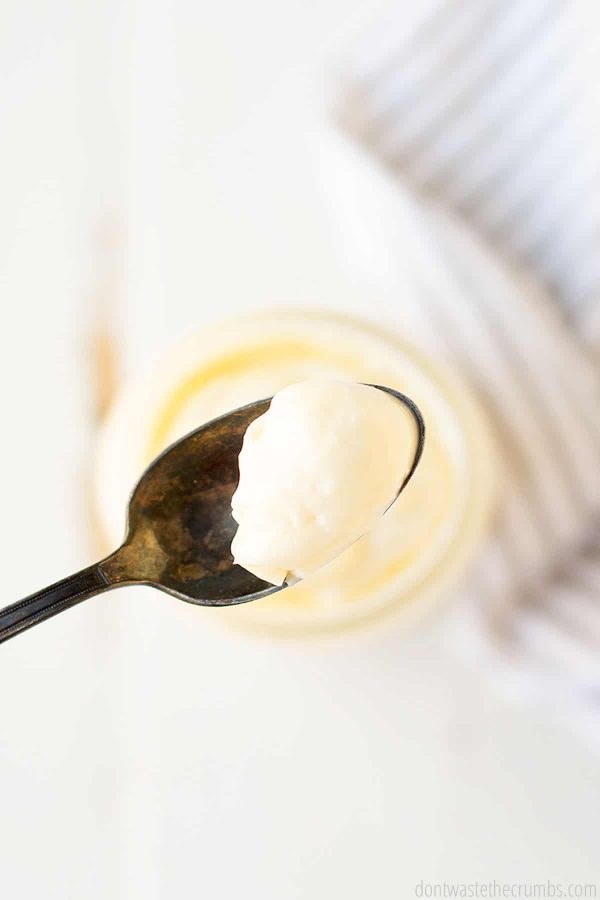
This homemade mayo recipe has just 4 basic ingredients: lemon juice, salt, egg, and extra light olive oil.
What oil is best for mayonnaise?
Extra light olive oil is best for this mayonnaise recipe.
Do you need room temperature eggs for making mayo?
In my experience, no. An egg fresh from the fridge works just as well as a room temperature egg.
How long does homemade mayo last?
This recipe for mayonnaise is good in the fridge for about one week. However, by lacto-fermenting the mayo, you can make it last for several months! (See the recipe tips above for how to lacto-ferment the mayo.)
Is it cheaper to make your own mayonnaise?
Yes, it’s more budget-friendly to make your own mayo. Plus, you’ll have ingredients on hand to make other delicious foods, like The Best Scrambled Eggs, Mediterranean Grilled Cheese, or Caesar Salad Dressing!
MORE HOMEMADE CONDIMENTS
- Caesar Salad Dressing
- Homemade Ranch Dressing
- Easy Homemade Pizza Sauce Recipe
- Easy Homemade Salsa
- 15 Minute Homemade Hot Sauce
- How to Make Nut Butter
Fight Inflation Workshop!
Sign up for my FREE Fight Inflation Workshop and learn simple strategies to save money, even with rising food costs!WATCH HOW TO MAKE FAIL PROOF HOMEMADE MAYO
Homemade Mayo
This creamy homemade mayo recipe is even better than store-bought, and with just 4 ingredients, you’ll be able to whip up a batch of mayonnaise in less than 5 minutes following this fail-proof recipe! Perfect on a sandwich with my Homemade Lunch Meat and Homemade Sandwich Bread!
- Prep Time: 5 minutes
- Total Time: 5 minutes
- Yield: 1 Jar 1x
- Category: Sauces/Condiments
- Method: Blended
- Cuisine: American
Ingredients
- 1 large lemon, juiced (or 2 tbsp lemon juice)
- 1 tsp kosher salt (or ½ tsp table salt)
- 1 whole egg
- 1 cup extra light olive oil
- flavors/seasonings (optional, see below)
- 1 Tbsp whey (optional, see below)
- immersion blender
Instructions
- In a wide-mouth jar, layer your ingredients as follows. First, lemon juice. Second, salt. Third, egg. Finally, extra light olive oil.
- Wait about one minute, or until the egg is at the bottom of the jar and the oils are sitting at the top of the jar.
- Place the immersion blender in the jar, all the way to the bottom.
- With the immersion blender at the bottom of the jar, press the button to “go” and let it blend for 20 seconds while sitting at the bottom of the jar.
- After 5 seconds, you’ll have mayo at the bottom.
- At the 10-15 second mark, you’ll notice the mayo creeping to the top.
- At about 20 seconds, you’ll have mayo near the top of the ingredients with a very thin layer of oil right on top.
- Very slowly (and carefully), bring the immersion blend up the side of the jar while still blending. As you do this, the thin layer of oil on the top will slowly drizzle down the side of the jar and blend with the mayo underneath.
- Keep bringing your immersion blender almost to the top, stopping just short so you don’t splatter mayo everywhere. Your mayo is done when all the ingredients are incorporated together!
- Taste your mayo and adjust your salt and/or lemon juice if desired.
Notes
- If you are using whey, finish the recipe as directed, then add whey and stir in well. Let sit on the counter at room temperature for 24 hours. Then refrigerate.
Nutrition
- Calories: 603





I have attempted making mayo in the past and failed. I’m excited to give this recipe a try. Does it make a difference if the egg is at room temperature vs. being just out of the fridge?
Good question Jamie! It does not. Either way the egg will emulsify the oil.
Can you use Avocado oil instead and leave out the whey? I’m not supposed to have anything fermentation or olive amongst other things due to food allergies 🙄.
Hi Jenny!
Yes, you can use avo oil, and leave out the whey. Hope this helps! Let us know how it turns out. 🙂
This has been the easiest recipe I’ve ever tried and made successfully the FIRST TRY! The mayo tasted great too!. After making it (and it turning out perfectly by the way), I took a portion of it and added dried mustard so I could have both mayo and mustard on my sandwiches. Great recipe and instructions!
Awesome Gaye! Thanks so much for sharing. Dried mustard sounds delicious!
I don’t have whey but I do have cultured coconut probiotic. Would this act in the same way, I think it would but am not sure? Here’s a link if you don’t know what I’m talking about – https://theculturedcoconut.com/ Thank you.
Hi Michelle, We haven’t tried it but it’s worth a try. Just give it a good sniff test before eating. And let us know how it goes by reporting back! 🙂
Hi, I have tried this recipe but it went hard in the fridge rather than having a normal runny consistency. Any ideas where I went wrong? I am also going to try the whey option to make it last longer. I have Isopure Whey Isolate. Will this work? Ive added a link below.
https://uk.bodybuilding.com/store/isopure/whey-protein-isolate-powder.html?skuId=NB2760012&gclid=Cj0KCQjw9_mDBhCGARIsAN3PaFM5Q-14XZ2OWaylfK2BCZlSzQecwtPnW9LWRVN0RhQHNZqb7kDYyMkaAqyHEALw_wcB
Many thanks for this
Hi Jo,
Whey protein isolate is NOT the same as whey. Would not recommend. Mayo will firm up in the fridge, for no one single cause. You can try putting it back in the blender or using an immersion blender on it. Every batch I’ve made firms up (but shouldn’t be rock hard – just more like pudding.) Best of luck!
Is there a substitute I can use for the whey? I am very dairy intolerant. Thank you. I love your recipes!
Hi Carolyn, There isn’t a good sub for Whey that will keep the mayo longer. You’ll want to make the batch as written (about 1 cup mayo), halve the recipe, or make sure to use it up in about 7-10 days.
Great idea! Thanks Hansley.
5 stars for ease, flavor, and the explanation of how and why the recipe works! 3rd time I made it, it did not “set up”, but had the consistency of salad dressing, lovely, dressing though. I used half the lemon juice and avocado but used a whole egg. Was that the culprit??? (Great recipe, like a blank canvas for your favorite flavors! I added 1 and a half tsp of Coriander Chutney, a tsp of garlic, tsp of onion powder, tsp of honey, half tsp salt.) Thank You
Hi Marita! That is most likely the case 🙂
I have tried a number of mayo recipes and this is the first one that my family liked. It’s so easy and so yummy. Thanks!
You’re most welcome Catherine!
I would love to try this recipe, and make it last longer than a week in the fridge, but can you suggest an alternative to lacto-fermenting? I have a cow dairy intolerance so I don’t have any whey on hand.
I have not heard or found in my research another way to make the mayo last longer. Yogurt whey or lacto-fermenting are the only options I can find.
If you can consume goat dairy, then I would suggest buying Redwood Hill Farm yogurt for extracting whey. I’m allergic to cow dairy, but I can eat goat dairy. I buy this at the local Kroger grocery store.
Thanks for the tip Rachel!
Duh!!! Why have I never thought of using my stick blender for mayo. I used to make mayo decades ago, but it was hit of miss. If one is too impatient in dripping the oil in sloooowwwly the old way, one ends up with dressing instead of mayo. By no means is a ‘bad’ batch of mayo a waste…it’s just a base for a variety of salad dressings! And for the nervous Nellies concerning salmonella and pastured eggs…the salmonella is on the shell, NOT in the egg! Just thoroughly wash the egg, and you’re good to go. Thank you so much for this and the many other recipes I have gleaned from your site.
I am delighted to hear this recipe works so well for you!!
I am 60, have been cooking my entire life (from scratch), but for whatever reason, homemade mayonnainse has always been my achiles heel. Relentless failure no matter what I tried. I have used a blender, a cuisinart, a whisk, room temperature eggs, an extra egg yolk, and on and on. I tried your method today and it was, literally, a miracle. In exactly the amount of seconds you said, there was my perfectly made mayo. I would hug you if I could. Thank you!
Ecstatic to hear this, Suzy!!
Thank you this recipe worked very well. I added some mild masala spice and the lemrecipeon pulp too for extra tang. A really great recipe!
Delfina, so excited to hear about your adjustments and that this recipe worked well for you!
This is fantastic. It never occurred to me to make mayo until now when I’m doing Whole30 and the compliant mayo at the store was $9!!! This worked great for me, and I love that I can store it in the jar that I made it in. No scraping. I did find it a bit salty, so I used less salt on subsequent batches. Thanks for sharing (and for your Whole30 meal plan!)
So delighted that you loved this recipe, Ginger!
Hello is there any way to avoid the mayo hardening in the fridge?
Hi Gail! If you’re using extra light olive oil, it won’t harden in the fridge.
How long does the Mayo last in the fridge?
Hi Tara,
As is, homemade mayo is good in the fridge for about one week. However, by lacto-fermenting the mayo you can make it last for several months.
To do this, add 1 tablespoon of whey to the finished mayo and stir well. Allow mayo to sit on the counter overnight, or up to 24 hours. Put the mayo in the fridge and you’ve got mayo that will be good for 2 months or more!
I forgot to leave it out on the counter will it still last?
Hi Catherine! If you put it directly into the fridge it will last about 7-10 days at most. It needs the time on the counter to lactoferment. We suggest making a big batch of our ranch dressing for a salad https://dontwastethecrumbs.com/dairy-free-homemade-ranch-dressing/ or our cilantro lime coleslaw https://dontwastethecrumbs.com/cilantro-lime-coleslaw/.
this turned out awesome from the first try! the first time I ever made mayo in my life and it worked! thank you for the amazing recipe!
You’re most welcome!
really great recipe
although i used 1 tbsp vinegar instead of lemon juice
and a normal smoothie blender worked just fine
Thank you so much for this recipe, it gave me exactly what I wanted
I am so happy this recipe was what you were looking for, Vanessa!
I was wondering if you have suggestions if you do not have an immersion blender. What else would work? Also, have you tried it with just avocado oil (I saw the mix of olive oil and avocado oils didn’t work well)?
All I use is Avocado Oil and a little Dijon Mustard. Love the Flavor.
I’m so happy to learn that by using whey I can expect mayo to last longer! Thanks for the tip! I’ve just gotten some plain whey and looking forward to trying it out. 💕
I’ve been making this recipe for almost 5 years now and it’s so fast and easy to make. Thanks for sharing this recipe. I was grocery shopping for a friend who needed mayo and realized I haven’t had to buy mayo for all these years! It’s a good feeling knowing you don’t have to rely on a store and can make your own. Thank you for a keeper recipe.
Planning to try this. I use sea salt how does that go as far as measuring?
Is it fine grain salt?
SUPER EASY!!! and delicious!
Worked perfectly, and took seconds to blend. Beautiful thick Mayo. I used 1 T Ume Plum vinegar and 1 T Lime juice instead of the 2 T lemon juice. My TCM doctor says Ume Plum Vinegar is very healthy for me, and I love it. Reduce the salt by 1/2 if you trade to Ume vinegar, it is very salty. I am very impressed.
So glad this worked for you, Carol!