
This creamy homemade mayo recipe is even better than store-bought, and with just 4 ingredients, you’ll be able to whip up a batch of mayonnaise in less than 5 minutes following this fail-proof recipe! Perfect on a sandwich with my Homemade Lunch Meat and Homemade Sandwich Bread!

Over the years I have learned how to make several condiments from scratch, but something about homemade mayo has always daunted me.
Maybe it was the raw egg. Or maybe it was my worry about the mayo not mixing properly. I mean, it had to be difficult to make this creamy, tangy sandwich spread turn out correctly, right?
As it turns out, all those myths about how hard it is to make homemade mayonnaise were wrong! With one amazingly simple recipe (and a couple of tricks), you’ll have delicious homemade mayo ready in less than 2 minutes!
HOMEMADE MAYO RECIPE
Not only does homemade mayo taste way better than store-bought, but it’s also:
- Quick. Make it in a total time of 5 minutes!!!
- Easy. It’s so easy that after you make it, you will wonder why you haven’t been all along.
- Frugal. With only a handful of pantry ingredients, homemade mayo is much cheaper than store bought.
I’m going to show you how to make mayonnaise at home!

HOMEMADE MAYO INGREDIENTS
- Lemon
- Kosher salt
- Egg
- Extra light olive oil
- Flavors/seasonings (optional)
- Whey (optional)

You need an Immersion blender for this homemade mayo recipe.
You need EXTRA LIGHT olive oil. Extra light virgin olive oil is absolutely delicious in dressings, or with freshly baked artisan bread, but it does NOT taste good in homemade mayo (been there, done that).
- If you’re REALLY feeling fancy, you can also use neutral-flavored oil like walnut oil, macadamia oil, bacon grease, or ghee (but not individually, nor all together). I haven’t tried many of these specifically, but they are options if you don’t have extra light olive oil on hand.
- I don’t use canola oil or vegetable oil because canola is chemically extracted using hexane. Cold-pressed canola oil exists, but it is usually very expensive and hard to find. It’s better to avoid, and just use different oils instead.
- I tried 50/50 extra virgin olive oil and avocado oil, which didn’t taste very good at all. Both have too strong of a flavor for homemade mayo.
- Extra light olive oil produced an amazing mayo that tasted better than any store-bought I’ve ever had, I stopped there. Feel free to branch out and experiment, and if you do, please leave a comment sharing with us what worked and what didn’t!
HOW TO MAKE MAYONNAISE
Step 1. In a wide-mouth jar, layer your ingredients as follows.
Step 2. Wait about one minute, or until the egg is at the bottom of the jar and the oil is sitting at the top of the jar.

Step 3. Place the immersion blender in the jar, all the way to the bottom.
Step 4. With the immersion blender at the bottom of the jar, press the button to “go” and let it blend for 20 seconds, keeping the blender sitting at the bottom of the jar.

Step 5. After 5 seconds, you’ll have mayo at the bottom.
Step 6. At the 10-15 second mark, you’ll notice the mayo creeping to the top.

Step 7. In about 20 seconds, you’ll have mayo near the top of the ingredients with a very thin layer of oil right on top.
Step 8. Very slowly (and carefully), bring the immersion blender up the side of the jar while still blending. As you do this, the thin layer of oil on the top will slowly drizzle down the side of the jar and blend with the mayo underneath.

Step 9. Keep bringing your immersion blender almost to the top, stopping just short so you don’t splatter mayo everywhere. Your homemade mayo is done when all the ingredients are incorporated together!
Step 10. Taste your mayo and adjust your salt and/or lemon juice if desired.
HOMEMADE MAYONNAISE RECIPE TIPS
This homemade mayonnaise recipe is good in the fridge for about one week. However, by lacto-fermenting the mayo you can make it last for several months.
To do this, add 1 tablespoon of whey to the finished mayo and stir well. Allow the mayo to sit on the counter overnight, or for up to 24 hours. Afterward, put the mayo in the fridge and you’ve got mayo that will be good for 2 months or more!
For best results, use a jar that is just a bit wider than your immersion blender. That allows the blades of the immersion blender to be all the way immersed in the egg and lemon juice at the start of blending, helping the mixture come together.
I’ve never had this homemade mayo recipe break, but if yours isn’t coming together, try adding an additional egg yolk or a teaspoon of mustard (both act as emulsifiers and help keep everything mixed together) and whisking it back together.
HOW TO MAKE MAYO WITH A FOOD PROCESSOR
Using an immersion blender is the fastest way to make mayonnaise. But you can make it in a food processor too.
Follow these instructions to make mayo in a food processor:
- Place egg, salt, and lemon juice in the bowl of the food processor. Place the lid on top.
- Turn the food processor on high and slowly drizzle the oil in. This takes some time so hum a tune or march in place to keep busy!
- Once all the oil is added, turn off the food processor. Now you have a fresh batch of mayo ready to eat!

TO SERVE HOMEMADE MAYO
This is a basic homemade mayo recipe. It’s absolutely stunning and delicious and has the perfect balance of tangy and creamy. But some people prefer their mayo to be a bit fancier. If that’s you, consider the following additions to your homemade mayo (add these just after the egg):
- Pinch of white or black pepper
- Dry mustard OR prepared Dijon mustard (in any flavor you’d like)
- Using vinegar (apple cider vinegar, white wine, white balsamic, etc.) instead of lemon juice, or using lime juice too
- Sweetener (honey, sugar, maple syrup, etc.)
- Garlic
- Horseradish
- Sriracha
- Fresh herbs
- Paprika
- Garlic powder
- Crushed red pepper
Start with just a bit of your added ingredient of choice, and taste after blending. You can always add more, but you can’t take the ingredient out!
WAYS TO USE YOUR HOMEMADE MAYONNAISE
Now that you’ve made a batch of mayo, what are you going to do with it?
- My favorite is to just use it as a sandwich spread. There’s nothing like a classic sandwich with Homemade Lunch Meat and mayo on a couple of slices of Homemade Sandwich Bread.
- Use the mayo to make dressing or dip, like this Ranch Dressing or Caesar dressing.
- Make Broccoli Salad or Creamy Coleslaw for a delicious side dish.
- Enjoy these yummy Spicy Salmon Tacos with Slaw for this week’s taco night!
- Make a batch of perfect hard-boiled eggs and mix with mayo and mustard for a quick and easy egg salad or add to chicken salad.

MAYO RECIPE FAQS
What is mayonnaise made of?
This homemade mayo recipe has just 4 basic ingredients: lemon juice, salt, egg, and extra light olive oil.
What oil is best for mayonnaise?
Extra light olive oil is best for this mayonnaise recipe.
Do you need room temperature eggs for making mayo?
In my experience, no. An egg fresh from the fridge works just as well as a room temperature egg.
How long does homemade mayo last?
This recipe for mayonnaise is good in the fridge for about one week. However, by lacto-fermenting the mayo, you can make it last for several months! (See the recipe tips above for how to lacto-ferment the mayo.)
Is it cheaper to make your own mayonnaise?
Yes, it’s more budget-friendly to make your own mayo. Plus, you’ll have ingredients on hand to make other delicious foods, like The Best Scrambled Eggs, Mediterranean Grilled Cheese, or Caesar Salad Dressing!
MORE HOMEMADE CONDIMENTS
- Caesar Salad Dressing
- Homemade Ranch Dressing
- Easy Homemade Pizza Sauce Recipe
- Easy Homemade Salsa
- 15 Minute Homemade Hot Sauce
- How to Make Nut Butter
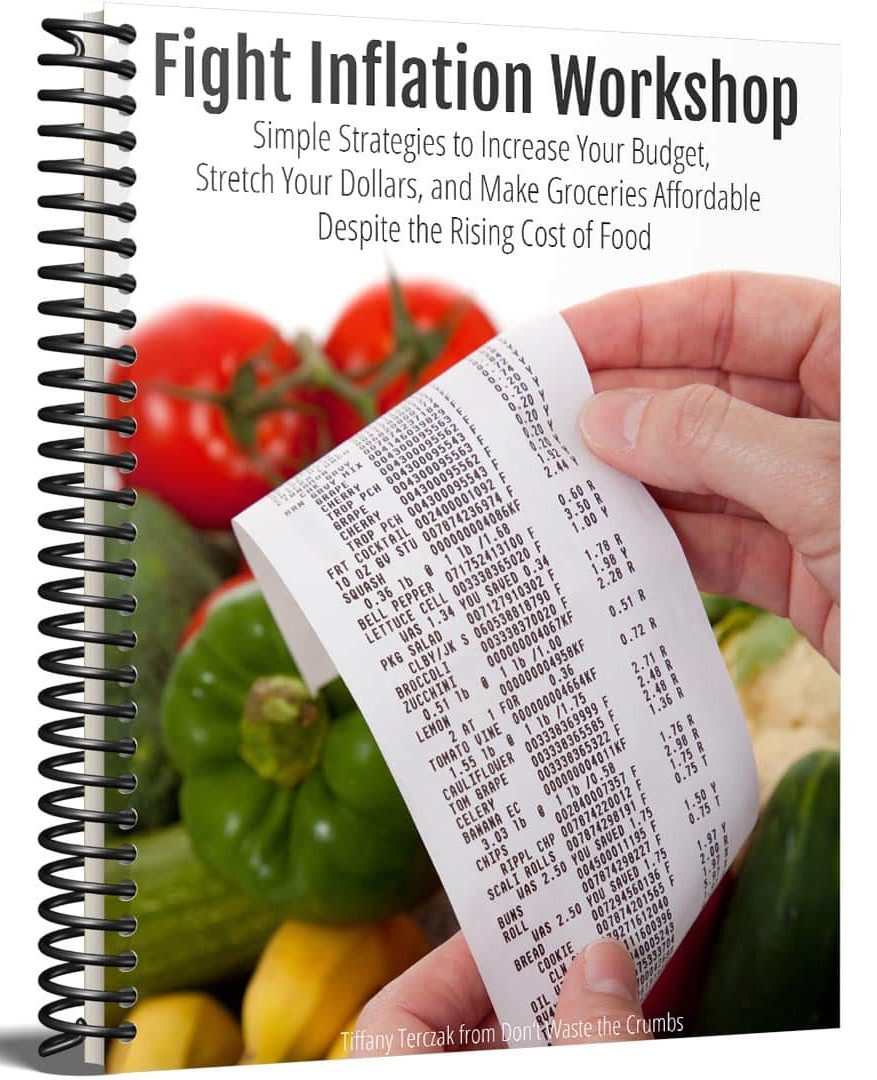
Fight Inflation Workshop!
Sign up for my FREE Fight Inflation Workshop and learn simple strategies to save money, even with rising food costs!WATCH HOW TO MAKE FAIL PROOF HOMEMADE MAYO
Homemade Mayo

This creamy homemade mayo recipe is even better than store-bought, and with just 4 ingredients, you’ll be able to whip up a batch of mayonnaise in less than 5 minutes following this fail-proof recipe! Perfect on a sandwich with my Homemade Lunch Meat and Homemade Sandwich Bread!
- Prep Time: 5 minutes
- Total Time: 5 minutes
- Yield: 1 Jar 1x
- Category: Sauces/Condiments
- Method: Blended
- Cuisine: American
Ingredients
- 1 large lemon, juiced (or 2 tbsp lemon juice)
- 1 tsp kosher salt (or ½ tsp table salt)
- 1 whole egg
- 1 cup extra light olive oil
- flavors/seasonings (optional, see below)
- 1 Tbsp whey (optional, see below)
- immersion blender
Instructions
- In a wide-mouth jar, layer your ingredients as follows. First, lemon juice. Second, salt. Third, egg. Finally, extra light olive oil.
- Wait about one minute, or until the egg is at the bottom of the jar and the oils are sitting at the top of the jar.
- Place the immersion blender in the jar, all the way to the bottom.
- With the immersion blender at the bottom of the jar, press the button to “go” and let it blend for 20 seconds while sitting at the bottom of the jar.
- After 5 seconds, you’ll have mayo at the bottom.
- At the 10-15 second mark, you’ll notice the mayo creeping to the top.
- At about 20 seconds, you’ll have mayo near the top of the ingredients with a very thin layer of oil right on top.
- Very slowly (and carefully), bring the immersion blend up the side of the jar while still blending. As you do this, the thin layer of oil on the top will slowly drizzle down the side of the jar and blend with the mayo underneath.
- Keep bringing your immersion blender almost to the top, stopping just short so you don’t splatter mayo everywhere. Your mayo is done when all the ingredients are incorporated together!
- Taste your mayo and adjust your salt and/or lemon juice if desired.
Notes
- If you are using whey, finish the recipe as directed, then add whey and stir in well. Let sit on the counter at room temperature for 24 hours. Then refrigerate.
Nutrition
- Calories: 603


I don’t have an emulsion blender, how can I mix to get right consistency? Also How can I fix runny recipe, I mixed all ingredients at same time.
Hi Arnita! I suggest reading the other comments – some have used a blender and some have fixed the consistency when they didn’t follow the recipe. 🙂
This is the mayo I grew up with…didn’t know you could buy at the grocery until I was in high school Mama woud make it in the mixer with an egg, lemon juice, 2 cups of oil, salt and white pepper. Then she dressed it with paprika. Now I use the above recipe with the immersion blender because it aways works.
This sounds great. I do have organic mayo, but, a little too salty and too expensive sorry to say. I need to cut down on sodium so I have to try this! Thank you so much.
You’re very welcome Rusti!
hi, tiffany
i made this recipe yesterday but mine came out runny. do you need to measure about 2 tbsp lemon juice from a fresh lemon or no? i followed exactly of the rest but my lemon was pretty large and I used all the juice that i was able to squeeze out which probably was more like 4 tbsp. i made this bc i wanted to make your ranch dressing which at the end worked out beautifully without having to add milk to thin it bc my mayo was already very thin. suggestions??
Hi Lisa! Yes, you need 2 Tbsp of lemon juice. Using more will likely make your mayo runny. I’m glad it worked out with the ranch dressing! It also might thicken being in the fridge too. Next time though, just measure out 2 Tbsp. 🙂
Will be using grape seed oil or sunflower oil for this (light olive oil is harder to find now!). Made ricotta last night -have lots and lots of whey (most is now frozen). Crossing my fingers!
I have an idea that may solve some unsuccessful problems. I live in AZ and the water is terribly hard. We have to add jet dry and a booster to our dishwasher so the dishes don’t spot severely. I’ve noticed if I use a clean bowl right out of the dishwasher, dairy product recipes I make are soupy. For instance, whipping cream or cream cheese dips. So I always rewash my mixing bowls by hand, with plain water to ensure the additives I put in the dishwasher are completely rinsed off the mixing bowls. It works! No more soupy hand made recipes!
I have made this recipe several times exactly as written (minus the whey). The mayo tastes good right after making it, but tastes like metal the next day—so bad that I’ve had to throw it out! The first time I blamed my immersion blender. It burned out so I wondered if that’s why it tasted bad. But got the same result with a new blender in both a glass jar and the plastic mixing cup that came with the new blender. Any thoughts on what I am doing wrong? The recipe notes that the mayo should last about a week; mine lasts less than 24 hrs before tasting bad. ☹️
That’s so strange Susan! I’ve never had that issue with the mayo. Could it be an ingredient that’s making the weird taste the next day?
Is going to work in a regular blender? I don’t have one like yours. I tried other recipes and it didn’t work.
It may or may not work Esther. I’ve only used an immersion blender so I personally can’t say for sure, but feel free to read the comments to see if someone else has tried it!
Woohooooooooo !!!! This worked so perfectly, thank you very much for the detailed recipe 🙂
I have stalked several “jar-blender” mayonnaise recipes for awhile but never tried one as I read too many comments (on other websites) where the recipe failed. Not wanting to waste costly, organic oil for failed mayo I just trudged on with the long, oil drizzle method in the food processor. And sometimes that translated into buying a jar of organic $$$ mayo instead of buckling down and making it at home.
I read your recipe about 8 times (lol, seriously!) then took the plunge. Easy, easy, fast, and easy! And so delicious.
I’ve made this recipe with raw egg and just threw in the ingredients and blended. Came out beautifully. Now I have a member of my household who has an autoimmune issue and can’t have raw eggs. I bought organic, pasteurized powdered eggs. Has anyone ever tried this recipe with powdered eggs? Thanks!
I just made the yummiest and creamiest Mayo now. I used Sunflower Oil and Lime as I don’t have lemon juice at home. What I will reduce for next batch is probably the salt. Apart from that this is the best ever. Way better than any store bought Mayo I have ever had.
Thank you
You’re so very welcome Taiwo!
I have a question about they whey and shelf life… I make milk kefir regularly for my family and wondered if I added kefir whey how long the shelf life would be. Also, the whey has already been made/fermented sitting out on my counter for 24 hours and because so, would I be able to add it to the mix and put it straight in the fridge or would it still need to sit out on the counter in the mayo mix?
I use whey from homemade strained yogurt but using whey from strained kefir should work just the same. I haven’t had a batch of mayo go bad yet and I’ve been making this recipe for years now. I let my mayo set out 4 hours to let the whey ferment the mixture but if you refrigerate it right away I would think the mixture would still last awhile from the whey being in it.
Great recipe, thanks! I will just say ‘don’t’ use cold pressed flax seed oil, the mayo will taste dreadful!
I have been making this mayo for years now and only had one time where it didn’t get thick. This was a couple weeks ago when I forgot to add the salt and the mixture turned out thin. I tried stirring in the salt but it didn’t help much. I ended up using this mayo for salad dressing. I think the salt interacts with the acid somehow so don’t leave the salt out or it might fail for you. This is the easiest, quickest mayo recipe. I highly recommend it.
Thanks so much Janette for your rave review!
Wow, its so amazing and simple, im using palm oil, and im adding stevia for the sweet taste… but little bit salty, im using regular salt, next time maybe i will add only a pinch of salt…
Thanks for this amazing recipe, from Aceh, Indonesia
If apple cider vinegar with the mother is used would that help to preserve it?
I would think so since it has the beneficial bacteria in it.
ACV is considered an acid like lemon juice, and will help keep it for a week or so, but you need whey to ferment it, if you want to keep it for a few months.
I think the acv with the mother has the beneficial bacteria like whey has for fermenting. Here is a link with info on it. https://nourishingourchildren.org/2015/11/17/fermented-garlic/
i’m lactose intolerant so will have to forego the whey. How long would the mayo last in the fridge without the lacto-fermentation?
It should last about a week or so Susan. Use the smell test to gauge!
Several people have commented that they are lactose intolerant, and as such are concerned about using the whey. I’m also lactose intolerant. If I drink 3 or 4 ounces, I get the usual symptoms.
But let’s think about the scale here. The entire recipe is approximately 23 tablespoons, including the 1 tablespoon of whey.
So in a 1 tablespoon serving of mayo, you’d be getting about 1/23 of one tablespoon of whey. Let’s assume a 1-ounce serving of milk is enough to produce symptoms in some very sensitive lactose intolerant individuals. In this 1-ounce serving of milk (or whey) there are about 1.5 grams of lactose.
In the 1 Tbs serving of mayo, there will be approximately 0.033 grams of lactose, even assuming 100% of the lactose from the source milk remains in the whey.
This is the equivalent of ingesting a couple of drops of milk.
Whey on!
This recipe is a 5-star, with or without the whey.
I love this break-down, Dadd-O – thank you so much for sharing!
The absolute best recipe! I love that it comes out nice and thick! My daughter can’t tell the difference between this and store bought! I made it exactly to the recipe the first time. I was so happy. This morning I had to make a quick batch for lunch sandwiches and I only had fresh limes and the only light oil was avocado oil. I added a tsp of some yummy Chardonnay Mustard and a pinch of sugar.
I WILL NOT BUY STORE BOUGHT AGAIN! Next time I will add the whey! Thanks for helping with posting this!
You’re so very welcome Rhonda! Thank you for sharing your wonderful experience! (and your chardonnay mustard sounds YUMMY!)
THANK YOU! For sharing this super easy way of making mayo. Just made some and it turned out great. I’ve always had trouble before and dreaded using the stand up blender. Using the stick blender in the mason jar is BRILLIANT!
Love It =)
You’re so very welcome Andrea!!
Nutrition stats on mayo?
Feel free to use an online nutrition calculator Brian!