
Buttery, flaky, warm fresh out of the oven…homemade biscuits from scratch are the best addition to ANY meal! With only 5 simple ingredients you already have on hand, this biscuit recipe is easy to make, adaptable for extra flavors, and made with no sugar!

Do you ever take a bite of something and do the little “I’ve died and gone to heaven” eye-roll thing? Yeah. That’s what my husband does every time he has these buttery biscuits!
Besides being easy (and delicious – did I mention that already?), they’re REAL quick to pull together. Even more so if you have a KitchenAid, but if you don’t, it’s only a five-minute job at the most.
Below is the plain-jane version of our easy biscuit recipe, but that doesn’t make them any less of a star at the table. There’s nothing like warm flaky biscuits slathered with butter.
Plus, since this biscuit recipe is basic, you can easily spruce them up to fit the meal you’re having. A sprinkling of Italian herbs or grated Parmesan cheese will pair with Homemade Spaghetti or Tomato Basil Soup.
And believe it or not, they can even be transformed into a dessert biscuit with a simple sprinkle of cinnamon and sugar and topped with strawberries!
Did I just say herbed dinner biscuit AND strawberry shortcake? With the same recipe? Without any additional work? Without any more dishes?!
Sold.

Homemade Biscuit Recipe Ingredients
- Flour. Any kind will do. I like all-purpose flour for this recipe.
- Baking powder. This is what makes your biscuits rise. It’s very hard to make biscuits without baking powder!
- Salt. Just for a touch of flavor.
- Cold unsalted butter. Make sure your butter is cold. This is what makes it flaky!
- Milk. Whole milk, low-fat, or nondairy milk will work!
How to Make Easy Homemade Biscuits from Scratch
Step 1: Preheat oven to 450F. Prepare a baking sheet with parchment paper if desired.
Step 2: Combine the flour, baking powder, and salt in a large bowl.

Step 3: Cut in the butter with a pastry blender or your hands, taking care not to melt the butter or create a paste. The mixture should resemble coarse breadcrumbs.

Step 4: Add ½ cup of milk and combine until the flour is moistened. Knead the dough into a ball, pressing against the sides of the bowl to pick up any small pieces of dough. If additional milk is needed, add just 2 Tbsp at a time, kneading thoroughly after each addition. Note: The dough should not be wet enough to stick to your hands or the bowl. It should be dry enough to handle easily, and when you’re done kneading, the bowl should be fairly clean.

Step 5a: For drop biscuits: Pull off a golf ball-sized portion and form it into a ball. Press down slightly and place the biscuits on a prepared baking sheet, 1″ apart.

Step 5 b: For rolled biscuits: Roll out the dough into a rectangle, approximately ½ inch thick. Cut into equal pieces and place on a prepared baking sheet, 1″ apart.
Step 6: Bake for 8 minutes. Rotate the pan at 180 degrees and bake for another two minutes, if needed. The biscuits should be light golden brown on the bottom, and barely browning on top. Serve with melted butter in the middle!

Tips for Making Biscuits
- Use COLD butter. The cold butter and cold milk will make the biscuits fluffy and flaky. You can cut the butter with a pastry cutter, a knife, or a box grater. The stand mixer is also AMAZING for this (along with these 45+ uses!). But if you are mixing by hand, cut butter with a knife before adding, or use a box grater to sliver it up.
- Don’t overwork the dough. Avoid warming up the butter by keeping your hands off the dough! Knead only until the ingredients come together. Then fold the dough over twice to create the flaky layers.
- Add flour to your work surface. The dough will be sticky and in order to flatten it out, you will want a lightly floured counter or Silpat mat. (This DIY Flour Shaker is a game-changer!)
- Cut biscuits with a mason jar ring. There’s no need to have extra items in your kitchen like a biscuit cutter. A mason jar ring works perfectly!
Biscuit Recipe Variations
2-Minute Breakfast Biscuit
Combine the flour, baking powder, salt, and butter in a stand mixer with the paddle blade (not the dough hook). Carefully turn it on low, avoiding the spilling of flour. Once you’re sure the flour won’t spill, turn it on one step higher and allow the paddle to cut in the butter with the flour. Proceed with step 5 above as noted.
Buttermilk Biscuit
Reduce the baking powder to 2 tsp and add ½ tsp baking soda. Substitute real buttermilk (or any one of these 10 variations) for the milk.

Shortcake Biscuit
Add 1 Tbsp sugar to the flour and roll out to ¾″ thick. Cut into desired squares or rounds before baking. Allow to cool and split horizontally before filling.
Drop Biscuit
Instead of rolling out the dough and cutting biscuits, pull off a golf ball-sized portion and form into a ball. Press down slightly and place the biscuits on a large cookie sheet, 1″ apart. Cook as directed.

Garlic and Herb Biscuit
Add 1 tsp of dried herbs and 1 tsp of minced garlic to the biscuit dough. Roll out or drop biscuits and cook as directed.
Questions about Homemade Biscuits
What to do with leftover biscuits?
If you have them, store leftovers in an airtight container. They are good for 2-3 days if left on the counter and 1 week if refrigerated. Leftover biscuits are delicious warmed up the next day, turned into breakfast sandwiches, or made into an excellent PB&J.
Can I freeze biscuits?
Yes! Make biscuits as directed. Allow to cool and then place in a reusable freezer-safe bag or a freezer-safe Ziplock. This tutorial has many ways to freeze baked goods.
Can I make ahead biscuits for camping?
Yes! Combine the dry ingredients and butter as directed. Add 2 Tbsp of powdered milk and store in a Ziploc bag. The flour mixture will need to be kept cold in a cooler.
When you’re traveling or camping, preheat the griddle to 350F. Pour the flour mixture into a bowl (or appropriate container) and add ½ cup water. Knead thoroughly. Be very cautious about adding additional water, if you do not have access to additional flour.
Place on a griddle and cook for 4-6 minutes, until the bottom is light to medium brown. Flip and continue to cook until both sides are light to medium brown.
Is a biscuit a type of bread?
It is in my book! It’s made with flour and an element to make it rise. It can be served as a side dish or made into sandwiches!
More Bread Recipes
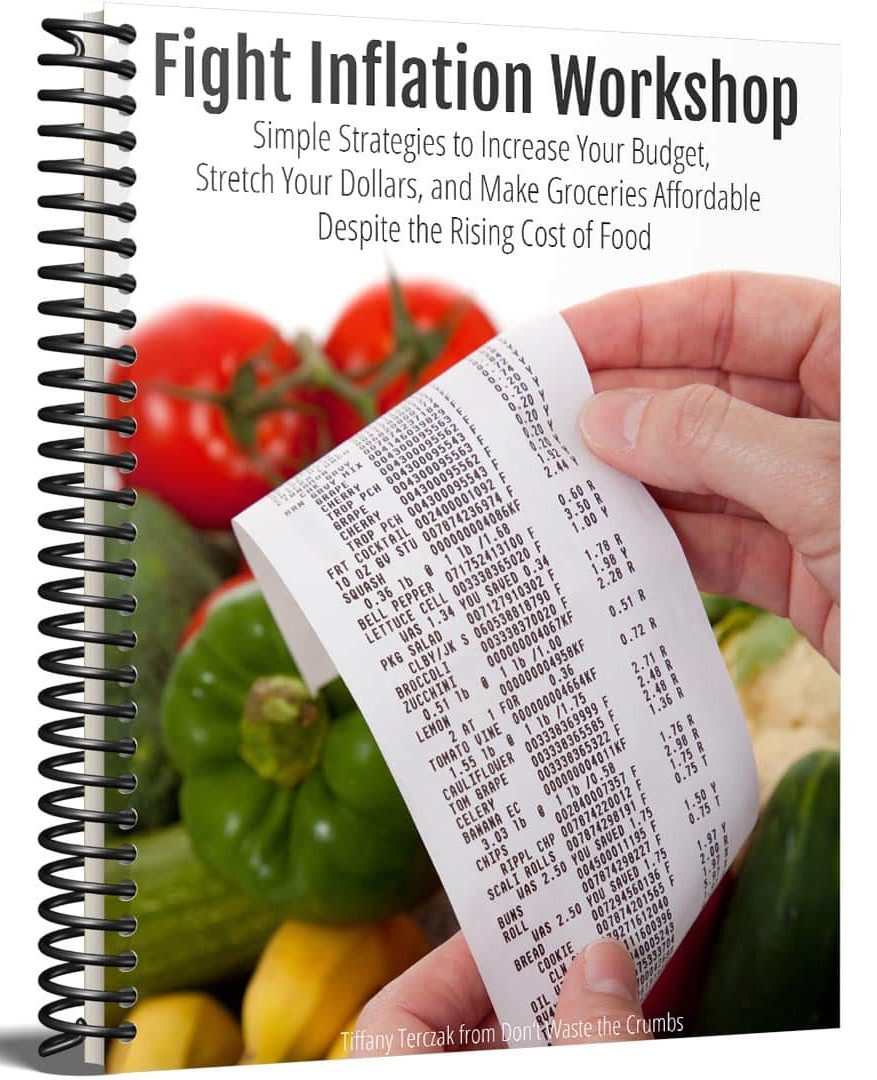
Fight Inflation Workshop
Sign up for my FREE Fight Inflation Workshop and learn simple strategies to save money, even with rising food costs!Easy Homemade Dinner Biscuits

Looking for a quick & simple biscuit recipe? This recipe for easy homemade dinner biscuits is a winner. Extra butter & extra salt mean extra yum!
- Prep Time: 15 minutes
- Cook Time: 10 minutes
- Total Time: 25 minutes
- Yield: 12 1x
- Category: Breads
- Method: Oven
- Cuisine: American
Ingredients
- 2 cups flour*
- 2 ½ tsp baking powder
- ¾ tsp salt
- 6 Tbsp cold unsalted butter, cut into small pieces
- ½ –¾ cup milk
Instructions
- Preheat oven to 450F.
- Combine the flour, baking powder, and salt in a large bowl.
- Cut in the butter with a pastry blender or your hands, taking care not to melt the butter or create a paste. The mixture should resemble coarse breadcrumbs.
- Add ½ cup of milk and combine until the flour is moistened. Knead the dough into a ball, pressing against the sides of the bowl to pick up any small pieces of dough. If additional milk is needed, add just 2 Tbsp at a time, kneading thoroughly after each addition. Note: The dough should not be wet enough to stick to your hands or the bowl. It should be dry enough to handle easily, and the bowl should be pretty clean when you’re done kneading.
- For drop biscuits: Pull off a golf ball-sized portion and form it into a ball. Press down slightly and place the biscuits on a large cookie sheet, 1″ apart.
- For rolled biscuits: Roll out the dough into a rectangle, approximately ½ ” thick. Cut into equal pieces and place on a large cookie sheet, 1″ apart.
- Bake for 8 minutes.
- Rotate the pan at 180 degrees and bake for another two minutes, if needed. The biscuits should be lightly golden brown on the bottom, and barely browning on top.
Notes
- Notes on flour: I have made these biscuits with organic all-purpose flour, freshly ground whole wheat, freshly ground spelt, and everything in between and in various proportions. If you have 2 cups of flour, the biscuits will turn out delicious (though more “hearty” with whole grains).
Adapted from Joy of Cooking
Nutrition
- Calories: 133


Hey Tiffany!
I’ve tried making this recipe twice now, and I love the taste! However, I can’t seem to get these to turn out flaky. Despite putting in all the right amounts of ingredients, I can’t seem to achieve that flaky texture. At least these ones don’t crumble like the ones made with your homemade Bisquick mix. Will a pastry blender work better than a stand mixer? I can’t even get them to form a seam that you can easily feel in order to break them in half to put jam in there. What am I doing wrong?
I was curious as to “why” you don’t need to soak “organic all purpose flour”! Thanks!
Hi Anisha! Soaking breaks down the phytic acid in whole grains, and since the bran and germ are sifted out of AP flour (organic or not), there’s very little phytic acid remaining.
If I try making these, would I cut them with a regular drinking glass, like you described in the recipe for the Bisquick biscuits? I sure hope these will turn out nice and flaky when I bake them in the oven. And, good Heavens I hope I can easily crack them open and put some jam in the middle! 450 °F? That seems a rather high heat for biscuits. Can’t I cook them at 350 instead? Sure it might take longer, but in the words of John Legend, “I’m never in a rush! No!”. And, if I were to cook them at 450, surely they would burn! Nobody likes burned biscuits!
Hi Annabelle! The high temperature is so you get a quick rise – if you want nice and flaky, you need a higher temp! And you can use a drinking glass, or use drop biscuit method – your choice!
Perhaps 350 for 20 to 25 minutes would work for me? I just worry that they might burn, especially the bottoms. That’s why I put an empty tray on the shelf underneath. Yours says 450 for 8 to 10 minutes.
Hi Tiffany! Thank you for this recipe. I want to share this with you and your readers. My grandmother made bread all from scratch. She baked her bread at 450 F all the time and it was perfect! It was a big loaf, beautiful brown color, soft crust, and delicious. I asked her why she baked it so hot. She said, “Because people today do not bake their bread hot enough to kill all of the yeast after it raises the bread nor adequately break down the starch from 12 molecules to 2 for easier digestion. That is why people have so much trouble eating bread.” I have another friend who measures ingredients by eye for a multi-grain bread, puts the dough in a round 10″ glass cake pan, and baked it in a hot oven. She kept telling me the oven was really hot, hotter than the dial setting of 375 F, and the bread was totally done in 20 minutes. I was skeptical it was done but it was and absolutely delicious! So, we got an oven thermometer and found out the thermostat had gone bad and the oven was at 600 F! This is the honest truth. I want to tell you that her loaves of bread were always whole grains, no white flour, and perfect rise, color, and soft! She got the thermostat replaced and went back to baking at 375 F and the bread was totally different. Higher temps made a believer out of both of us and made me remember what grandma said. 🙂 I believe my grandma put a pan of water in the oven too.
Thanks for sharing Marie!
So interesting and helpful, Marie. Thanks for sharing!!
Made and loved that basic biscuit. When you added seasonings to make savory or sweet how much did you add. You mention 2 tbsp sugar once. I would assume it would be the same for for the savory using something like italian seasoning. What other seasonings have you used and what amounts are best. I am not the most inventive in the kitchen and if I try it turns out bad. Thanks
The sugar makes for a sweeter biscuit, good for shortcakes. 1-2 Tbsp is fair, as some seasonings are stronger than others. Always smell first and if it’s faint, use more. Italian seasoning is good, rosemary + garlic would be good too. If your dinner calls for any seasonings, pick two and use 1 tsp of each, then smell/taste from there. You can always add more. Experimenting is how you learn best! ♥
Any help with making these on a camp stove instead of a griddle? I’m testing them at home right now and I don’t know how high to have the stove for these to cook through and not burn. Maybe butter would help in the pan?
If your pan isn’t non-stick, butter or another oil will help. As for temperature, I’d say medium? You can always go higher, but once they burn it’s much harder to get them cooked in the middle.
Thank you, Tiffany. I’m going to try again. I think part of the issue was over mixing. But I never thought about them having a hard time cooking in the middle if the outside was cooked too much. Duh! 😉 I want these to work! Say a prayer for me on round 2!
I was directed to this recipe via your simple camping recipe post. I’m stuck in a cooking rut; I think I’ll try these out today so my poor family can have some variety. You mentioned the book ‘Nourishing Traditions”. I have it too, but I’m yet to make any of the recipes. I’m sure they’re easy enough when you get going but the ingredients and processes are a little intimidating.
Anyway, I just wanted to say thank you. I always enjoy your posts and have made quite a few of your recipes. I wish I was as organized as you!
Hi Kate! I’m only organized because my type A brain doesn’t handle chaos very well, lol. And even the organized people get stuck in ruts too. 🙂 I hope you enjoy these biscuits! We make them plain often, but if you add savory spices (Italian, sage, oregano, garlic, etc.) or sweet (cinnamon, nutmeg, etc.) you can add variety to what you’re serving. A cinnamon biscuit w/just a bit of sugar sprinkled on top goes a long way w/fresh fruit and butter!
I tried 2 batches tonight and ruined both, I think due to over mixing. how do you incorporate butter using stand mixer without over mixing? I have an inherited kitchen aid and not sure what attachment to use.
Thanks for your great site and all the help on this “better food journey” that I have started my family on.
Recipe #3 says: “Cut in the butter with a pastry blender or your hands, taking care not to melt the butter or create a paste. The mixture should resemble coarse breadcrumbs.”
So a mixer is not to be used for incorporating butter.
Hope that helps someone.
Actually you can use a mixer – I do! I just realized that you could after I shared this recipe. 🙂 Just use it on low and ensure it doesn’t get mushy and you’re fine!
That is great to know. But since I’m not so sure if my hand mixer would work very well, I will probably just use the pastry blender. But I may try the hand mixer first.
Hi, I can’t seem to find the info anywhere, so asking…what is the quantity the recipe makes, approx? I want to make multiples to put away in the freezer for during the week, and am trying to figure out how many! Thanks! 😀
Hello! This makes about 7-9 biscuits. Enjoy!!
Hi, quick question. Do you know if almond milk would work in the recipe or would it completely change to texture?
Thank you for your inspiration!
Bobbie
Hi Bobbie! Almond milk will work, as does coconut milk!
I used this recipe as my first venture into 100% whole wheat bread making — not that I have prior bread making experience, just decided to go big or go home 🙂 When rolled and cut, they turned out sort of like an English muffin for me, delicious with a bit of sand plum jam! My biggest surprise was at how filling these were: it is well past “lunchtime” but I am still contentedly full from breakfast. The nutrition facts on the flour I used show that each biscuit comes to about 3 grams of protein and fiber each, and under 200 calories with the other components. I am so thankful for the recipes and work you have put into your blog. It has been a huge inspiration and motivation as I strive to be healthier and cook more wholesome food (yay resolutions), all while staying on a budget. We still eat food that comes out of boxes, but are slowly progressing! Thank you.
Aw, thank you so much Elizabeth! I’m glad you enjoyed these. I’ve rolled them out, but also done drop style and they’re one of our favorites. It sounds like you’re making progress on your resolutions – One step at a time, right? Eventually we’ll get there because they all add up!!
You did not tell a single fib. These are as expected; they go together easily and quickly, extra salty and buttery, easy to convert to just about anything (topping for a cobbler?). This recipe has made it into my hand written spiral notebook cookbook and that is no easy feat.
One question; do you happen to have a cost analysis and or nutritional on these? I understand with so many variations this is virtually impossible, but a guesstimate?
and freezing. I imagine they freeze just fine?
You know, I haven’t tried freezing them! We usually inhale the whole batch. 🙂
Do as recipe directs. Then put on a lined cookie sheet and freeze solid. Remove and put in a zip lock bag. Just like the store bought ones. Have done this for years.
Ooh – cobbler topping? Brilliant idea Sarah! I am HONORED to make it into your spiral notebook. I have something similar too, and I know it’s a special place. Thank you! Cost analysis… I calculate 20¢ per cup of flour, salt .01, baking powder .05, butter .15 per Tbsp and milk .19. It’ll vary of course depending on what YOU buy, but that’s based on a $3 bag of flour (cost of whole wheat at Trader Joe’s), Kerrygold butter from Costco and a $6 gallon of whole organic milk – per recipe it’s a total of $1.62. 🙂
We’re making these with whipped honey butter on the side 🙂
Oh man yum!!
How would i add cinn sugar? Sprinkle on top after baking? Mix in to the batter before baking? What do i use to make it stick if i sprinkle on top? You mention cinnamon sugar and im dying over here trying to figure out how lol! 😉
Add the cinnamon/sugar to the biscuits just before baking. You could also mix a little bit into the batter too, and I’d probably do both. You can brush w/milk to make it stick on top, or you could even make little balls and roll them in the mix. Oh gosh, you’re making me hungry, lol. Let us know how it goes Amanda!
My 14 year old daughter jumped at the chance to make these yesterday – – – so we had them with lunch. YUM! We couldn’t get enough!
We’ll make them for dinner tonight now and see what Dad thinks!
THANKS!
Can’t wait to try the variations!
This recipe is just like the one that I use but I confess, I do use white flour as I get a loftier biscuit and my family likes them better. They are SO simple and I don’t even cut them out most of the time. I just pat the dough out and cut them into squares. Such flaky, layered, tender biscuits!
Tiffany-thanks so much for posting this today! I’m excited to try them. Found my tablecloth and got some marshmallow roasters so I think we are close to ready!
You’re most welcome Gina! I hope you guys have a GREAT time camping! 🙂