Think sourdough bread is too complicated to bake at home? Think twice! This sourdough bread recipe is so easy & simple that I promise you will want to bake it again and again! It’s delicious, frugal & healthy, plus there’s no kneading required!
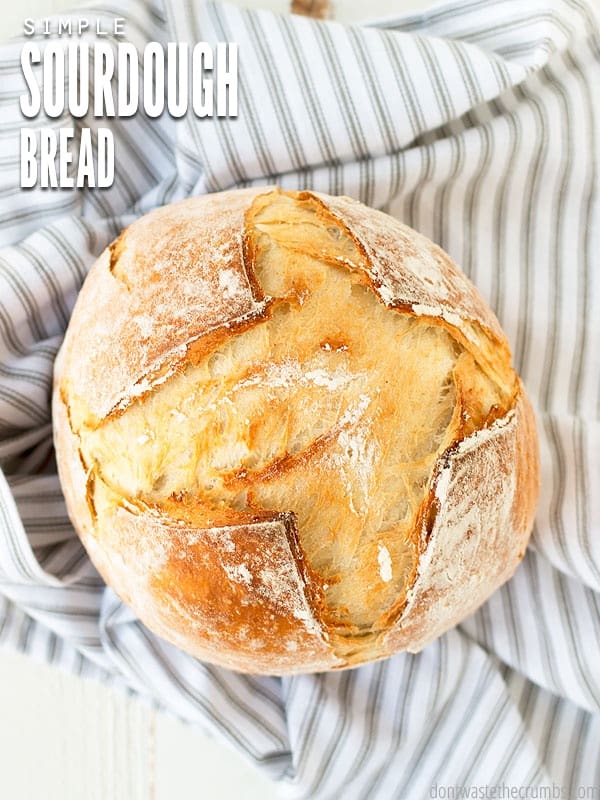
I love to make sourdough bread, AKA the “lazy man’s bread.” Yep. Because it’s that simple to make! Plus, the amazing benefits of sourdough are well worth giving it a try!
I also love it because:
- Making bread from scratch is one of the healthiest and most frugal ways to save money on food.
- All you need for sourdough is a starter, whole wheat flour, a pinch of salt, and some water!
- You can even make a gluten-free starter and adapt this recipe for gluten-free sourdough bread!
Notes on Ingredients

Sourdough Starter. Sourdough bread needs an active starter culture (which is made of beneficial bacteria and yeast) to create the sour flavor of the bread. You can make your own sourdough starter from scratch (or get a sourdough kit to help speed along the process).
This sourdough bread recipe needs to have an active starter culture, but if you don’t have any currently, here is my post for tips on the sourdough starter.
Whole Wheat Flour. You can use white flour if you don’t have whole wheat or are not comfortable using whole wheat in baking yet. It may be easier to experiment with the lesser expensive flour and once you’ve found your sourdough groove, upgrade to whole wheat. Here are some tips on the dough:
- You want to bake with a starter that is at its peak – when nearly all of the yeast has eaten but hasn’t begun to go dormant because of the lack of food. You can see when a starter has peaked because it will have a dome-shape on top.
- Starters peak in the 2-3 hour range after each feeding.
- Don’t skimp on the water that recipes call for. Sourdough recipes are wetter than traditional bread recipes made with baker’s yeast.
- The press-your-thumb-to-test-for-springiness test works. Do it.
- The see-through-your-dough test works too. Try it.
- Two rises will produce a more sour bread than a single rise.
- I use a bread proofing basket called a “banneton” to let my sourdough bread rise. I use this kind here.
A complete list of ingredients with the amounts you need is located in the recipe card below.
Step-By-Step Instructions
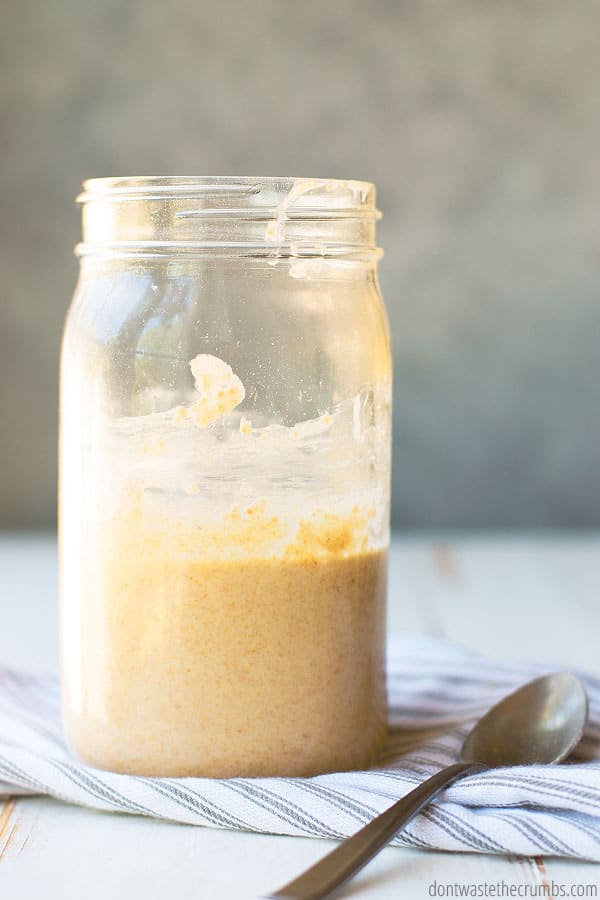
Here’s how to make this sourdough bread recipe from scratch.
Step 1. In a very large bowl, mix the sourdough starter, water, and 3 cups of whole wheat flour with a wooden spoon and combine well.
Step 2. Add salt and remaining flour 1/2 cup at a time, attempting to completely stir in the flour with each addition. When you can no longer mix with a spoon, use your hands to mix in the flour. Continue adding flour until your dough begins to resemble dough, but is still sticky and “pourable.”
Step 3. Pour the dough into a banneton (I like this one) and fill 1/3 way up. Cover with a towel and allow it to sit in a warm place for 4-12 hours, until the dough is at least doubled in size and looks to be “domed” on top.
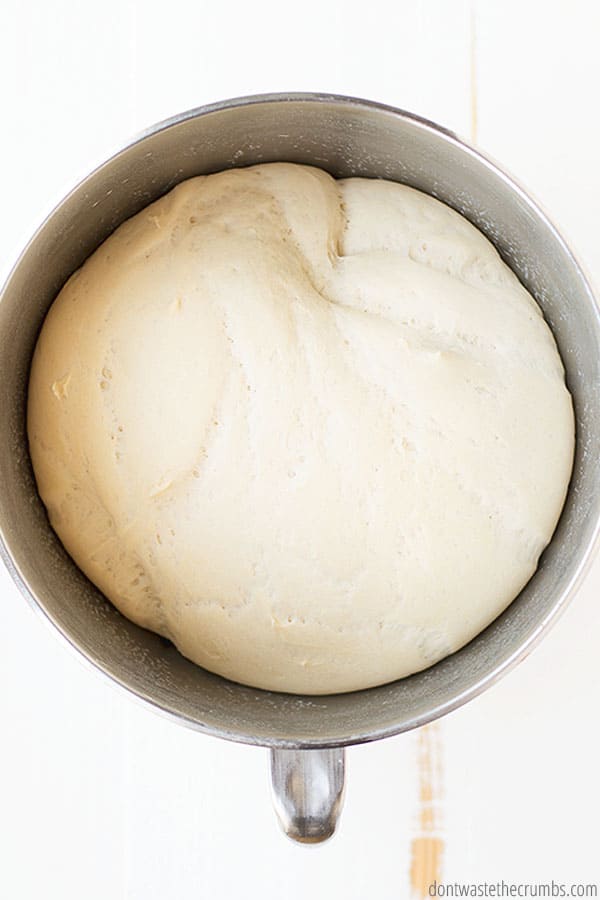
Step 4. When the dough is at least doubled in size, flip the banneton over so that the dough dumps directly into a Dutch oven, lined with parchment paper, (or loaf pans). If the dough doesn’t come out centered into the Dutch oven pot / loaf pans, wait 20 seconds, then grab the handles and shake the dough so it’s centered.
Step 5. Place the Dutch oven or loaves in a cold oven and turn the oven on to 350 degrees. Bake bread for 50-60 minutes, until the edges are golden and the bottom sounds hollow when tapped.
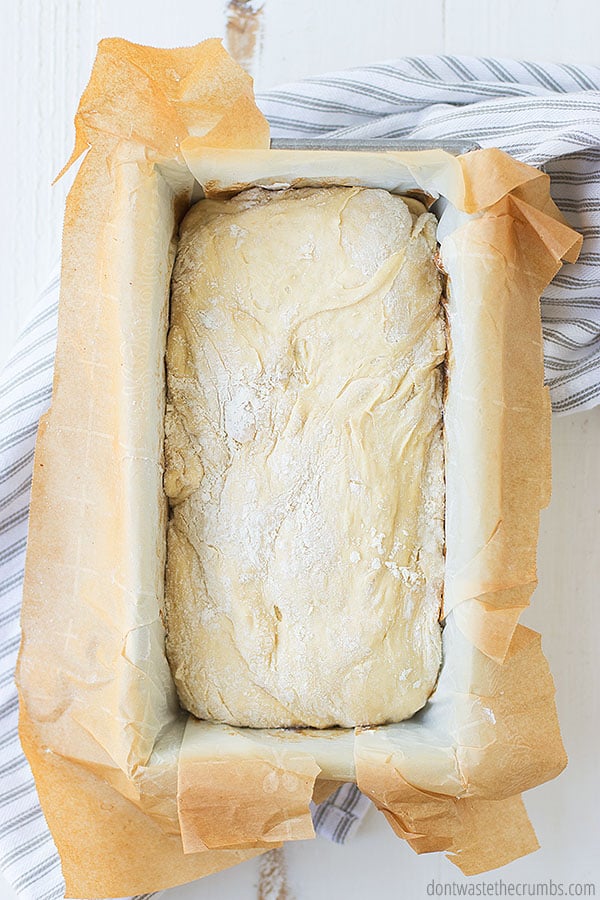
Step 6. Remove to cool on wire racks for at least 30 minutes.
Additional Recipe Tips
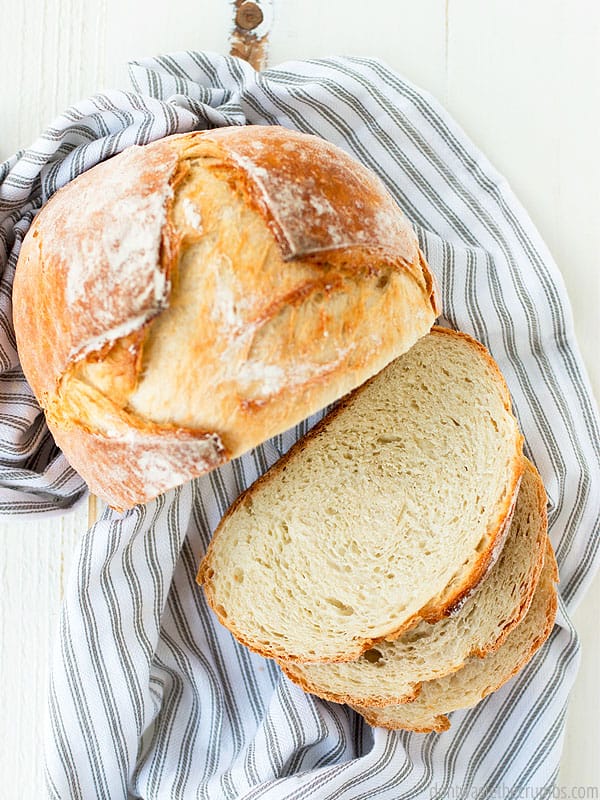
- Halving the recipe while striving for your “perfect loaf” will cut down the cost on ingredients and reduce food waste.
- Putting the dough into a cold oven and then turning it on gives the yeast a final boost to help the bread rise. Do not do this if your bread has already domed AND is starting to recede in the rise.
- If your bread fails, have no fear! Determine what exactly went wrong and try again, aiming to fix that problem. You wouldn’t be the first person who didn’t succeed on their first attempt!
- If bread fails despite repeated attempts, use the starter for other baked goods for a few weeks to a month. Meanwhile, feed the starter consistently to build up the concentration of the yeast.
During the Rise
- The vessel in which dough rises can limit the extent of the rise. Be sure to leave plenty of room for expansion.
- The quicker the dough rises, the less sour the bread will be.
- The longer the dough rises, the sourer the bread will be.
- The warmer the temperature, the quicker the dough will rise.
Temperature for Rising
Controlling the temperature allows you to be in greater control of when the dough will be ready, and in turn when the bread will be ready.
The following methods will provide a consistent temperature for the bread to rise: Heating pad on low, in an oven with the light on or in a dehydrator. Consider adjusting the temperature higher and lower to find the “sweet spot.” Using my heating pad on low gives me a rise time of 5-6 hours.
Rising Times
When experimenting with rising times, bake this bread on a day you plan to be at home. Numerous factors can affect the rise time overall and when the yeast peaks, so you want to have a vague idea of how long the bread will take in your home before you leave.
For a point of reference, I turned my oven on the lowest setting, placed it on top of my stove and it was ready in 4 1/2 hours.
FAQs
Sourdough bread is NOTHING like traditional bread. When you’re done kneading traditional bread, you likely have a firm, round piece of dough. When you’re done kneading sourdough, you will have a very loose and likely pourable dough on your hands. Literally.
In less than two hours, traditional bread will have doubled in size. In two hours, sourdough looks like it hasn’t even budged.
Traditional bread can be whipped up in half a day’s notice. Sourdough definitely requires advanced planning. Like, up to 24 hours in advance.
You will use 2 cups of sourdough starter for this sourdough bread recipe.
You can use white flour or whole wheat flour. It may be easier to experiment with the lesser expensive flour and once you’ve found your sourdough groove, upgrade to whole wheat.
Sourdough Recipes and Tutorials
- Sourdough 101: The Benefits of Sourdough
- How to Make a Sourdough Starter
- Toasted Coconut and Banana Sourdough Pancakes
- How to Make a Gluten-Free Sourdough Starter
- Sourdough vs Soaking vs Sprouting: Which is best?
- Sourdough A to Z eCourse (Plus recipe book!)

Crush Inflation Challenge
Sign up for my FREE Crush Inflation Challenge and learn simple strategies to save money, even with rising food costs!Simple Sourdough Bread Recipe
Try my favorite Sourdough Bread Recipe. Super easy for beginner sourdough bakers, with simple instructions and just one rise. It’s healthy, frugal, and can be made gluten-free!
- Prep Time: 12 hours, 15 minutes
- Cook Time: 1 hour
- Total Time: 13 hours 15 minutes
- Yield: 2 loaves 1x
- Category: Sides
- Method: Oven
- Cuisine: American
Ingredients
- 2 cups sourdough starter
- 5–6 cups whole wheat flour
- 1 heaping Tbsp salt
- 1 cup filtered water, cold or room temperature
Instructions
- In a very large bowl, mix starter, water and 3 cups of whole wheat flour with a wooden spoon and combine well.
- Add salt and remaining flour 1/2 cup at a time, attempting to completely stir in the flour with each addition. When you can no longer mix with a spoon, use your hands to mix in the flour. Continue adding flour until your dough begins to resemble dough, but is still sticky and “pourable.”
- Pour dough into large loaf pans or a banneton (I like this one) and fill 1/3 way up. Cover with a towel and allow to sit in a warm place for 4-12 hours, until the dough is at least doubled in size and looks to be “domed” on top.
- When the dough is at least doubled in size, flip the banneton over so that the dough dumps directly into a Dutch oven, lined with parchment, (or loaf pans). If the dough doesn’t come out centered into the pot / pans, wait 20 seconds or so, then grab the handles and shake the dough so it’s centered.
- Place loaves in a cold oven and turn the oven on to 350 degrees. Bake bread for 50-60 minutes, until the edges are golden and the bottom sounds hollow when tapped.
- Remove to cool on wire racks for at least 30 minutes.
Notes
If you’re using loaf pans, this recipe makes 2-3 loaves, depending on the amount of flour used and size of loaf pans.
Nutrition
- Calories: 456

Wow, thank you for this recipe! I just tried my hand at making sourdough bread for the first time and, I have to say, I am super pleased at how it turned out. It’s nice and crunchy on the outside and nice and soft on the inside. I think perhaps I lucked out with my starter. I got it from a friend and fed it for a couple days. I also am fortunate to live in a tropical climate wear yeast thrives! I followed your recipe to a “t” including all of the tips and it worked out just great! Thank you so much! I don’t think the first loaf will last through the night! Oh, and I didn’t use a bread pan because I didn’t have ones big enough so I did it free form on a large baking sheet. That seemed to work well 😊
When do you use the heating pad for the dough?
Hey! I am trying to make my first loaf of sourdough. I just have a quick question. Do I add yeast to my starter? It says water and flour and that’s it….is there yeast in the flour to make it rise, do I not need to add yeast yet, or am I missing something. Haha Please help.
Hey Lauren! No yeast – in a few days, the water and flour will bubble and make their own yeast. Then that’s what you’ll use to make bread rise later!
Awesome! Thank you!
Do you have to grease the pans before baking?
I’d always recommend greasing and flouring bread pans before baking.
My roommate and I just made this recipe – our first sourdough! I would definitely agree with the comments that suggest to add more water. Our dough was very thick and almost brick-like by the end of step 2, even though we added extra water. When we baked it the bread was very dense, although still spongy, and had the nice tart sourdough flavor. If we added more water, I think it could have come out as a normal loaf. We’re encouraged, and definitely will be trying again.
Hoping to make this tomorrow, I’m confused with the bread pans…the picture has a round loaf but I keep thinking a 9×5 regular bread pan…any advice here? I’d love a round loaf like the picture! Thanks!
Recipes call for 2 cups of starter or more. Won’t that use all of your statter?
Not if you have more than 2 cups to begin with. 🙂
OK I’ve read how you increase starter to have enough. I’m new to this
Inforgot to mention that I successfully made sourdough starter from whole wheat flour, successfully baked a bread for my hubby. He really liked it. Thank you!
You’re most welcome!
September 20, 2017 at 9:24 AM
Hi Tiffany!
Is there any step using above recipe I should do a bit differently when I am using GF starter and gf all purpose flour? I use Bob’s red mill gf flour.
Hi Agi! My experience with GF sourdough is VERY limited, and I honestly don’t have any tips to offer. I’m so sorry!!
Hi Tiffany!
Is there any step using above recipe I should do a bit differently when I am using GF starter and gf all purpose flour? I use Bob’s red mill gf flour.
I just watched a video on Youtube where she makes Sally Fallon’s bread from sprouted flour – totally follows the recipe and you can see how liquid her starter is. Sally Fallon’s starter is made 50/50 by volume with freshly ground rye (preferably) flour and filtered water.
https://www.youtube.com/watch?v=BdLYSDbAkg8
PS if I had wanted the dough to be pourable and not a regular kneading dough, I think I would have needed to at least halve the flour. Or double the water. I’m seeing this consistently in the comments, and I wonder if you perhaps have a particularly liquid starter? Maybe add a note in the recipe about the differing consistencies of starters that could call for varying amounts of water/flour? I also read a comment from someone who read the recipe this is based on in Nourishing Traditions who said the starter and water ratio in your recipe was incorrect. Seriously not trying to nitpick you, especially if you consistently get a good result yourself from this exact recipe, but I must say, that would really explain the lack of moisture and rise noted in many of the comments and in my own experience… Totally not willing to give up on this recipe though. Despite my issues, I am consistently (can I even use that word with just 2 attempts?) having better sourdough flavor than with the more common partially yeasted recipe. If I can just get Jean-Baptiste (my starter) to get off his butt and do his job (I mean, I’ve fed him for like a month and a half…), I think I can get a really good loaf out of this recipe.
I’ve made this bread twice now, and while the sourdough flavor is excellent, the bread never domes or rises above the tin, but comes out a perfectly rectangular shallow loaf (which is, on the upside, easier to cut). For this second try, I turned our AC off and let it get to nearly 80 in our apartment in case temperature was an issue, and I gave it 8 hours with the last few proving (haha) the dough wouldn’t rise any more. If anything they were wanting to fall with too much movement…. I’m honestly considering adding a little yeast (and experimenting with kneading and adding a rise first in the bowl….why is there just one rise, btw? never seen that before). And even with lots of oil added to the tops of the loaves during the rise, the crust still dries out and yields a tough, dry result after baking (using a towel and not cling wrap because every time I do, even if I put a fold in the wrap that allows for expansion, the wrap restricts the rise). Also, what do you mean by “pourable”? It’s just, I also have needed to add quite a bit more flour and water just to get enough dough to form two small loaves. Sorry for the barrage of questions!
Followed the recipe to a T , bread rose perfectly in the pans, placed in the cold oven started baking, the loaves fell flat, very unhappy right now , I was excited by the way the bread dough raised and looked until going into the oven 😥
I’m sorry your bread fell Michael! The culprit could have been two things, either the move from the counter to the oven moved the bread around too much (like, the bread within the pans) OR the bread over-rose, and the slight movement caused it to fall. I’m so sorry!! Don’t waste the bread though – it can be great croutons or breadcrumbs!
Usually you supposed to let bread to rise in the pan only halfway up, so it could continue rising in the oven. If you let it rise in the pan fully up, so it means, you have been putting your bread in oven when it started falling down.
this recipe did not work i made my own sourdough and followed your recipe to make the sourdough bread. it was very dry and crumbly one cup of water was not enough i just wasted 2 cups of my starter on this. not happy
I’m sorry this didn’t work out for you Lisa! Most bread recipes are very straightforward, but sourdough is an art – so many different variables can effect the outcome. I wouldn’t write it off and instead, keep working at it!
Also, I’ll be using your recipe in this trial, but I’m curious to know why you changed the ratio of starter:flour in the NT book? Your recipe uses nearly half the proportion of starter. Did you find that it was unnecessary and gave the bread a really strong off-putting flavour?
I think I halved the entire recipe Amanda, is that right?
Not quite. The recipe for sourdough in Nourishing Traditions is 13 cups flour, 2 qt. (8 cups) starter, 2.5 Tbsp salt, and 1.5 cups water. That’s a flour : starter : water ratio of 13 : 8 : 1.5 cups. Whereas the corresponding ratio in your adaptation is 13 : 4 1/3 : 2 1/6.
So, for equal quantities flour your recipe uses nearly half as much starter as well as less water. I think your starter must be more liquidy than mine for those ratios to work.
I just finished my rye flour starter from the Nourishing Traditions recipe. It’s looking really good! I’ve even got a small hooch forming on it. I feed it everyday at 9:30 – 10 am. I’m super grateful for all your advice. NT is an amazing wealth of information, but the recipes aren’t very detailed. I often have a lot of questions when attempting to execute one of Fallon’s recipes, so it’s great to have all of your follow up advice to help!
I’m not sure where to go from here. I’ve got a quart of starter set aside for the freezer (as a backup) and a cup of starter set aside to continue growing for next week. The last quart of starter I’ve got is for baking bread today but should I feed it right before I use it to make bread or freeze it? Is there an optimal time in the 24 hour cycle of the yeast colony for baking or going dormant? That is, 9am right before it would have been fed, 9pm 12 hours opposite to feeding, or 10 am right after feeding?
Today I’m going to do two batches using half your recipe (which I believe is already half the NT recipe, 13 cups of flour!!) I’ll do one with 2 cups starter right before feeding and one with 2 cups half an hour after feeding. I’ll report on my success or lack of, but I’d really love your thoughts.
Regards,
Amanda
Hi Amanda! It’s been awhile since I’ve used this recipe, but if I remember correctly, there is no optimal time – you just want the starter to be fed consistently before you bake. I fed mine every morning and night, so I baked about 3 hours after the morning feeding. Does that help?
Yes, thank you!
It’s 6 hours into the rise and the batch made from starter which hadn’t been fed for 24 hours hasn’t moved a bit. The batch made from starter which had been fed a half hour before mixing the dough is starting to rise a little.
This is also my first time ever baking any kind of bread, so I expect to get some duds, and this test isn’t conclusive. But next week when I bake again, I’ll feed the starter before I mix the dough since it seems to be working better and it’s what you do.
And about these amazing sourdough pancakes? This could be amazing for gym buffs for the morning! How would you make these? 🙂
I’m trying this with coconut flour. Why is there no yeast in sourdough? I might of missed it. Is it because of the natural fermentation?
Yes! The fermentation process captures wild yeast from the air and that’s what causes the rise.
Made my first sourdough loaf today with this recipe. We are in India so Indian “atta” is what I used. I had to add at least double the water called for in order to get a sticky dough and incorporate 5 cups of flour. I spooned it into my baking pan and waited for the rise. Thanks for an easy to follow rme file that an just be popped into the oven once it’s risen well. We enjoyed this with dinner today!
Hi Tiffany,
First time trying your recipe, great tips ! I am trying with spelt flower as my partner has intolerances. So far the starter is looking good and i cant wait to try the sourdough recipe. Has been great reading everyones advice and great to find other passionate cooks out there.
Thanks Tiffany and everyone.
Ian – from Melbourne , Australia
Thanks Ian! I hope your spelt sourdough turns out amazing!!