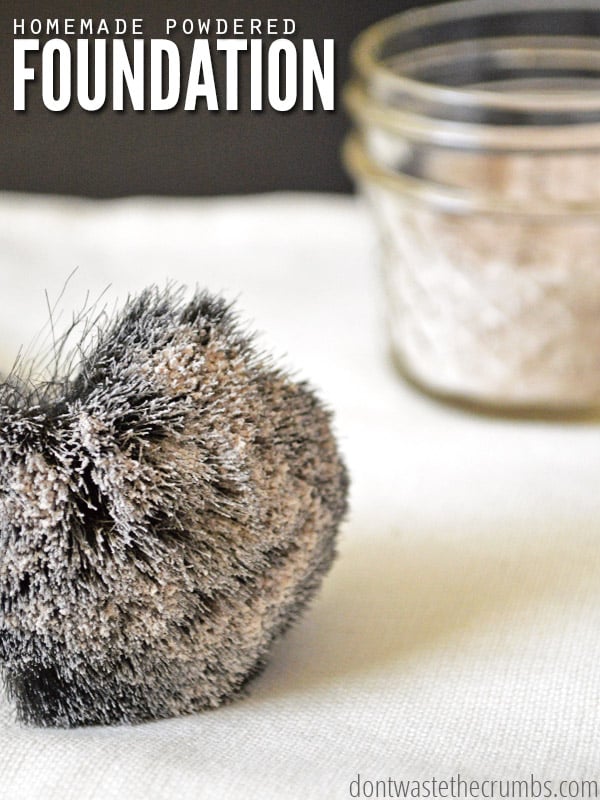
Learn how to make foundation at home with this easy tutorial. Use ingredients you likely already have to find your perfect shade in 5 minutes! Customize your natural foundation with clean ingredients that work with your skin type.
I don’t always wear makeup. But I do like feeling a bit more put together sometimes.
What I don’t like? How much natural makeup costs at the store. I try to keep my toiletries budget in check, and natural makeup can quickly add up, especially as you try to find brands with cleaner ingredients.
Whether you’re trying to cut back on cosmetic products with questionable ingredients or you simply want to experiment with a new type of foundation, this DIY makeup foundation is for you!
This homemade powder foundation is perfect for all skin types and is adjustable for different skin tones. Made with simple ingredients like cocoa powder, bentonite clay, and ground spices, this natural foundation contains all of the good stuff and none of the bad. So, grab your ingredients, and let’s get blending!
WHY MAKE NATURAL FOUNDATION
Once you learn how to make foundation at home, you won’t go back! I love making my own, because:
- It’s healthier: Making your own natural foundation is a great way to cut back on those long lists of questionable ingredients found in traditional beauty products.
- It’s quick and easy to mix up a new batch, and you likely have most of the ingredients already.
- Plus, this natural foundation is perfect for sensitive skin!
- This foundation is also super customizable to your skin tone, giving you the perfect match, unlike testing out hundreds of traditional foundations that don’t match your skin.
- It’s super frugal! Natural make-up can quickly take over your toiletries budget, but not this DIY foundation!

DIY FOUNDATION POWDER INGREDIENTS
You’ll find many of the ingredients for homemade foundation in your kitchen.
- 2 Tbsp arrowroot powder or cornstarch
- ¼ tsp bentonite clay
- ¼ – ½ tsp cocoa powder
- ¼ – ½ tsp ground nutmeg
- pinch – ¼ tsp ground cloves
- pinch – ¼ tsp ground ginger
- pinch – ¼ tsp ground sage
- 10 drops of nourishing oil (jojoba oil, sweet almond oil, vitamin E oil, or lavender essential oil)
- 5 drops of tea tree oil (optional)
Note: I really like Plant Therapy essential oils. You can find their shop here.
HOW TO MAKE FOUNDATION AT HOME
Making your own homemade powdered foundation is really easy. You start with a base powder, add some color, and mix with just a hint of lavender essential oil. There is a bit of science behind it, though, so let me explain that too.
START WITH YOUR BASE
You can choose non-GMO cornstarch or arrowroot powder as your base. This is the blank canvas powder that you’re going to add color to. If you’re allergic or sensitive to corn, choose arrowroot powder. If you don’t have any sensitivities, choose whichever is more affordable.
CRAFT YOUR COLOR
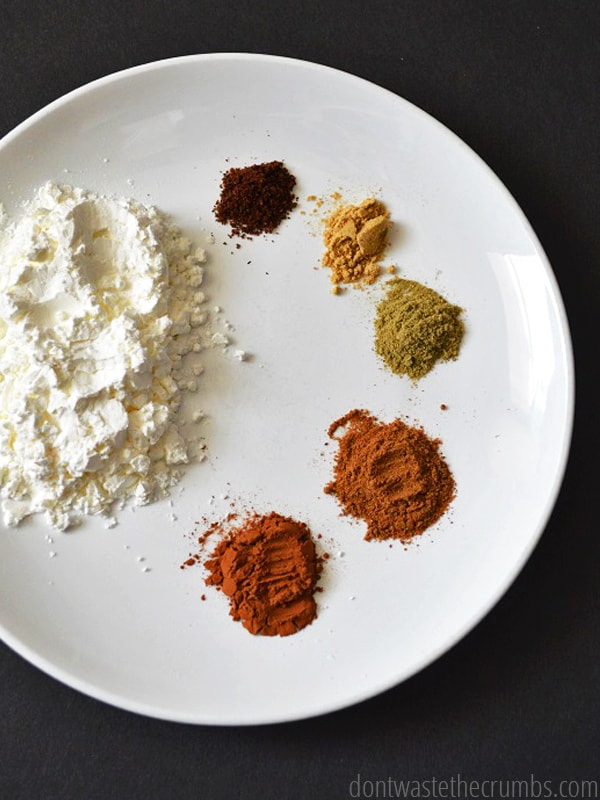
You have your choice of essentially any ground spice you can get your hands on, except for cinnamon. Cinnamon is known to be irritating to the skin, so I’d avoid that one if possible. Here are the colors that will make up your pallet:
- Clove – dark reddish brown
- Cocoa powder – medium brown
- Nutmeg – light/medium brown
- Sage – green (off-sets red undertones)
- Ginger – yellow (off-sets blue undertones)
Tip: If you don’t have a green spice that is ground and you need to counteract some red undertones, make your own by putting some dried oregano, basil, or sage in a coffee grinder or blender and whiz away to get that powdery texture!
ADJUST THE TEXTURE
The cornstarch and spices alone make for a great powder, but they’re not very user-friendly. As a powder should, they kind of leave messes behind during the transition from container to brush to face.
Essential oils and other nourishing oils like jojoba oil, vitamin E, sweet almond oil, or argan oil help make the powder stick better to itself (and your face) so you don’t make huge messes everywhere, while at the same time keeping the foundation in powdered form.
ADJUST THE QUANTITY
The quantity of the base will stay the same, but the colors will vary depending on your skin type. I’ll share a basic recipe that should get you started, but you’ll have to tinker with the amounts to find the right shade that’s perfect for you.
It might sound intimidating, but it’s really not difficult. Adjust the color using small amounts, and you’ll have your perfect shade in less than five minutes. Yes, it’s really that easy!
HOW TO MAKE FOUNDATION
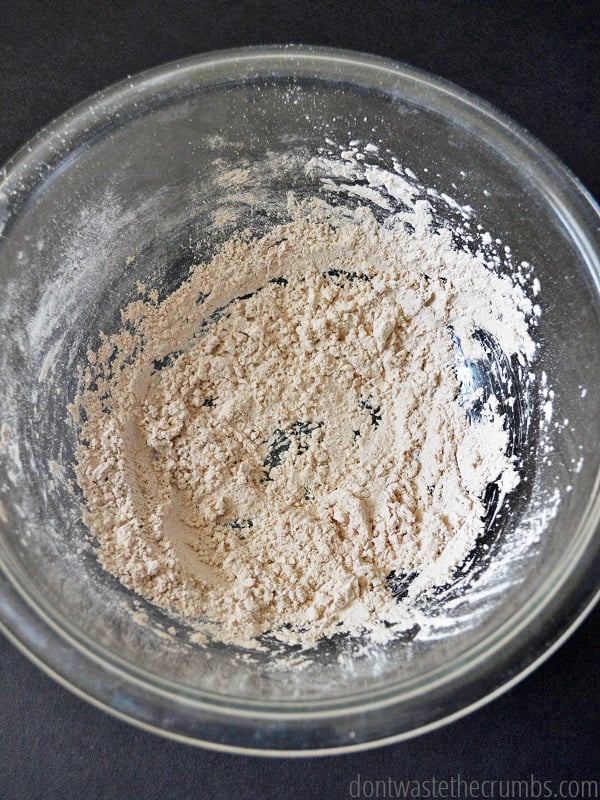
Step 1: In a small glass bowl, measure out the arrowroot or cornstarch. Add ¼ teaspoon of cocoa powder, bentonite clay, and ¼ teaspoon of nutmeg. Mix well with a whisk.
Step 2: Add the remaining ingredients, ⅛ teaspoon at a time, depending on your skin tone, whisking well after each addition. Test the color by dipping your foundation brush into the bowl and brushing the foundation on your face. Adjust the color as needed to find the right formula for you.
Step 3: When you’ve found your perfect color combination, add 10 drops of lavender oil (or your oil of choice), and whisk well. If you would like additional moisture, add the optional tea tree oil, and whisk well. Scoop the powder into your final container and store it closed.
MY MAKE UP FOUNDATION FORMULA
I have very fair skin, and I burn easily. When I shop for makeup, I always get fair/light powder and concealer. My liquid foundation is usually one of the two lighter ones (whichever is more pink). Here’s MY perfect color combination for homemade powdered foundation:
- ¼ tsp cocoa powder
- ¼ tsp nutmeg
- ⅛ tsp sage
- ⅛ tsp ginger
- ⅛ tsp cloves
Remember that yours will likely vary a bit from mine, but once you figure it out the first time, it will be even easier to mix up your next batch of make up foundation.
HOW TO STORE NATURAL FOUNDATION POWDER
You have two basic options for storing your homemade powdered foundation:
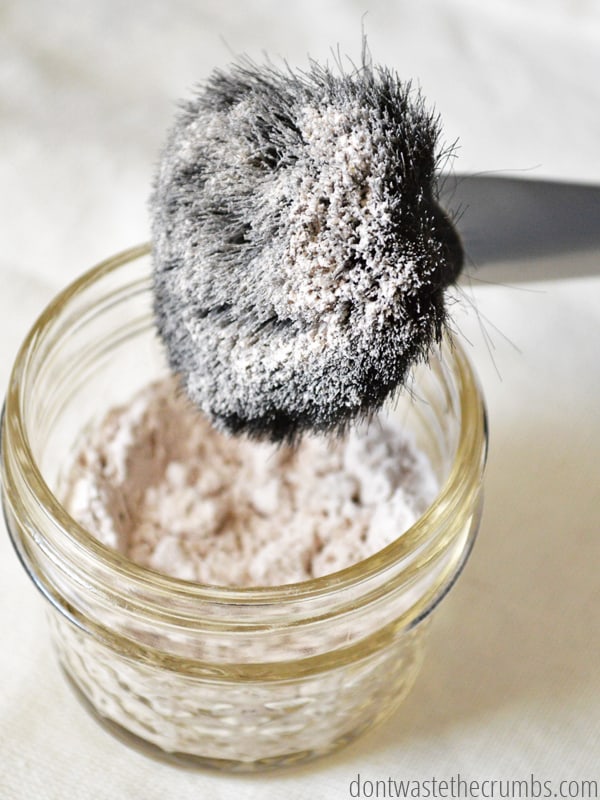
- Glass Jars – you can get these in all sorts of sizes, but you probably don’t want to go any smaller than 4 oz simply because you won’t be able to get your brush in the smaller jars. As you can see, this is what I use. I tip the jar over so the powder can rest in the lid, and then I dip the brush in the lid before applying it to my face.
- Powder Jar – these are the special jars that have an insert with little holes to help you control the flow of the powder. This will be a great option if you’re prone to making messes. They would also work well if you prefer to use a powder puff over a brush.
HOMEMADE FOUNDATION FAQS
How much does making your own powder foundation cost?
Here’s the best part. The total cost of homemade foundation? Less than 30¢. Can you believe that?! Each batch of makeup will last anywhere from 4 to 8 weeks, depending on how much you use.
There might be a small upfront investment for the oils if you don’t have them, but once you do, the small amount of each ingredient per batch means you can literally make your own makeup for one full year for just $3 – less than the cost of a latte!
How do I alter the foundation based on my skin?
If you have oily skin, you can leave out the oils in this recipe. On the other hand, if you have dry skin, you can add more oils to combat the dryness. If you have combination skin, I suggest keeping the oils in the lower range and adding more as needed.
Can I make translucent powder with this recipe?
Absolutely! Translucent powder is essentially powder without color. So, just skip the spices, and you’ll have a translucent face powder you can use to set your foundation.
What kind of coverage can I expect with this foundation?
This foundation has super buildable coverage, so it really depends on your personal preference! For light coverage, simply dust a thin layer all over your face. For more medium coverage, you can continue adding layers to reach your desired coverage.
How can I adjust the undertones in this foundation?
For more yellow undertones, you can add spices like ginger. On the other hand, if you have more cool undertones, you can add more red spices like cloves and nutmeg to suit your skin tone.
Can I add SPF to this foundation?
Yes! You can add zinc oxide powder to your foundation as an SPF! Mix it in with the base layer in the first step of the foundation recipe.
What are some tips for achieving a flawless foundation look?
I suggest starting with a thin layer of foundation and adding more to suit your coverage needs. Then, you can use a natural setting spray to set your foundation! If you need more coverage in certain areas, such as dark spots, tap a smaller brush into the foundation and dot on those specific areas.
Can I turn this foundation into a liquid formula?
Yes! The best way to turn this foundation into liquid form is by mixing a small amount of powder and moisturizer onto the back of your hand. Then, rub it between your fingers and blend it onto your face. Now you have a DIY liquid foundation or tinted moisturizer!
MORE DIY BEAUTY PRODUCTS
- Homemade Natural Shampoo
- How to Naturally Condition Hair
- Homemade Toothpaste (That’s Just Like Earthpaste!)
- DIY Face Mask Recipe
- Natural Makeup Remover Recipes
- Homemade Sunscreen Lotion




I can’t wait to try this recipe! I just had to replace my bare minerals powdered foundation compact after dropping it and watching as it rolled across the floor leaving a mess. The price has greatly increased from$24 to $37 to my dismay. It usually lasts me 1 year since I don’t wear makeup everyday but the pain was real. So you can bet I was looking for a more natural and cheaper version I could make at home. I have been making my own body care and moisturizers for over 2 years now. I just didn’t know where to start with powder foundation. I have most of these ingredients already and thinking about using Helicrysum EO instead of lavender since I have some.
Another thank you for this recipe! I just tried making it (sans clay powder- but I’m ordering it for next time), and it works nicely. It has a very faint, pleasant fragrance (reminds me of autumn), which is nice because my previous (very toxic) foundation had a very chemical smell to it. I’m so excited to have something non-toxic!
I am so glad I found this article. I was looking for one without bentonite clay as I can only find it on specific websites and I dont want to spend shipping for just this one product. But turns out you use bentonite in the end. Then i read in the comments that this powder works without bentonite and now I am gonna try this! My Estee Lauder Double Wear Foundation went from € 35 to € 50 and I just never liked the ingredients, neither of powder. I mainly dislike the titanium dioxide. Why does it always have to be in there. Why use a total of 50 ingredients on your face when it can just be 5, cheaper, and even natural?
I had to throw out all my foundations during the pandemic because they went bad and made my skin itch. I was able to get away without wearing makeup with the mask on but now mandates are being lifted so to avoid weird looks I’ll have to go back to showing my face. I’ve been trying to find (affordable) foundations without harsh and/or synthetic chemicals but I haven’t found any I’m set on.
I haven’t seen any recipes using clay and I thought that was nice since I have oily skin. I can’t wait to try making my own foundation. I always had to buy 2-3 different shades and blend to get my tone especially when seasons change. At least now I can have one batch per season instead of having to mix every single time I apply makeup.
Thank you and GOD BLESS!
You’re most welcome Chantel! Enjoy 🙂
Is there any other ingredients that can be used as a base besides cornstarch and arrowroot?
Hi Crystal, We haven’t tested anything else. Feel free to do some research and let us know what you find!
I’m going to test out with tapioca starch. If I remember to update here I’ll let you both know. I don’t have any arrowroot powder and I want to avoid corn starch.
That’s a great idea! Please do check in and let us know how that sub goes. 🙂
Maybe try carob powder instead of cocoa?
What do you do if your allergic to coco?
I read this post a few months ago but just now got the gumption up to make it and use it. The reason: I wear wire frames glasses. I have a skin condition that is making it difficult for me to use soaps, lotions, and makeup. Here is what I did:
Used cornstarch for the base, Cocoa powder, nutmeg, ginger, sage, vitamin e, tea tree essential oil. I used an all natural moisturizer base then I used my makeup brush to put the homemade powder on. It smells great and the light coverage is great for my skin. I left out the clay because I wear the wire frames.
Oh, duh! I just saw the fine print! I’m just a tad overwhelmed with all of this DIY!!!
Thanks for all of your helpful recipes and articles, Tiffany! I appreciate you sharing all of your trails and errors and posting your successful recipes so we don’t have to fail! 🙂
Regarding Bentonite Clay, does the powder foundation use the powder or the clay mask? I assumed the powder, but your link goes to the masks. Thanks for your help!
Hi Lisa! The link should be to the powder. I’ll get that fixed for you!!
I just want to say thank you for posting this! I was spending $50 a pop on “natural” powdered makeup. I had no idea I could make it myself! I tried this and I havent looked back! I’ve been using this for about a year now. I made a batch about 2 months ago and I’m still using it! I’ve recommended this recipe to everyone I know 🙂 my face is clearer and it glows. Before, I was having awful break-outs. I’m so grateful I found your post. Thank you again!
I just have a question about this recipe.
If i make this, how long can it last?
It can last a long time – it’s just a bunch of powder and spices!
Hi Tiffany,
Could you please clarify your recipe for
“Homemade Powdered Foundation “?
The Bentonite Clay is listed in the
Ingredient list, but not mentioned at all in the Directions/Method part of the recipe.
So.. do you want us to put Bentonite Clay in our powder?
If so, then at what stage of the directions do we put it in, and how much?
2 Tbl cornstarch/arrowroot ?
1/4 Tsp bentonite clay ?
Thanks!
Sorry about that Rhonda – I’ve updated the recipe. Add it at the very beginning with the cornstarch!
I am looking for a foundation recipe similar to the bare mineral powered foundation. I don’t wear liquid foundation and want to make sure before I get out all the ingredients. What type of coverage is this? Full, medium, light or just poweder on your face? Can I buff it into my skin like bare minerals?
I tried bare minerals and wasn’t a fan, and this will probably be very light in comparison.
What is the bentonite clay for? Is it a must have?
Bentonite clay removes impurities from the skin. It’s not a must-have, but my acne-prone skin benefits from it. 🙂
I’ve been trying to make pennies stretch lately so I tried making a double batch of this recipe. My family is gagging and coughing saying it stunk so badly they couldn’t even finish eating dinner in here. It also came out brown even though I added more corn starch and regular powder from the store to try to lighten things up a bit. But I am caucasian and this is DEFINITELY for someone else’s skin tone. I’m glad others had good things happen with this but it definitely is not something I’ll be attempting again.
That’s very strange CJ – I’ve never even smelled this when making it. And remember that it’s easier to make it darker, and harder to make it light once it’s dark. I hope you can find a recipe that works for you!
Wow! That’s a huge compliment Bella – thank you for sharing!
I made this recipe today but did not have the clay so I left it out. So far, it is working really well. I also made the tinted moisturiser and found it did nothing for me but moisturise no matter how much powder I added (the colour in the jar was perfect, but it did not impact the colour on my face). I would give this recipe an A, but unfortunately the other one only a C. I also tried your liquid herbal shampoo today. Worked well,and I am excited to give it a month or two to allow my hair to adjust. Thank you for all of the ideas!
You’re welcome Janelle! Just like over-the-counter brands of make-up are different for everyone, DIY makeup is too. I’m glad you’re enjoying the powder!