My first experience with kombucha tea was a lot like my experience with dairy kefir: unpleasant.
It was too tart, too fizzy and too expensive.
But I’ve been tinkering with brewing a kombucha recipe at home and now I look forward to drinking a glass of kombucha every day!
For those who have never heard of kombucha before, here’s a quick lesson.
Kombucha is fermented sweet tea. It’s packed with healthy bacteria that promote good gut health, and it’s full of vitamins and healthy acids too.
I’m sure you’ve heard of yogurt, right? And how you’ve heard that yogurt is good for digestion because of the probiotics?
Kombucha is kind of the same, except it’s made from tea instead of milk. You also drink kombucha, as opposed to eating it with a spoon (like yogurt).
Although there haven’t been many formal studies done on the benefits of kombucha, fans will tout all sorts of benefits of kombucha, from increased energy to immune support and even help with keeping your joints healthy
I personally have experienced better sleep, bowel regularity and a lot less anxiety as a whole.
My husband has been drinking it too and the biggest benefit for him has been digestion. He no longer experiences acid reflux.
We know these benefits are from kombucha because we’ve been drinking it daily now for over 3 months. The one week we went out of town on vacation and didn’t drink kombucha, our entire digestive systems were off.
A few days after coming home and resuming our daily kombucha? Everything was back to normal!
It wasn’t that long ago that kombucha wasn’t available commercially. You had to either know someone who brewed it, or be willing to schmooze it up with a farmers market vendor in hopes they knew someone who did.
Today though, you can walk into almost any supermarket and buy a bottle of kombucha. Most stores even have organic and raw varieties too. I just have one big problem with that.
The cost.
One 16 ounce bottle of kombucha costs anywhere from $3 to $5, depending on where you live and where you buy it from. Even on sale at $2.50, the price is pretty steep.
But if you learn how to make it on your own, you can get your cost down to dirt cheap – just a few pennies per 16 ounces!
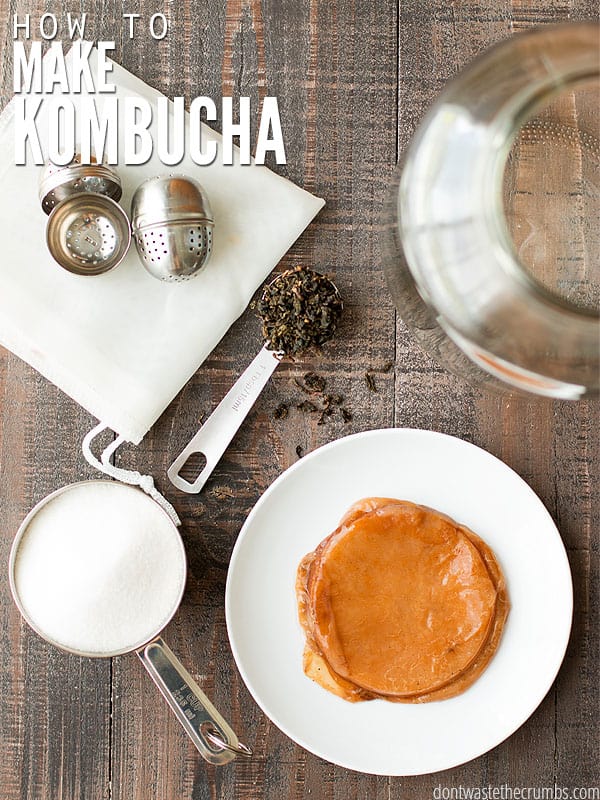
This kombucha recipe tutorial is for the person who wants to brew kombucha while making the bare minimum investment. We’re all working within a budget, and I want you to see that it doesn’t take a lot of money to make kombucha, nor make healthy changes in general.
With that said, there are plenty of shortcuts you can make along the way if you’re short on time OR don’t have the patience or resources to collect the supplies needed. I’ll note the shortcuts along the way.
How to Make Kombucha: Recipe
Supplies Needed to Make Kombucha
water (filtered if possible)
1 gallon glass jar, absolutely clean
tea (I use this blend of loose leaf tea)
tea balls or re-usable tea bags (if using loose leaf tea)
SCOBY
1 cup kombucha from a previous batch (raw and organic)
white sugar
cheesecloth or nut milk bag
rubberband
pH strips (optional, but very handy to have)
** See my notes below for finding the best deals on these kombucha supplies.
Method for Making Kombucha
Fill a medium pot with water and bring it to a boil. Meanwhile, fill a tea ball or re-usable tea bag with 1 Tablespoon of loose leaf tea.
If you start to research the best tea for kombucha, you’ll quickly find yourself in a rabbit hole of information that will leave you more confused than when you first started. To keep it simple, I recommend using either oolong tea or this delicious tea blend from Kombucha.com.
If you choose to use pre-filled tea bags, you’ll need 6-7 per batch of kombucha. Note that in the long run, using loose leaf tea is more cost effective and I think brews better tasting kombucha.
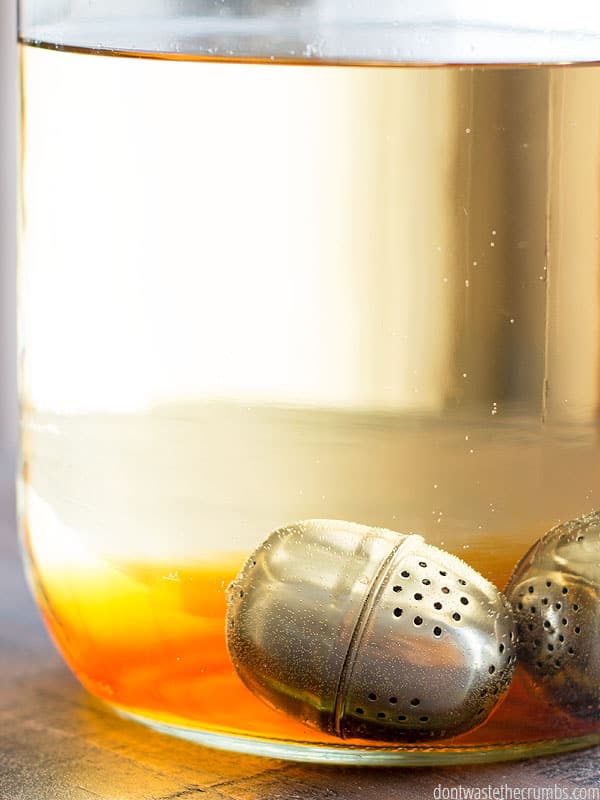
Place the filled tea balls in the glass gallon jar. When the water is boiling, carefully pour the water into the gallon jar and let the tea steep. Personally, I let it steep for at least two hours and haven’t found any bitter taste in my tea. I attribute this largely though to using quality tea in the first place.
If you’re not sure if your tea will be bitter after a long brew, you can either make a test cup of tea beforehand, or let the tea steep for a shorter time frame.
When the tea is cool enough to touch, remove the tea balls from the glass gallon jar. I have a pair of tongs with silicone tips that I really like to use, but a pair of regular tongs will work too.
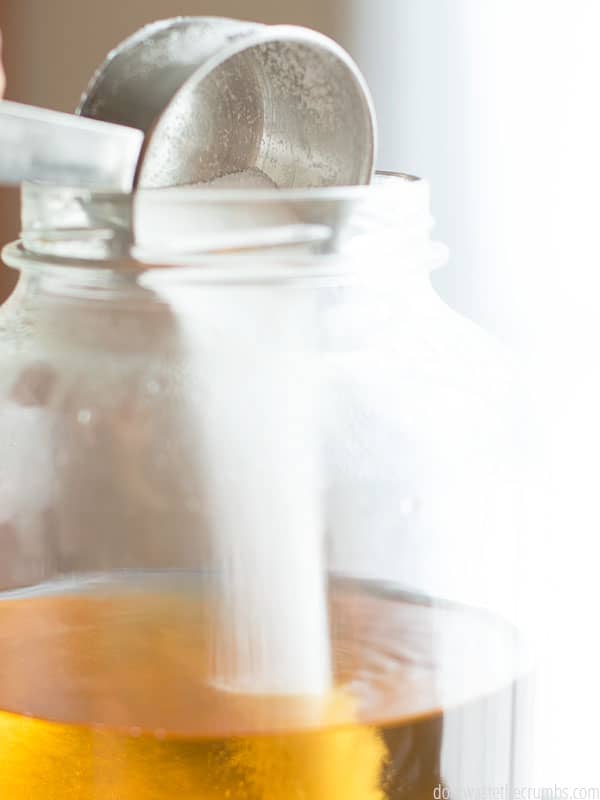
Measure 1 cup of sugar and pour into the tea. Stir until the sugar is completely dissolved and let the tea cool completely.
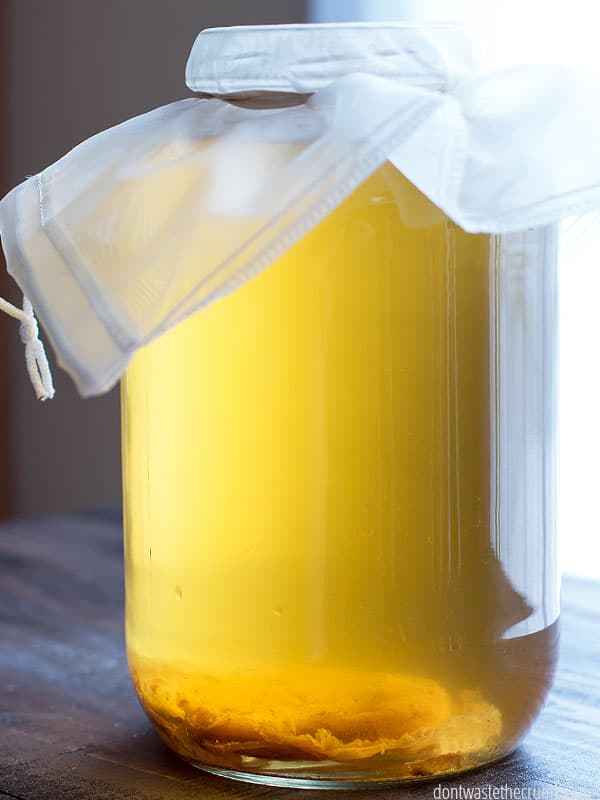
When the tea is completely cool, add the SCOBY and 1 cup of kombucha from a previous batch. The SCOBY might sink to the bottom, and that’s fine.
Add water to the glass gallon jar until it’s full, leaving about 3-4″ of space from the top.
Place the cheesecloth or nut milk bag over the opening of the glass gallon jar and secure tightly with a rubber band.
Place the jar in a warm place in the kitchen, out of direct sunlight. I place my jars on top of the fridge. If your fridge is in direct sunlight, you can cover the jars with a towel.
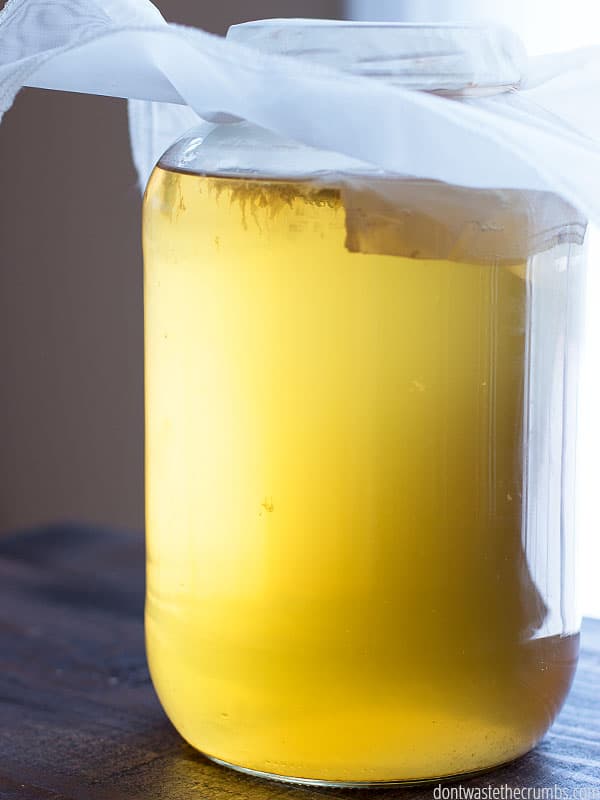
Let the kombucha sit undisturbed for 4 days, then start tasting.
How to Know When Your Kombucha is Done
Your kombucha is done when it has passed three tests.
- The pH test. Kombucha is safe to drink when the pH level reads 4.6 or lower.
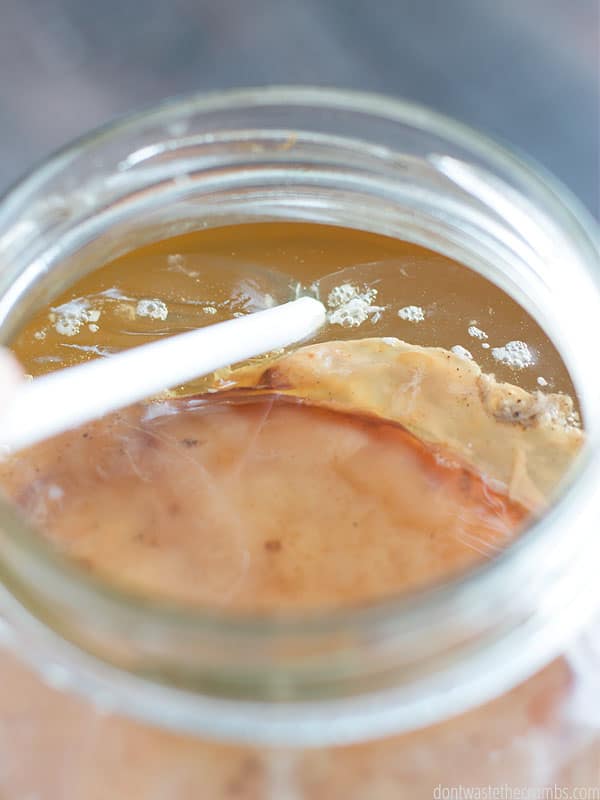
- The SCOBY test. Every time you make kombucha, a new SCOBY will automatically form at the top of the kombucha. The SCOBY should be clear(ish) and thick(ish) and have a gel-like texture. See the picture below for an example.
- The taste test. Taste your kombucha to see if the desired amount of sugar has been converted to acid. I prefer my kombucha to be tart with practically zero hint of sweet. You may prefer it to be just slightly sweet. You’ll be able to better judge whether kombucha is ready using the taste test after 2-3 batches. Meanwhile though, it’s safe to drink so keep on brewing!
What to do After You’ve Made Kombucha
When your kombucha is done, it’s time to make another batch! Here’s how:
- Put your SCOBY and 1 cup of kombucha in a glass or large measuring cup. Cover with the cheesecloth or nut milk bag.
- Pour the rest of the kombucha into clean jars. Any jars will work – brand new quart mason jars or re-used spaghetti sauce jars. I like to use a set of swing top jars similar to these that I found at ALDI. I also use a stainless steel mesh strainer to catch any fermentation strings that might have formed during brewing.
- Rinse out the gallon glass jar and repeat the process for making kombucha!
Want to Flavor Your kombucha?
There are few different ways to flavor kombucha, and you don’t even have to do a second ferment (which is a slightly advanced step anyway).
You can follow my flavored kombucha tutorials:
Rose Hip and Hibiscus Kombucha // Strawberry Lemonade Kombucha
Finding the Best Deals for Kombucha Supplies
I mentioned earlier that this tutorial requires a minimum investment – it’s like the bootleg of kombucha tutorials! With that said, you will have to acquire a few materials to get started. Whether you do this all at once or over a few weeks is up to you (and if you don’t want to bootleg it, scroll down for an affordable all-in-one option).
Gallon Glass Jars
I bought gallon pickle jars from Walmart for about $3.50 and my family ate the pickles (which took about 3-4 weeks). When the jar was empty, I filled it with warm soapy water and turned it upside down. After 3 days, I rinsed it out, washed it again and let it dry.
If you don’t want to go through this hassle, you can buy a gallon glass jar from Amazon for about $9. You can also look at garage sales and thrift shops, but I found that thrift stores especially cost more, and they didn’t come with a lid AND I wasn’t confident about the cleanliness of the jar.
Tea
There really is a ton of information and opinions when it comes to the best tea for brewing kombucha, but the short answer to all of it is to brew a tea that you enjoy drinking. Oolong tea is a very mild tea, and this delicious tea blend from Kombucha.com is a special blend of green and black tea that’s designed to help you get the maximum health benefits from kombucha.
If you try a tea and aren’t sure if you like the flavor, consider brewing it stronger or weaker. I actually prefer to make kombucha using two balls of tea (using 2 Tablespoons in 2 tea balls) as opposed to just one.
You can get your tea here.
Tea Balls or Re-usable Tea Bags
I happened to find a tea ball at a garage sale not too long after I bought the pickles, but if you don’t have such luck, you can get stainless steel tea balls on Amazon. They likely come with a chain, but I found the chain got in the way so I took it off.
SCOBY
The SCOBY is the likely the most difficult supply to acquire. You want to be sure you’re starting with a high-quality SCOBY, since the health of your kombucha essentially depends on it. You also want to make sure the SCOBY is healthy from the get go, because if you take care of it, a SCOBY will last practically forever!
Getting a SCOBY from a friend or neighbor or family member who brews kombucha will be the most cost effective. However, you can order one too. I recommend this one.
I had the pleasure of chatting with Dave a couple of weeks ago and to say that he is passionate about kombucha is an understatement. He lives, eats and breathes kombucha and I’ve seen first-hand the quality of the items in his shop.
You can get your SCOBY here.
Kombucha From a Previous Batch
This is also tricky to obtain, unless you’re okay going to the store and buying a bottle of organic, raw kombucha just to make your own. Which you can do, but it’s another expense.
One of the plus sides to buying a SCOBY is that it comes with the starter liquid, so you don’t have to go out and buy a special bottle of kombucha just to get started – you already have it!
Sugar
Like tea, the best sugar for brewing kombucha is filled with tons of opinions as well. The purpose of the sugar is to feed the bacteria, and there’s very little IF ANY sugar left at the end of the brewing process, so in my personal opinion it’s best to go with the more affordable option, plain white sugar.
If you are concerned about plain white sugar being processed at all, you can go one step up with organic sugar. There is no need to get any less processed or more expensive than organic sugar though, because kombucha doesn’t brew as well with brown sugar, raw sugar, honey, maple syrup or any other more natural sweetener.
Even though we’ve made it a goal to eliminate processed white sugar from our house this year, I still buy it solely for the purpose of making kombucha.
Cheesecloth or Nut Milk Bag
I use a nut milk bag because it’s what I already had on hand, so if you have cheesecloth, go ahead and use that. You can even use a coffee filter too, but I found that using the nut milk bag was a more sustainable and reliable method (the coffee filter kept getting wet when I put the jars on my fridge, and the wet filters attracted fruit flies).
My bags are very similar to these nut milk bags, and I would recommend buying a 2-pack if possible. That way when you start enjoying the benefits of kombucha and want to brew more than one gallon a week, you already have a second bag!
pH Strips
These are optional, but they are very handy to have on hand – especially when you’re first starting out. I have these pH strips designed for wine makers, but they contain the pH range for kombucha that’s safe to drink, so they get the job done.
Don’t want to bootleg it?
This tutorial is my bootleg version of making kombucha. It’s essentially hunting and gathering the supplies you’ll need over time to eventually brew your own kombucha. If you’d prefer to get started ASAP without the hassle of hunting and gathering, I suggest a kombucha starter kit. It includes:
- certified organic black and green whole leaf tea leaves (the tasty blend I mentioned earlier)
- starter liquid
- kombucha culture
- organic fair trade evaporated sugar cane
- accessory bag including: covers, bands, reusable tea filters, pH strips and gloves
It’s everything you need to brew kombucha, except a jar (but that’s easy to find, right?).
You can get your Starter Kit here.
Another way to brew kombucha is through a continuous brew. Find out how I worked that method HERE.
Do you brew kombucha? Do you have any questions about how to make it yourself? Leave your comments below!
Disclosure: This post is sponsored by Get Kombucha. As always, I would never recommend anything on Crumbs that I wouldn’t recommend to a close friend or neighbor, and all opinions here are my own.

Hi! Do you have any update to the links in this article? The ones listed aren’t working! TIA!
Hi Christy – which link(s) aren’t working?
I also have a problem with the links This one is from the ingredients list. https://dontwastethecrumbs.com/go/scoby
The same for the separate area that about scoby this secton Getting a scoby from a friend or neighbor or family member who brews kombucha will be the most cost effective. However, I recommend getting a scoby from Get Kombucha if this isn’t an option.
When click on it pulls up a page that says clickfunnels. and this is on the page.
No Page matching this path found.
If you were looking for ClickFunnels Click here
If you believe this page should be here, there might be more information on our status page
and putting the link in the address bar does not work as well
Thanks for letting me know! Here’s an alternative source: http://amzn.to/2rPHi5z
Ok ladies….for someone who has never even tried kombucha, what brand would you suggest purchasing to taste and see if this is something that I would even like? I would love to test this and see if this is something that I would even like before stepping out into the world of making my own. I do know that I have had tea that has soured per say and I have to admit that I find it just nasty and undrinkable. Does kombucha taste soured???
Hi Penny! I don’t think kombucha tastes sour at all. The best way to describe it would be like a very mild and bubble ACV… but more tea-ish than vinegar-ish? As for tasting beforehand, any brand is fine. I’d avoid the ones w/chia seeds, ginger and other strong flavors. Aim for a berry or something, because it’s the easiest flavor to start with (IMO) and easiest to replicate at home. 🙂
Thanks Tiffany!
I used to brew kombucha, a gallon a week. My friend got the first batch going for me from her own scoby. I love kombucha and the way it made me feel…I noticed a huge improvement in my gut health. However, drinking a whole gallon in a week by myself proved to be too much for my body. I got really bad eczema, and stopped brewing and gave my scoby to the chickens. Now, 2 years later, I so want to brew again! I buy it every now and then from the store (for a while I had an Ibotta rebate, but it’s expired now) but it’s not sustainable at all, it’s so expensive. Do you think I could brew smaller quantities at a time?
Oh yes Heidi! You can brew as little or as much as you want! One idea is to brew 1/2 gallon and let it ferment, then store in the fridge to prevent further fermentation. Meanwhile, store your scoby in 1 cup kombucha in a jar. When you’re down to 2-3 days worth of kombucha in the fridge, start another batch. It all depends on how much you want to drink on a regular basis, but it’s very manageable!
I just brewed my first batch wih go kumbucha.
It has been brewing for 6 days and the ph is still 4.5 and very weak.
How long should it take. It’s covered and in closet.
Thank you.
Hi Donna! The first batch will always take the longest, but the time it takes to ferment depends on many variables (temperature, tea used, how “old” your scoby is, etc.). I’d let it go for a full week and start to enjoy it. If it takes longer than a week to brew, consider moving to a warmer spot in the house. Here in Atlanta, our house is hovering around 75-80 and my jar is right next to the fridge – I have a new batch is about 4 days.
what do you do with the initial scoby that is at the bottom? I am a first time brewer and have been following your method but I did not see anything on what to do with the initial scoby. Thanks!
Hi Heidi! The “old” scoby is the one you use over and over to make more kombucha. You CAN use the new one, but it’s not as mature, so your new batch might take longer to ferment. It’s best to remove the new scoby and either compost, give to the dog or save in a scoby hotel (i.e. a big jar w/extra kombucha and the scoby). Then reuse the “old” mature scoby to brew. 🙂
Thank You for that information , just a little bit more…..How long will it take for the newer Scoby to mature? and do I keep it in a jar with kombucha in the fridge? Dark? Thanks
Hi Heidi! It depends. Scobys can be thick or thin, but I’ve found that a thick scoby (at least a solid 1/8″) makes the best kombucha. Ideally, it has no holes either. If you want the new scoby to mature, just leave it in the jar when you brew another batch, along with the old scoby. Your brew will ferment faster, but the new scoby will grow stronger and thicker, since it sits at the top where another “new” scoby would grow.
To store, keep it at room temperature in a semi-warm spot out of direct sunlight with a cover, but not sealed. I store mine in a gallon glass jar, halfway filled with kombucha (usually the brew that I accidentally forgot to let sit too long and it’s now too strong to drink!), with a cloth over the top w/rubber band to secure, on top of the fridge. 🙂
Hi, thanks for the great step by step tutorial. Two quick questions: Can I use decaf teas, as caffeine gives me the jitters – and how do I store my extra scoby mushrooms? (sorry if I missed that detail)
Thanks,
Susan
Hi Susan! I haven’t done it myself, but research says you can! And you can store extra scobys in a jar, in enough kombucha to cover the scoby. 🙂 Enjoy!
I made Kombucha tea for many years…. I used to give the scoby to my local health store. I would put it in a zip lock plastic bag with 1 cup Kombucha tea. too easy. I would keep one for myself and put it in the refrigerator which stagnates the action. just in case.
what I remember, you NEVER use a metal spoon/knife etc., it ‘kills’ the Kombucha.
I’m thinking about starting another one up, hopefully the health food store will have one.
BerylH
Just harvested my first Kombucha prior to reading your post on making it. I didn’t know very much and made mine using one tea bag. I also didn’t measure the sugar because I didn’t know that either. I tasted to Kombucha today (13 days after making) and I really like it but perhaps it is not strong enough. I didn’t get a new scoby but I believe I can re-use the one I had. Do I rinse off the dark spots on the scoby before I use it again? How much Kombucha do you drink at a time (small amount?). I did strain mine through a milk bag but I didn’t test the PH. I used filtered water. I love your blog and wish I had seen your method sooner.
Great questions Linda! There is no need to rinse the scoby at all – just remove from the old tea (along with one cup of kombucha) and brew the new batch. I drink 2 cups of kombucha per day, but I’ve heard that it’s best to start with 1/2 cup and increase over time. There’s no need to strain either. 🙂 I’m not sure what method you used Linda, but once you get it “right” a couple times, homemade kombucha is really easy!!
What kind of water are you using to make your kombucha? Ive read that it needs to be free of chlorine and fluoride which means no tap water for me. Suggestions?
In an ideal world Sadie, you would be right, but I use tap water because that’s what I have. So far, so good. 🙂
Thanks so much for the speedy reply. Do you let the water sit out to decrease the chlorine in it? Or just go from tap to recipe?
You’re welcome! Tap to recipe. I *could* let it sit out, but to be honest and realistic, it would be more of a hassle and clutter my kitchen. 🙂
What was the significance to having lidded jars, if you didn’t use them in the process?
There is no significance Stephanie, but it’s nice to have a matching lid to a jar in case I ever use it for something other than kombucha. 🙂
Do you have any idea what the final carb or sugar count is once this recipe is finished and ready for consumption. I think my dad would love this but he has to watch his carbs/sugars.
I don’t Anna, but all the research I’ve read says that very little, if any sugar is left at the end of the fermentation process (something like 2-6 g per 8 oz). The only purpose for the sugar is feed the good bacteria – it’s not for flavor or even sweetening because kombucha isn’t sweet!
Can I just say that making kombucha scares me because the scoby looks like something from another planet!! LOL (Even though I’m very interested in natural health, I threw away a bottle of vinegar a few years back because it had “stuff” floating in it! Of course I’ve since learned that’s the “mother”!) Baby steps!! 😉
I think it’s entirely okay to be freaked out by the SCOBY! I was too!!
Do you strain the stringy threads at the bottom before drinking the brew?
Diane – Yes, I strain the finished kombucha as I’m pouring into another glass jar. I’ll edit the post to show this!
Hi Tiffany! Have you ever experienced mold growing/floating on top of your kombucha tea while you were waiting for it to ferment before tasting? Do you know if it’s best to start all over or just scoop the mold out and continue using the kombucha tea?
I have not experienced mold Jee. Are you sure it’s mold and not a new scoby? Usually the pH of kombucha is so acidic that it prevents mold from growing.
Do you ever flavor yours? I used to make a ginger kombucha and it would turn out well, but the other flavors were not as successful.
Yes! I’ve been flavoring my kombucha in a second ferment. I’ll be sharing some tips for that one in the next few weeks as well. I’ve just recently learned how to flavor kombucha in the first brew, but I’ve only done it once so I’m comfortable sharing until I’ve got that one figured out. 🙂
What do you do with scobys once you’re done with a batch and already have a few …. ??
Share, or make a scoby hotel. I’ve heard of some people dehydrating and eating them. 🙂
I’ve been making Kombucha at home for a decade. My reason for doing so was also the cost. It’s simple to make but a bit labor intensive at bottling time. One suggestion is to keep extra scabby in a “scabby hotel.” I make 4 gallons of Kombucha at a time and have a 1-gallon jar that I keep just to house a few extra scaby in case something goes wrong. Usually scobys are hardy and strong but I had something happen a few years ago where there was an issue with the tea I was using. The scoby weakened and never recovered. I had to buy one from the Internet. It, too had an issue and never grew into something really healthy. I finally found a “keeper” and have been using its babies for years now but still keep a “hotel” with three spares–just in case. I share extras with friends or whoever wants one.
CURSE YOU, AUTOCORRECT! PLEASE READ “SCABBY” AS “SCOBY” LOL!
Another “bootleg” comment: I didn’t have a source for the scoby, so I used the bottom of the bottle of store-bought kombucha. It grew a beautiful scoby!
Where else do you recommend getting scoby? The link above goes to Amazon but it says out of stock and no indication of when it comes back.
Sorry for the delay Brandi – here’s how you can buy directly from Get Kombucha (and save 50%!): https://dontwastethecrumbs.com/go/scoby
Such a timely post, Tiffany. I have been looking for a free ebook on Amazon on making Kombucha. And I was pricing scobys yesterday, too. I’m now very excited to get started. I have much confidence in your recipes because they always turn out and they are cost effective too. Good news for Mr. Crumbs and his acid reflux. Mine has all but gone since I upped my probiotics, (yogurt, kombucha, kimchi, etc) and gone gluten free. Thanks for this post. Happy Monday.
So glad it’s helpful JoAnn, and Happy Monday to you too! I think you’ll love making kombucha. The first round is “odd” because it’s the first time and all, but by the third week, you’ll feel like a pro!!
Will you have a post about second fermentation? I really crave bubbles, we tried 2nd ferment, it did not go that well so far, i.e. no bubbles.
I haven’t mastered the second ferment yet Yuliya, but I will write it up when I do!
You forgot the price for your homemade per 16 oz 😉
Do you have a link for which oolong tea you like, instead of the new customer link? I’ve been interested in Kombucha for a while and am placing a vitacost order this week.
Yikes! I’ll update that today. I had full intentions to do that! I don’t have a direct link, but it’s the Starwest Botanicals variety..
Buy a pound of organic black tea and a pound of organic green tea from Mountain Rose Herbs. They have quality teas and they are way cheaper. A pound of each will last a long time. (I use .8 oz of tea leaves per gallon of water.) Using organic sugar, I estimated my cost per 16 oz. bottle to be approx. 25 cents. Prices have risen recently so your cost may be slightly more.