This post contains affiliate links.
How to Make Kefir
Making kefir is as easy as making citrus vinegar and removing labels from jars – add, stir, do nothing.
It’s perfect for when you’re too busy making bread to make healthy probiotic yogurt.
Or if you just like to go to sleep and wake up to the work being done for you!
The process truly is simple. Those with NO kitchen experience can do this without a problem. The kids could do it if they can reach the counter top!
(PS – if you haven’t read the “all about kefir” post, be sure to read that too. There’s lots of good information there than can help you in the how to make kefir process.)
How to make kefir step by step instructions:
1. Acquire kefir grains.
These are not the same as the powdered starter culture. The starter culture can be reused only a few times and is heavily dependent on cleanliness and contamination of the culture. You want the indestructible, super-resilient grains. (The grains really aren’t invincible, but they are pretty tough.)
Kefir grains can be purchased (I recommend Cultures for Health via Amazon), or a generous friend who is having a hard time keeping their grains under control can pass some onto you. Grains can be found on Amazon, but many of those buyers had poor experiences. I chose to pay a bit more from a trusty-worthy company. And if you’re curious when you’ll break even after this initial investment, I did the math here.
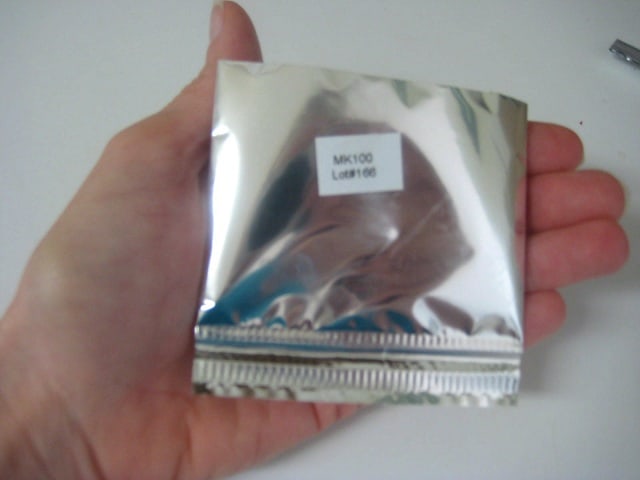
FYI: Purchased kefir grains come in a very tiny package, sealed with organic powdered milk. It will honestly look like nothing of importance, which makes the kefir-making process all the more exciting!
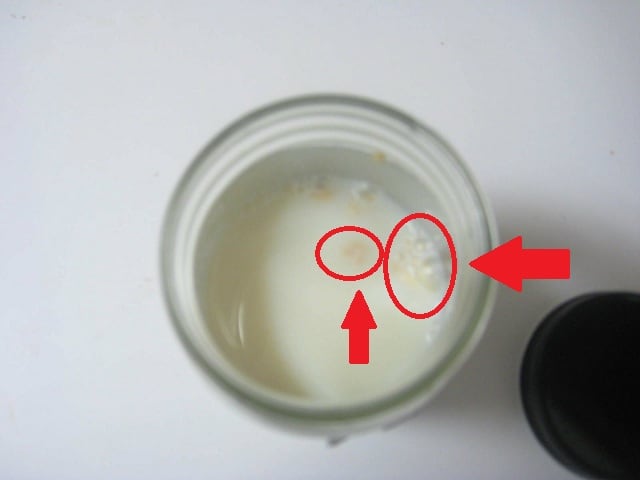
2. Place your grains in a glass jar and add approximately one cup of organic milk. Cover the jar with a coffee filter and let it sit on your counter top.
The filter is so debris and other food particles don’t interfere with your kefir making process. The kefir grains need air to breathe, so do not put a lid on your jar. Besides, the fermentation process will create pressure in the jar. If you seal the jar instead of using a filter, your jar may explode when you try to open it.
Know anyone volunteering to clean soured milk off your ceiling?
Kefir grains thrive best between 68 and 77 degrees, so you may have to find a better suitable spot if your kitchen is especially warm or cold. Don’t feel discourage when nothing magical happens. It will, just not yet…
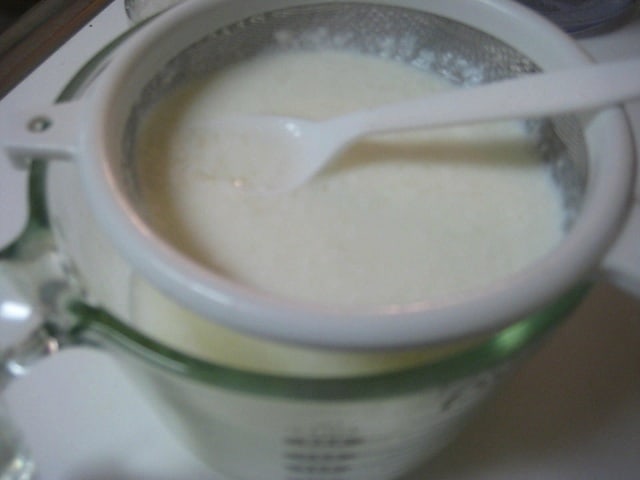
3. After 24 hours, use a strainer to pour the milk down the drain or into a another vessel, but not the kefir.
Note: You may use this milk if you’d like so long as it doesn’t smell sour. Room-temperature-possibly-soured-milk does not sound appetizing to me, but it may be suitable for pancakes, waffles or biscuits. Your strainer should be plastic if at all possible, but stainless steel is sufficient. You may use a plastic spoon if it’s necessary to help drain the milk from the kefir. Moving the kefir and curds from side to side will help the milk drain. This may not be an issue yet, but it will be later on.
4. Repeat steps 2 and 3 for 10 days.
Yes, 10 days. This process is called rehydrating the kefir – you’re essentially bringing the dried kefir grains back to life. Some grains are ready after 7 days and some take as long as 14 days. Use your best judgment, but I’d personally rehydrate for 10 days.
5. After the kefir grains are “alive,” you’re ready to make kefir.
Want to know how? Repeat step 2. No joke. Once your grains are active, you’re making the good stuff!
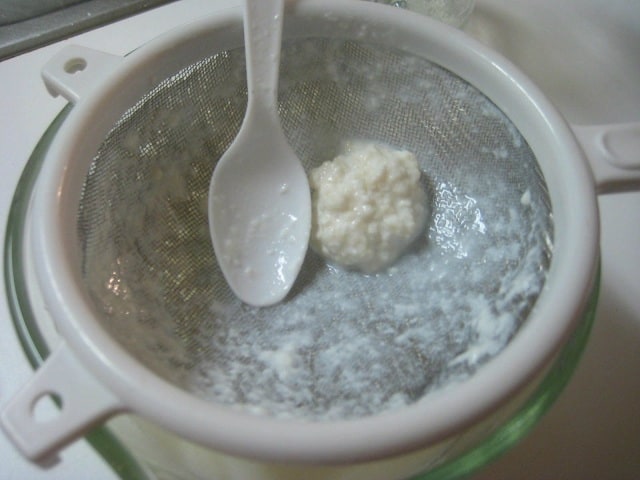
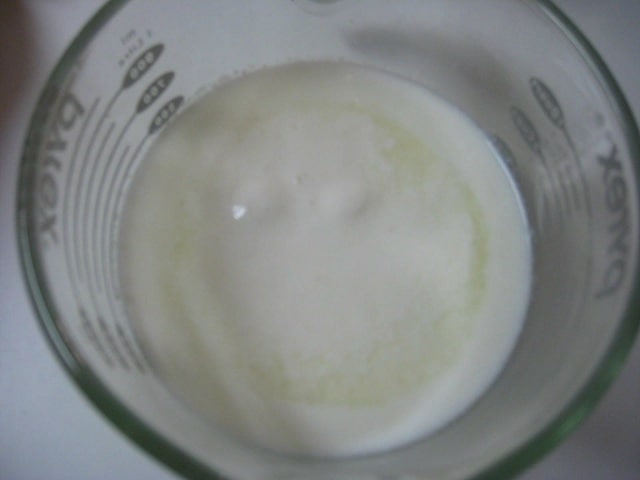
Depending on the environment and the quantity of grains you have in your milk, the jar may only need to sit for 12 hours, or it may need to sit for 24. After one month of making my own kefir, my grains have grown from a teaspoon of powder to one full tablespoon. In one cup of milk, these grains make kefir in about 18 hours.
My grains came with a list of FAQ – which was helpful – but I still had more questions. Here’s a few of the FAQ’s, along with my own questions and the answers it took me forever to find. Hopefully, this will solve all you’re “how to make kefir” questions…. You’re welcome. 🙂
My grains are yellow. Is this normal?
Yes. Kefir grains can be anywhere along the white to yellow color spectrum
My grains are super tiny. Is this normal?
Yes. Grains can range in size from a pin head to a golf ball.
Do I have to stir the kefir in the process?
It’s not required, but I’ve found it helpful.
Do I need to rinse the grains between batches?
No, but I usually do because yeast and curds builds up on the grains. There’s also something kinda oogey about putting soured milk curdles into fresh milk and then drinking it. It is recommended to use filtered water, but I use tap water without any problems. (I know, such a rebel.)
Can I reuse my jar?
Use a clean jar for each new batch of kefir.
My kefir separates into curds and whey. Is this normal?
Yes. This happens when the milk is over-cultured. Reduce the culture time, or use a plastic spoon to help strain the curds through the strainer.
My grains don’t look any different after the rehydration process. Is this normal?
Yes. Grains may grow, they may not. They may stay yellow, they could turn white. Don’t give up. Give it to the max of 14 days before thinking the grains are bad. Even after 14 days, the grains are probably doing what they’re supposed to, they just don’t look any different.
What if I need a break from making kefir?
Since cold temperatures render the grains dormant, you can store grains in milk safely in the fridge for up to 3 days. If you want to store them longer, it’s recommended that you rinse, dry and freeze the grains. I haven’t done this personally, but there is information available.
Do I have to make big batches?
No. You can make as little or as much as you’d like. Making one pint (two cups) at a time works well with the quantity of kefir grains I have. I make a batch, pour half (one cup) for a smoothie and refrigerate the other half. The grains are given fresh milk and put into the fridge. They get moved to the counter when the second cup from the original batch is pulled out. They then come to room temperature and kefir is ready the following morning.
Can I make kefir with non-cow’s milk?
Yes, milk kefir grains can be used with other milks, but may need to be rehydrated in mammal’s milk every couple batches or so. Milk kefir grains need certain bacterias to thrive and grow and while the grains will ferment almond, soy or other milks, they will not grow. Rehydrate your grains for maximum long-term potential.
Easy peasy, right? Are you ready to start making your own kefir?
Cultures for Health has milk kefir grains on Amazon and they have excellent customer service. If you have any questions in the process, you can contact them via their website or shoot, leave me a comment and we’ll see if my experience can help out too!
Disclaimer: This post contains affiliate links. By making a purchase through those links, I will earn commission that helps to keep the lights on in the Crumbs house – with no additional cost to you. Thank you for supporting Crumbs in this way. Read my full disclosure statement here.






I am going out of town for 17 days. How do I preserve my grains so that I can start back making kefir?
Feed them right before you leave Sheila, and then store them in the refrigerator. You’ll be fine!
I’ve not made any yet.
When I’m away at the weekends, can I put the grains in milk, in the fridge, Friday evening, then get them out Sunday evening to produce Kefir on Monday evening when I get home from work?
or would I have to throw that milk away and start new from Sunday?
Deane – your time frame should work if your grains are fully active. You won’t ever have to throw milk away and start over if the grains are active, that’s ONLY if you’re hydrating them for the first time. And even then, you an re-purpose the milk for biscuits or pancakes or waffles or something.
Hi Tiffany, thanks for the information.
I also have a few questions. To prepare kefir means to make it ALWAYS?. I have to make it every day?.
I mean, I would like to prepare for example 1 liter, and take a rest for a few days :).
Preparing kefir sounds like have a baby at home!. There is any way to prepare a batch for a few days (4 or 5 days), and then start doing that again?.
Hi Edith! Absolutely, kefir is ONLY an everyday thing when you’re first rehydrating the grains. Once your grains are producing kefir, you do exactly as you mentioned – a big batch every few days. You can even ferment it in the fridge to slow the process and make it less frequent. Or you can use less grains to slow the process too. It’s definitely flexible!!
Thanks for your time to answer Tiffany :).
Well, I am going to look for the grains as soon as possible, and starting making my keffir. I will tell you about my expierience :).
I really want to make it because I use to have digestive problems 🙁
Thank you again!
Can I use organic goats milk to make the kefir? I have a local source and love goats milk over cows milk. Thanks!
Yes you can!
I want to make sure I’m reading this right. The grains can only make 1 cup a day? Thanks!
Hi Melissa! No, the grains can actually make much more on a daily basis, but they need to be re-hydrated first. When you only have a small amount of grain (1 T or less), it’s best to use around 1 cup of milk. Over time, they’ll grow and multiply and you can use more milk (because you have more grains). Until the grains are fully hydrated, it’s just a waste of milk to use much more than one cup. 🙂
My son has a heart condition and receives WIC because he needs special high calorie supplements. He never gets through all of the milk he receives and have been looking for a way to make use of the extra. It’s not organic. I’m wondering if it will work. May be a good way to make this milk more nutritious?
Absolutely, Melissa!! Organic or raw is always best, but any kind of whole milk can be used.
I received grains from a friend, didn’t realize how much money I saved. I am only a little scared now, because I have been using UHT milk. I hope I haven’t killed them. I live in Belgium and that is the norm here. I’ll have to go to a dairy to get some fresh stuff.
You think what I have been drinking has been safe or kefir at all? It wasn’t rancid, but wasn’t delicious either.
Was the milk kinda tart, slightly sour? If so, that was kefir. UHT doesn’t make the best kefir, but you probably haven’t killed them. They won’t necessarily grow as fast or as large as those fed regular milk though. Given the choice, a dairy would be the better option. 🙂
Can I use raw milk instead of processed organic?
Yes absolutely!
I received my grains from someone who used regular 2% cows milk from the grocery store… I am wanting to switch them to raw cows milk . What kind of procedure will I need to go through?
Hi Becky! No special procedure – just use your raw milk going forward!
My main question is, can I use regular milk instead of organic? If we are fermenting them for possibly 2 weeks, using 1 c of milk a day, it seems like it could be expensive to get started. Also, how do you know when to actually save the strained milk after the 10 days or so of fermenting? I’m sorry I’m just confused.
Thank you for all the hard work you put into this website to help us go through the stages. I have only heard of you in the last 4 days, but you are the 1st to actually help me understand meal planning as I never saw how to growing up. Thank you so much for sharing your knowledge, experience and faith.
Hi Heather,
Yes, you can use regular milk instead of organic. I would not recommend UHT milk though – I did that recently and damaged my grains (I’m on cycle 4 or 5 now to get them healthy again). Yes, it does seem expensive to start, but you can alleviate that by using that milk for what you’d ordinary use it for, i.e. baked goods, waffles, pancakes, etc. Just keep it in a separate jar in the fridge and note not to to drink it. 😉 Another option is starting with only 1/3 or 1/2 cup of milk for days 1-3. They’ll likely revive just fine using less. You’ll notice the smell of the fermented milk to be a bit “off,” or tangy/sour. That’s when you can start using it as kefir. Actually, you can treat all of the milk as kefir from day 1, except don’t use it to ferment other items (like soaking grains or sourdough) until after day 10.
You’re so sweet Heather! I’m glad we’ve found each other! 🙂
This may seem like a silly question..(I have only bought kefir in the store) so steps 1-5 are just for preparing the kefir grains…and you pour the milk out. Then in step 5 after it has sat for 24 hours this is the milk/kefir (like what I buy) to be used??? And then you keep adding milk to the grains to keep them alive or store them in the fridge???
Maybe once I try this it will seem less complicated!
Thanks!
No question is silly 🙂 Yes, #1-5 are to prepare the grains, give them ‘life’ so to speak. When you get them, they’re usually freeze-dried or frozen and are not active to culture anything. They need to be revived in order to properly culture. You can pour the milk out or use it in a smoothie or even cook with it but I wouldn’t drink it. It’ll be warm and may have a not-milk or not-kefir taste. Just my personal preference there. Once the grains are alive, and you’ve cultured milk for roughly 24 hours, you’ll have what you used to buy at the store. Strain out the grains and put them in new milk – they won’t survive alone. Either make more kefir on the counter, or keep the new milk w/grains in the fridge for a slow ferment.
I’m sorry it sounds complicated – it really isn’t! The reviving period (day 1-5) is no different than culturing, except you’re not making kefir yet and you don’t drink the milk.
Once the grains are ready, always keep them in milk. Either fermenting on the counter for 12-24 hours (depending on how warm your house is), or in the fridge for several days. Let me know if that doesn’t help Melissa!
I have been brewing kefir for five months. Now, a teaspoon of grains have bloomed to a full cups worth! I am wondering if making kefir with all of these grains in a half gallon jar with 2% milk is how one uses them.
Thanks.
There are a ton of ways to use it and in milk is one of them.
Shoot. I can’t tell my grains from the curds. Last night I decided it was time to just make a quart of kefir because evey time I did it with one cup of milk, there was a section of white something (curds, kefir grains?) floating on top of the whey, completely separated. SO I strained the white stuff, started over with a cup of milk. Anyway, I can’t tell them apart.
Hi Nan!
I strain my grains with a fine mesh sieve, causing the milk to be filtered through. I also use a spatula to move/separate some curds from the grains. Once I’ve gotten as much as I can, then I transfer to a new jar. If you find whey at the bottom, you’ve over-cultured the milk (which I do ALL THE TIME, and it’s no big deal). It just means your milk will be extra tangy. 😉 Using more milk will help, or straining the grains sooner. In either case, grains are somewhat firm. They will not squish completely in your hands like a curd will.
My suggestion would be to try a lesser culture time and strain so you can see what the grains look like without the curds getting in the way. Then when you know what they look like, over-culture like crazy! 🙂
Thank you for your submission on Nourishing Treasures’ Make Your Own! Monday link-up.
Check back tomorrow when the new link-up is running to see if you were one of the top 3 featured posts! 🙂
Just got some kefir grains from a friend, so this was really timely 🙂 Thanks! PInning.
You’re welcome! Lucky you to skip the rehydration part – you’ll have kefir tomorrow!
Thanks for the step by step! You make it look so easy.
You’re welcome – and it really is super, super easy!