Wondering how to start a frugal urban garden bed? These practical tips will help you start the best budget-friendly garden from scratch! Looking for more gardening tips? Here are my 5+ ways to use plastic for gardening.

When I was a kid, I thought my parents were so uncool for wanting to plant things outside.
I remember them waking up early on Saturdays and working diligently in the garden… decorating with bricks, planting a variety of colored flowers, laying down mulch… They would work hard until the Texas heat kicked in and the sun mercilessly poured out its scorching rays. My sister and I were routinely called to deliver tall glasses of water, iced tea, or lemonade – always with extra ice.
Now that I’m older, have children of my own, and am passionate about real food, I’ve grown to appreciate the art of having a garden. Except…
I did NOT inherit the green-thumb gene. In fact, I’m pretty sure I got a double dose of the black-thumb instead.
Still, I’ve been wanting, yearning, and CRAVING a garden year after year. My lettuce growing in a cup wasn’t cutting it out anymore. I wanted the real deal. Outside. With dirt.
Since it’s growing season, I’m very excited to share my garden with you guys, but today’s post isn’t really about my garden. It’s about inspiring you to start your own!
I know that many of you desire a garden, too, but feel inhibited with finances. So I’d like to share some ideas with you to help offset the cost of starting a garden, plus how we tackled some of our typical gardening issues above without spending money at all.
Starting a Frugal Urban Garden
Why am I talking about gardening on a frugal real food blog? For 4 main reasons:
- Growing your own food is the only way to know for sure the methods used for growing and harvesting.
- Picking food from your own garden is good for your grocery budget.
- Gardening is therapeutic, and stress can really do a nasty number on your body.
- Gardening is a way you can teach your kids about real food, as well as yourself.
What are you going to grow in your garden?
This should be an easy answer while making your garden plans, but it’s really not. Not every climate is ideal for every fruit and vegetable, and not every family likes tomatoes! Some ideas to consider when deciding what you’re going to plant:
- Your family’s preferences. If your family can’t stand zucchini and hates green beans, then don’t grow them! Only grow what your family will eat and enjoy. This will make the entire gardening process much more fun.
- Cost if you bought the food. What foods tend to lean toward the expensive side? Which ones are affordable? Try to grow the foods that cost the most at the store or the farmers market.
- Growing conditions. Certain vegetables and fruits will grow better in different regions. Consider how much full sun, shade, rain, and wind your home garden will have.
- Research the average growing season temperature that your climate has and also what your annual frost dates are. You can do this research independently, or talk with nurseries in your area.
When should I start my garden?
To know the best time to start your garden, reference an interactive map of the US hardiness zones. This is a very helpful way to see growing zones across the country, so you know when to plant your garden.
How do I grow a frugal garden?
To plant and grow a healthy and frugal garden, you’ll need:
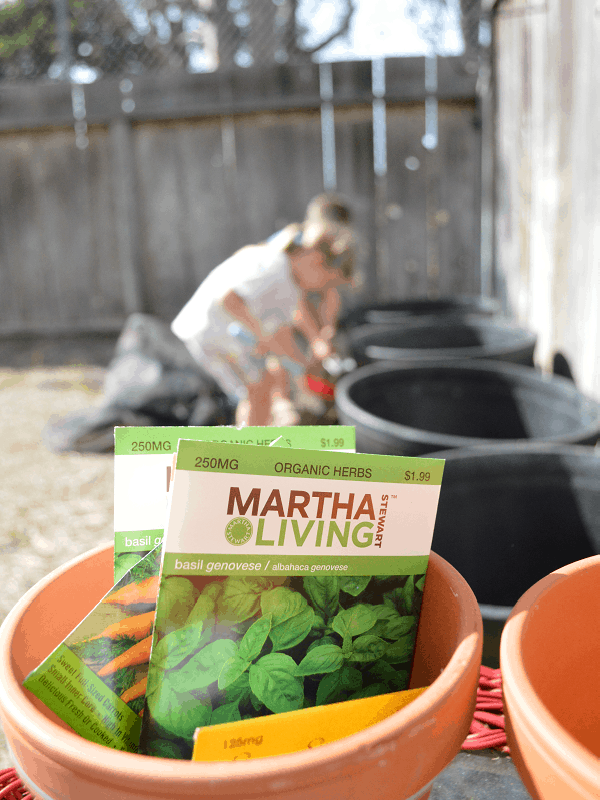
Seeds
Remember to save seeds from your family’s favorite fruits and vegetables for planting in your seasonal garden. You can do seed starting early in the season, indoors. Then plant the young plants outside according to your hardiness zone. But, if you’re going to buy them, it’s best to find ones that are non-GMO.
The cost of seed packets can range from $1-2, and it might be worth shopping around at different stores to see who has the better deal. If the cost of seed prevents you from gardening, consider splitting the cost with another real foodie.
Also remember that spending just $1 and growing just one item will have an impact on your budget in the long run. Consider a $1 packet of zucchini seeds:
- One packet could grow 12 plants (and honestly, that’s on the conservative side) with each plant producing 3-5 zucchinis each week.
- If you’re paying 50¢ per vegetable, you’ve saved $17 in just that first week!
Soil
If your property is lush with dark brown dirt and rich with naturally occurring nutrients, count yourself lucky – your healthy soil is free! You can easily plant in the ground, or in raised beds, using the dirt you already have on hand.
If your property is less than ideal (i.e. filled with sand, plant roots, clay, rocks, sticks, and random pine cones), you’ve got a little bit more work to do and some things to consider before you start planting.
- Do you want to plant in-ground, in raised beds, hanging planters, or boxes lined up against the fence? Your answer will greatly depend on what you’re growing, but know that there IS hope for a garden in your sandy, reedy beach.
- Determine how much dirt you’ll actually need. The best mix for plants is actually not 100% topsoil, so you can mix/match certain materials to get a perfect combination based on the food you’re growing, your environment, and how you’re going to grow it. Here’s a tutorial for making your own potting soil, plus tips for enhancing the soil you already have.
- Organic soil isn’t always better, but it’s almost always more expensive. Rely on labels instead and if there’s anything from animals (like poultry litter), know that it’s likely from conventionally-raised chickens unless it says “100% organic.”
- Think outside the box in terms of where you get your dirt. Traditional stores like Home Depot and Lowes are an option, but so are smaller hardware stores, grocery stores, drug stores, and even the dollar store! You can also ask family and/or friends if they have spare dirt or salvage dirt from open land.
Growing Containers
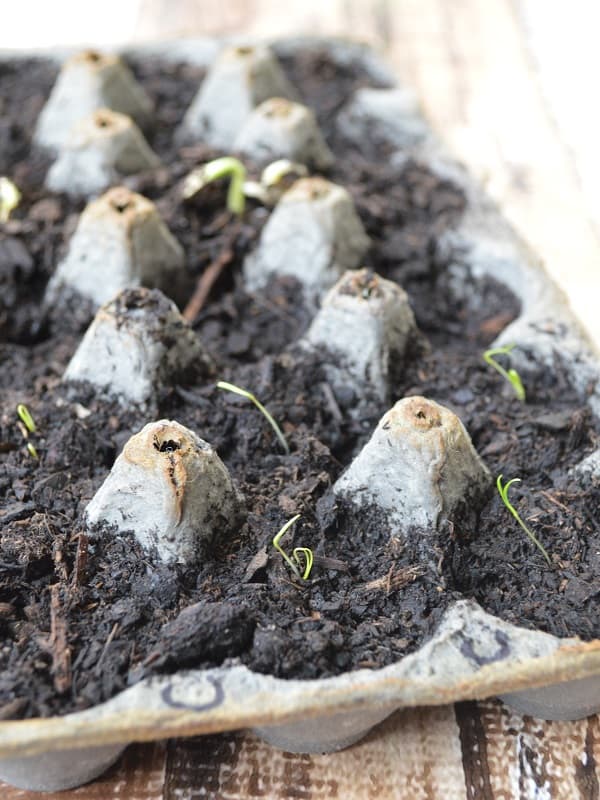
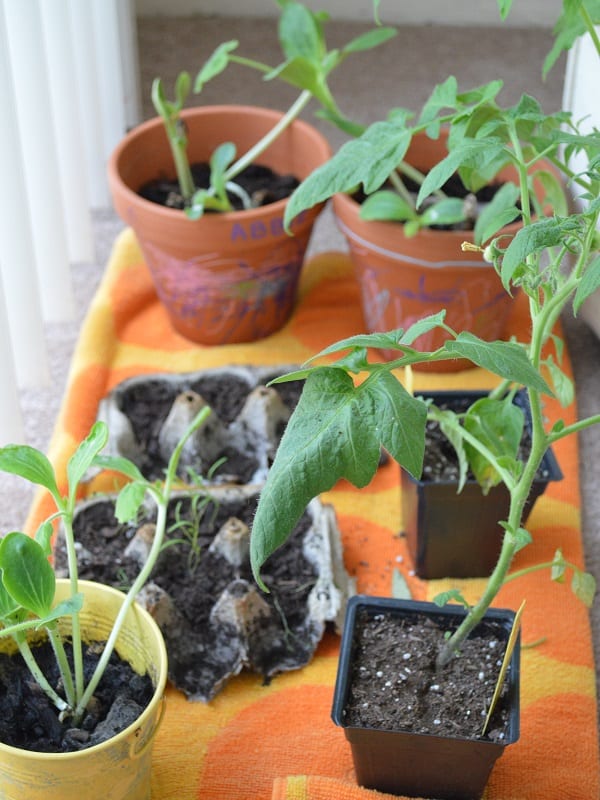
There are so many different free things you can use to start seeds, it’s crazy. My container of choice is the cardboard egg carton since you can start seeds of several different plants in just one carton and it’s easily portable to the best spot in the house.
Just be sure to label each cup so you know which is which (C for carrot, Z for zucchini, etc.). When it’s time to transplant, rip each little cup off – taking care not to break the roots – poke a hole in the bottom and plant the whole thing in the garden!
Other container ideas include:
- yogurt containers
- reusable bags
- small trash cans
- kiddie pools
- colanders
- clam-shell from berries
- or a shoe rack that hangs over a door!
Even the cardboard from toilet paper can be shaped into a container! All you need is something to hold a little bit of dirt that has a small hole at the bottom for drainage (or is porous) and you’re set! Remember, you can cut a hole if one doesn’t already exist.
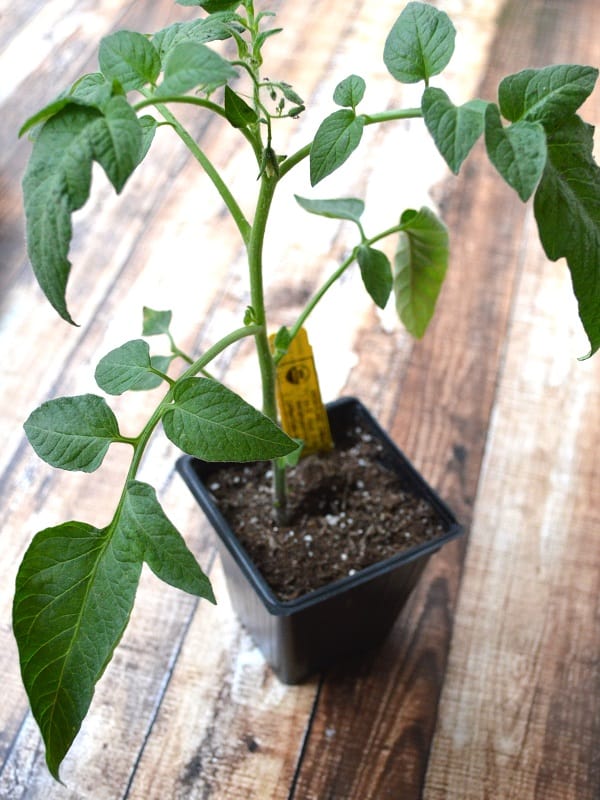
How do I transplant seeds into the garden?
Once the seedlings are ready to be transplanted, you can:
- Put them into pots
- Corner off parts of your yard with a raised bed. Things like rocks, cinder blocks, and even wood make great “walls” to your bed and allow you to fill just that area with the good dirt the plants need. Here are some big fabric raised pots, but I’m considering the cinder block approach for next year in a spot that gets partial sun (which I’m told is good for zucchini).
- Consider re-using materials around the house too, like empty hanging planters.
Water
Most of us pay for water in some way, and it’s inevitable that the cost of watering a garden every other day will add up to something. Reduce the cost by…
- Capturing water from the tub as it’s getting hot and use that water to water your garden.
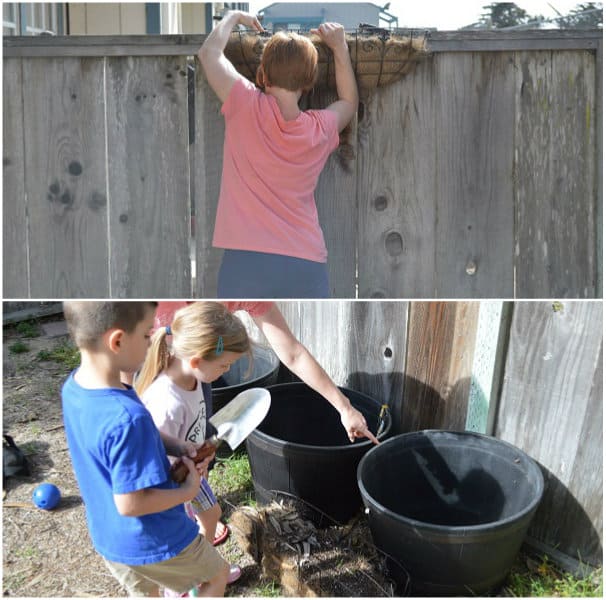
- Routing your gutter into a large trash bin to collect rainwater, and then using that.
- Reusing water used to wash your car. You can also reuse your bath water or water for boiling noodles/steam veggies.
Anytime you’re about to pour water down the drain, consider setting it aside for the garden instead.
Note: When you water your garden, be sure to water the roots of the plants well and you won’t have to water as often.
What is the best method for watering my garden?
Here is a great tip that I have seen in some frugal gardens…
- Poke holes in a water bottle.
- Plant the bottle a few inches away from the plant, but leave the top of the bottle above the soil.
- When you water, water the jug so the water goes out of the poked holes, directly feeding the roots instead of just the surface of the plant.
Also, a milk jug with holes poked in the lid can make a great watering can, or just go super simple and use a cup!
Regardless of your circumstances, how little your yard is, or how busy you might be, I promise that you can grow SOMETHING and enjoy the rewards that come from growing your own food. Even if it’s a basil plant in a cup of water in your kitchen, starting small by taking baby steps can make such a difference.
Do you have any experience gardening? Do you have any tips to share with us? Please leave them in the comments!


You can even grow sunflowers in large pots. I planted some from my birdseed and under it planted cilantro. Now the cilantro is going to seed, but I will have coriander seed from it. The sunflowers are 8 feet tall and have branches with sunflowers coming between the leaf nodes. Also planted scallions from the ends of organic green onions in between and green shoots coming up can be used like chives. Garlic chives grow well too in my desert garden. Herbs of all kinds do well here in the desert.
Great stuff. I was wondering – when you plant the seedlings from the egg carton . . . do you cut the egg carton itself and actually plant the paper egg carton in the ground? Doesn’t that keep the roots from spreading and growing?
Yes to cutting the egg carton, and no to the roots. They’re usually poked through and growing strong at that point!
greetings from Europe!
I started with gardening in containers and for this I tried to make it with no money invest (finally I spent some money, but this is just 3-4 euro). For this I reused some plastic bins that I had, some wood boxes collected from the shop, some plastic bags. For wood I make my compost (cartons and kitchen throw away are decomposing with the help of some worms, humidity and heat). The seeds I collected and reused.: the old small potatoes , the onions, garlic, seeds from local farmer tomatoes etc. or collected on the streets: calendula, nasturtium seeds, branches of rosemary etc. -or shared with neighbours /local freecycle groups.
Water I reused from the kitchen: the water used to wash potatoes, rice, apples, the salads, the water from glasses/bottles.
I combined the plants following some rules found on permaculture sites.
I remember I started with some aromatic plants. There are easy to maintain: don’t need too much space or too much sun/heat, not too much water and with several leaf I can change the flavour of any dish: think to mint, rosemary, basilicum, cilandro, oregano, etc. .
You can use the white polystyrene boxes to grow verges, just punch a few holes in them and fill with soil. When you plant tomatoes take off the bottom leaves and plant them deep. Extra roots will form along the buried stem and the plant will be stronger.
I’ve been gardening for a lot of years and since living in a semi arid area, gardening can be challenging. When I’ve had very limited water, I washed dishes in a plastic tub in the sink and then dumped my dishwater on garden plants and pots of flowers. It’s a good way to catch water that you’re running in the sink to get it hot/cold. Some think soap isn’t good for plants, but actually is OK. The soap helps the water to penetrate through the soil down to the roots.
Garage sales are good places to get large cast-off pots or wash tubs. You can also use old tires for planters.
I love to grow and eat a variety of lettuce. I plant lettuce 2 or 3 times during a summer at different times. That way you can have fresh lettuce throughout the summer and some for fall too.
I’ve been enjoying your blog and love the recipes in “High Protein No Powder.” Just finished a yummy bar.
one more thing… shop for seeds at the end of the season when they are on clearance and they will be fine to use next year. keep all your saved seeds dry,and in an air-tight container or plastic bag and store them in the fridge.
i go to my local organic grocery and farmers market and buy the veggies i like and when i am preparing things for cooking like squash or tomatoes i save the seeds for planting. also, there are plants like potatoes and garlic that will grow a whole crop from 1 bulb or tuber. and i like to plant the root ends trimmed from things like celery and green onions that will regrow over and over. carrots will regrow their tops and go to seed that can be saved. let a few of your annual herbs like coriander and parsley go to seed and you can save some for next season or an indoor window box for winter use. and those coriander (cilantro) seeds are good for cooking. mustard greens are delish good food and i use mustard, celery and dill seeds in so many things. and you know all of it is grown in a healthy and organic way. get a few knobs of ginger and plant them horizontally near the surface so it shows on top of the soil. water lightly and bag the pot till it sprouts. then keep it damp and out of the hot sun. ginger takes some time to reach a harvest but it makes a pretty house plant in Winter. for tomato, bean and pea seeds go for the slightly over ripe ones as they will have the most developed seed. ALWAYS plant horseradish, mint and dill in a pot and don’t let the seeds spread or you will be invaded! plant perennial herbs like rosemary, chives, oregano and thyme separate from annuals and you can bring them in for the Winter months, then out again after last frost in Spring. then there are lemons, limes, figs and avocados that happily grow for years in pots as long as you bring them in for the cold months. even grapes and dwarf bananas are happy in pots. banana leaves can be used for steaming fish and seafood and stuffed grape leaves are easy to make and a bonus veg usually overlooked. bay laurel is a common house plant and culinary seasoning that looks as good on the patio as in the home.
as far as the cats are concerned you can find a spot farthest from your garden beds, like in the alley if you have one, and plant catnip. catnip is another invasive herb but the neighborhood cats will keep it in check. in fact, you might need to cover it at first so it has a chance to take.
a good way to use space is to companion plant. when filling a pot, put some crushed egg shell and a banana peel (organic) about 4″ from the soil line. then fill to 2 or 3″ from the top of the pot so watering does not overflow. on top of the dirt near the outside edge i put a small, flat stone or broken pot shard. i do this so i can water there and not end up washing a hole in the dirt, disturbing seeds or roots. plant 2 or 3 sweet corn about 6″ apart and near one side, or the “back” of the pot. around the corn plant a few climbing beans. then plant a pair of melon, squash, eggplant, cuke, etc. in the “front” half of the pot. and finally you can sow spring greens like spinach and leaf lettuce. what you end up with is 3 season wave of food it one spot. corn and greens will come up quick. harvest with scissors so you don’t disturb the roots and soil. the greens go to seed when it gets hot and are done before the vines take over and spill over the edge of the pot and on the ground. don’t be afraid to trim them if they start to take up too much turf. you will get less but better sized fruit from them. and squash blossoms are yummy! the corn may need some help but will support the beans as both grow. beans start in early July for me and keep on till the frost. and beans are nitrogen fixers (nature’s fertilizers) and will actually feed the rest of the veggies.
I really like your idea about saving the water run in the tub waiting for it to get hot. I could easily do that with the water in the kitchen sink, too. I might feel a little nervous using bathwater or anything else that had soap in it, though. Soap’s not good for plants.
LOVE this, Tiffany! Can’t wait to share it! 🙂 And hear more about how your garden is progressing! xo
Thank you Kelly!!
Love this post. When we started our garden a couple years ago it was far from frugal. It cost a lot and I failed miserably at growing everything! Love these tips, so helpful. I took a break last year (just growing herbs and collards), but I’m going to give it a go, scaling back this year for (hopefully) much better success.
Thanks Kristin! I’m hopeful that our small garden will produce well, but there’s PLENTY of room for grace and error with my black thumbs, lol. Hopefully I’ll learn a lot as to how it all works, and be able to grow it more next year. From what I hear, starting small seems to be the way to go – so it looks like we’re both on the right track! 🙂