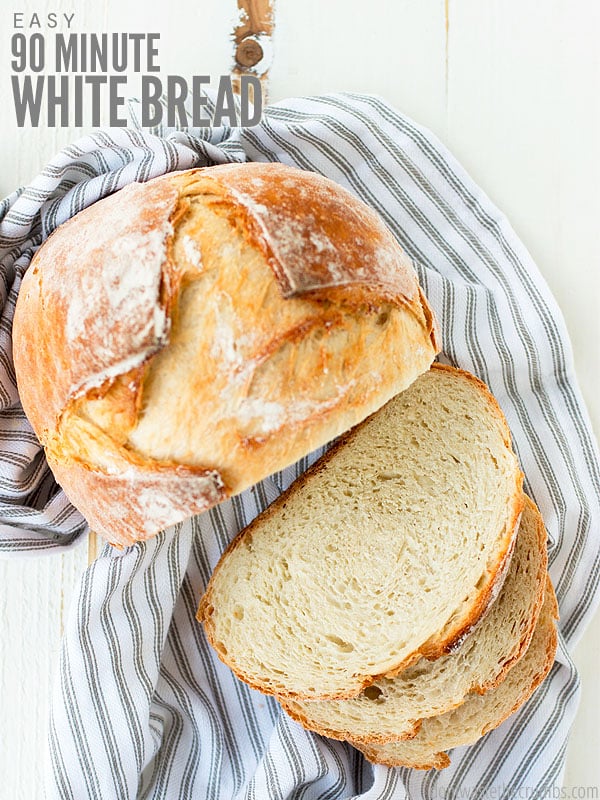
This easy white bread recipe, AKA man bread, is so easy to make! Create an awesome, man-sized loaf or a dozen rolls of homemade bread in just a quick 90 minutes. This is the perfect bread recipe for beginning bakers.
Written by Mr. Crumbs
Usually, Mrs. Crumbs is the one experimenting in the kitchen, but occasionally I take a turn too. And this is one kitchen experiment that turned out pretty awesome: Man Bread.
It’s crusty on the outside, and soft on the inside. When we pulled the first loaf out of the oven, Mrs. Crumbs and I were like, “Holy moly! That is one huge loaf…wonder if it’s any good?”
Well, I’m going out on a limb by saying this may be the BEST and easiest sandwich bread we’ve ever made. At first bite, we rejoiced. After the second bite, we knew we had to share it with you.
So, after some deep decision-making (AKA choosing between butter or peanut butter while taste testing) and recipe refinement (AKA eating a few more loaves of bread), we proudly present:
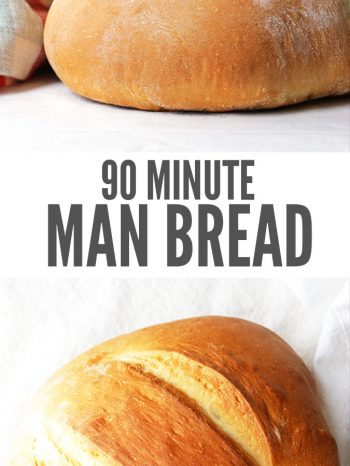
Man bread.
MAN BREAD AKA EASY WHITE BREAD RECIPE
This white bread recipe is so easy, that even a man can make it. It was, after all, developed by one!
It’s just as easy (if not easier?) than the No-Knead Overnight Artisan Bread, which many say is the easiest bread in the world.
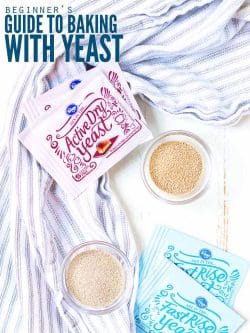
And if you doubt me and say “Baking bread is too hard” or “I’m scared of yeast,” I’m here to tell you that making homemade bread isn’t too bad! This loaf is your new best friend (and here’s a beginner’s guide on using yeast).
WHY IS THIS RECIPE FOR BASIC BREAD SO GREAT?
- There’s no refined sugar. It’s sweetened with honey and has a tasty hint of coconut oil. A healthy bread recipe developed by a man who once survived on Doritos and soda? Proof that picky eaters really can switch to real food!!
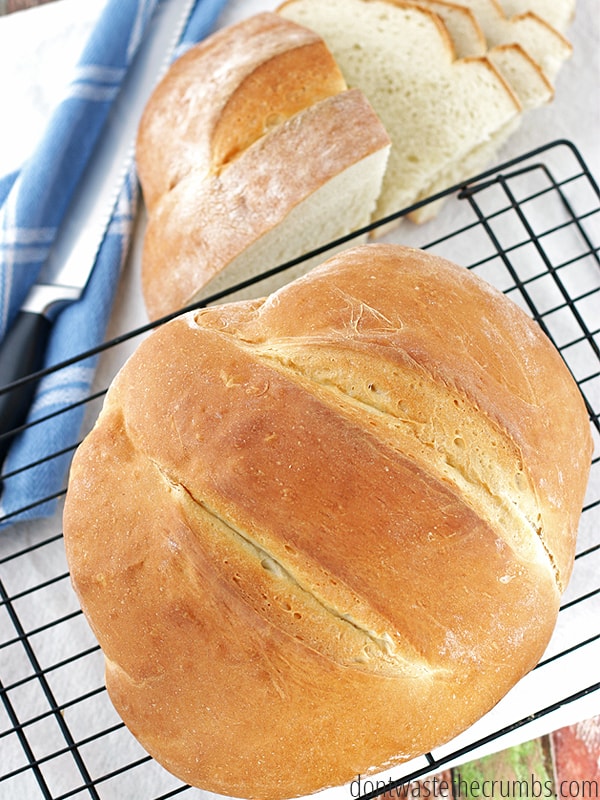
- You can make it fast. You can treat yourself to this ginormous, football-sized loaf of delicious goodness in just 90 MINUTES. That’s a quick rise, little effort, and yum-o in your belly in no time.
- It’s pretty foolproof. This recipe for basic bread was a complete accident. Which means it’s highly unlikely you can get it wrong. Perfect for the novice cook, or fellow husbands out there.
Despite its size, it holds up to the hacking of a knife and smearing of butter and peanut butter very well. Granted, we love our Potato Bread, Maple Oatmeal Bread, Rosemary Olive Oil Bread (and more) – but this is just SO much easier!
Even funnier: we’ve made 3 loaves of this stuff in 2 days.
The first was obliterated by the family with a couple of sticks of butter. The second loaf was used for grilled sandwiches.
The third was a final test loaf to ensure we could replicate this recipe and that it wasn’t too good to be true. I’m eating that one as I type this.
WHITE BREAD RECIPE INGREDIENTS
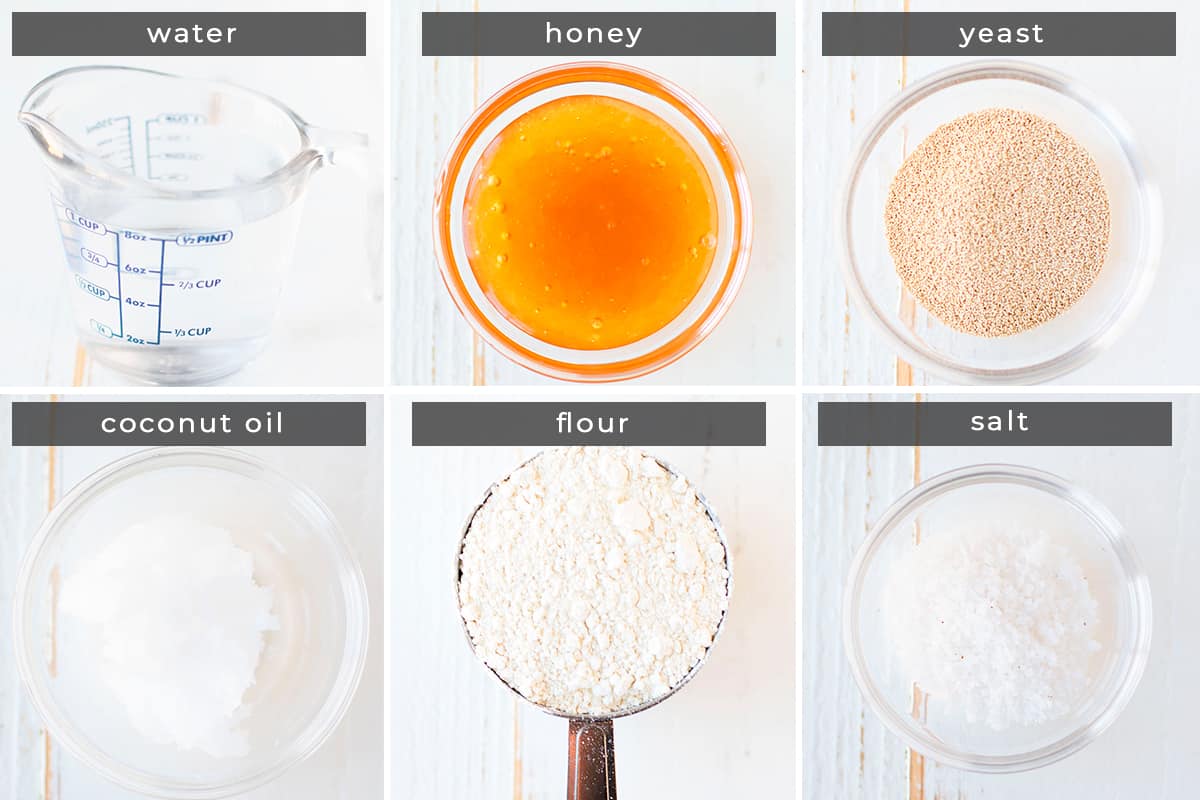
The ingredients list for man bread is pretty simple.
- Warm water (105-115 degrees).
- Honey. Just a tablespoon helps to activate the yeast.
- Active dry yeast.
- Coconut oil. You can use melted butter or olive oil instead, although the flavor will be slightly different. Rest assured; this bread does NOT taste like coconut oil.
- All-purpose flour or bread flour. You can also use up to 50% whole wheat flour.
- Salt.
- Vital wheat gluten (optional). This makes for a softer, more pliable loaf. If you are using bread flour, you don’t need to include this. Otherwise, add 1 tablespoon for every cup of all-purpose flour to make homemade bread flour.
Note: Believe it or not, coconut oil is mildly sweet and tricks the taste buds into thinking it’s eating something sweeter than it actually is (cinnamon also does the same thing). That’s one reason why this loaf is loved by so many people who only eat white bread. Store bought bread has added sugar, but this homemade loaf TASTES sweet – despite the fact it only has 1 tablespoon of honey.
Psst…Did you know that many salts contain MICROPLASTICS? It’s a sneaky toxin that may be in your everyday salt, and thus your everyday food (um, gross). I love Ava Jane’s Kitchen because their salt is FREE of microplastics, and it tastes delicious! PLUS, you can get your own 8 oz bag of salt FREE on this page! (Just pay shipping)
HOW LONG TO BAKE BREAD
How long to bake bread will depend on which type of pan you use.
Most breads call for loaf pans, but we used our pizza stone. This is the one we have. It’s over 5 years old, has been through hundreds of pizza nights, and is still going strong. No cracks, despite moving across the country!
Plus, it makes your pizza and bread taste pro-artisan (a.k.a. makes you look like you know what you’re doing).
You can also bake this easy bread recipe in loaf pans. After the first rise, split the dough into two loaves and place into two greased bread loaf pans. Rise again and bake as directed.
This recipe can also be used to make dinner rolls. Split into rolls after the first rise. Rise again and bake for 12-15 minutes. Your baking time might vary depending on the size of your rolls, so you’ll know they’re done when they’re golden brown and reach an internal temperature of 220 degrees, just like the single loaf of man bread.
HOW TO MAKE HOMEMADE WHITE BREAD RECIPE
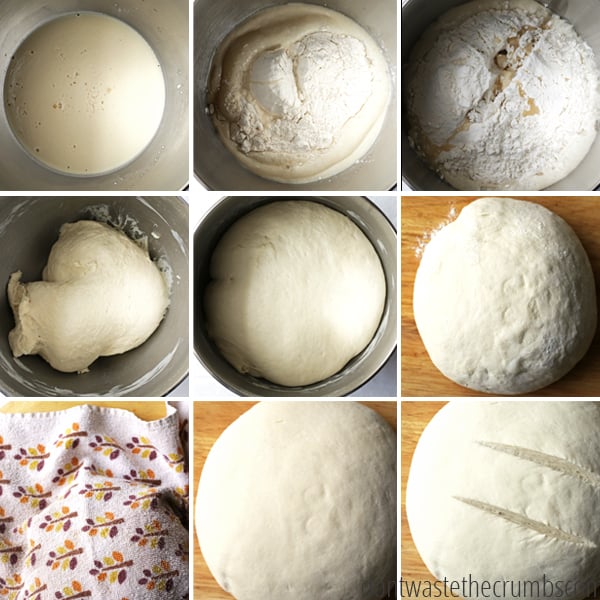
Step 1: If your kitchen is not warm, turn your oven to low. This is simply to warm your kitchen up a little bit (since it’s cool where we live).
Step 2: In the bowl of a stand mixer or large bowl, add warm water, honey, and yeast. Stir a few times until the honey dissolves. Once the yeast starts foaming (5 minutes or so), add flour, melted coconut oil, and salt. Once your bread dough comes together using the dough hook, knead for 10 minutes on low/medium-low. Leave your dough ball in the bowl and cover with a towel. Let rise for 30 minutes.
Step 3: After the first rise, scoop your dough ball on a lightly floured surface. ( Knead your lump of dough by hand a few times, until it forms a firm ball. Cover this ball of dough with a towel.
Step 4: Preheat oven to 400 degrees. If you have a pizza stone, make sure this is in the oven to warm up. Alternatively, you can use a cast iron skillet while the oven is preheating, or two loaf pans (see notes above).
Step 5: Let the bread rise for 30 minutes.
Step 6: After the second rise, place the dough ball directly onto the pizza stone, cut two slits on the top of the dough ball, and bake for 25 minutes at 400 degrees. If you are using loaf pans or a cast-iron skillet, the cook time may need to be increased by an additional 10-15 minutes. (The bread is done when the internal temperature is 220 degrees on an instant-read thermometer).
Step 7: Let cool on a wire rack and enjoy.
Note: We move this dough from the counter to the pizza stone, but if you don’t feel confident in that transition, flour a piece of parchment paper, and shape the dough on that for the second rise. Then move the entire paper with the dough to the oven for baking.
CUTTING THE MAN BREAD
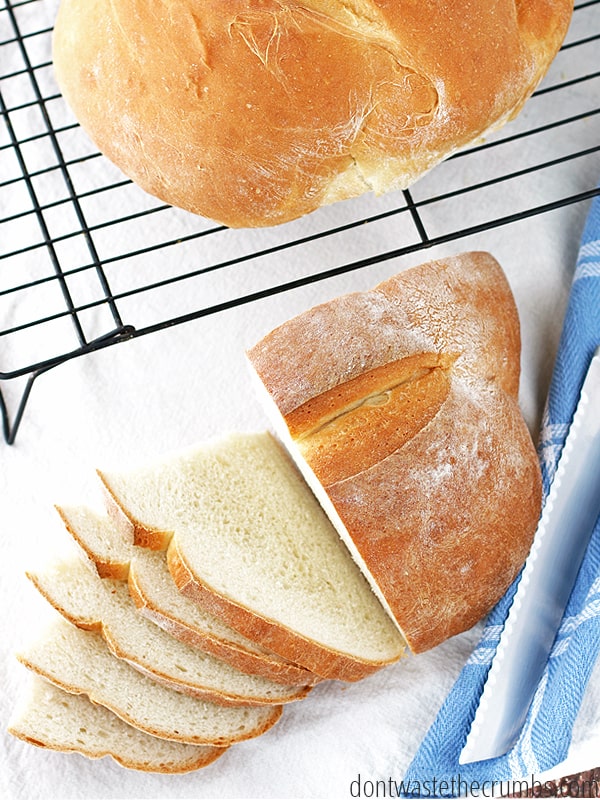
Making this recipe will likely yield a Joe Montana-sized football-loaf-of-bread. Which means cutting it can be awkward. Here’s how we do it:
- Cut the whole loaf in half lengthwise.
- Take one of your halves and cut into slices. Trust me, the slices are plenty big for your sandwich. These are man-sized slices.
- Smear with lots of butter.
Homemade white bread doesn’t keep for very long because it doesn’t have the preservatives of store-bought bread. Store in a breathable container or bag (not airtight) at room temperature for 3-4 days. If you have any left, that is. Or go ahead and make double or triple if you want to save some for later. Trust me.
FREEZING INSTRUCTIONS
You can freeze this simple white bread recipe in whole loaves, slices, or unbaked dough. Here’s my full tutorial on freezing bread if you like to read more details but here’s the quick version:
- Whole loaves: Wrap in plastic wrap to help protect against freezer burn, then place in freezer-safe bags.
- Slices: After cooling, slice bread. You have two options, lay the bread out on a sheet pan to allow each slice to freeze and then pack in a freezer bag for storage. Or place a small sheet of parchment paper between slices to keep them from sticking together.
- Dough: After the first rise, shape the dough into desired loaf. Wrap in plastic wrap and place in a freezer bag. Thaw overnight on the counter and let rise. Bake as directed.
Be sure to label your freezer bags!
WHITE BREADS FAQS
Why is white bread so soft?
The optional vital wheat gluten in this homemade bread recipe helps make a soft, pliable loaf.
Can you make white bread in a bread machine?
I haven’t tried this white bread recipe in a bread machine. Honestly, this recipe is pretty easy on its own, so even if you’re a beginner at baking bread, I bet you can do it!
How do I know if the bread is done rising?
Following the rise times listed in this post should get you a yummy loaf of bread. To check if the bread is done rising, gently press your index finger into the dough. If it bounces back and fills in the indentation, it needs more rise time. If the indent stays, it’s ready for the next step.
Why is my bread so dense?
Your bread could be dense for a couple of reasons. You may have added too much flour. Or the bread might have needed more rise time. Luckily, bread is a great frugal baking recipe to learn with, so you can try it again. Dense bread still tastes good toasted or as French Toast or Croutons!
MORE FAVORITE BREAD RECIPES
- The Best White Sandwich Bread
- Soaked Whole Wheat Bread
- Maple Oatmeal Bread
- Rosemary Olive Oil Bread
- Cinnamon Raisin Bread
- Simple Sourdough Bread
- Homemade Hamburger Buns
- Light and Fluffy Hawaiian Rolls

Crush Inflation Challenge!
Sign up for my FREE Crush Inflation Challenge and learn simple strategies to save money, even with rising food costs!WATCH HOW TO MAKE OUR MAN BREAD
Man Bread: Homemade White Bread
This easy white bread recipe, AKA man bread, is so easy to make! Create an awesome, man-sized loaf or a dozen rolls of homemade bread in just a quick 90 minutes. This is the perfect bread recipe for beginning bakers.
- Prep Time: 1 hour 15 minutes
- Cook Time: 25 minutes
- Total Time: 1 hour 40 minutes
- Yield: 1 loaf or a dozen dinner rolls 1x
- Category: Breads
- Cuisine: American
Ingredients
- 1 ½ cups of warm water (105–115 degrees)
- 1 Tbsp honey
- 2 ¼ tsp active-dry yeast
- 2 Tbsp coconut oil, melted
- 4 cups all-purpose flour
- 1 ½ tsp salt
- Vital wheat gluten – 1 Tbsp per cup flour (optional)
Instructions
- If your kitchen is not warm, turn your oven to low. This is simply to warm your kitchen up a little bit (since it’s cool where we live).
- In your mixer bowl add warm water, honey, and yeast. Stir a few times until honey dissolves. Once yeast starts foaming (5 minutes or so), add flour, melted coconut oil, and salt. Using dough hook, knead for 10 minutes on low/medium low. Leave your dough ball in the bowl and cover with a towel. Let rise for 30 minutes.
- After the first rise, lightly flour a surface and scoop your dough ball on it. Knead your lump of dough by hand a few times, until it forms a firm ball. Cover this ball of dough with a towel.
- Preheat oven to 400 degrees. If you have a pizza stone, make sure this is in the oven to warm up. Alternatively, you can use a cast iron skillet while the oven is preheating – as one reader had great luck with! (Note: We have only tested this recipe with a pizza stone.)
- Let rise for 30 minutes.
- After the second rise, place dough ball directly on pizza stone, cut two slits on the top of the dough ball and bake for 25 minutes at 400 degrees. If you are using a loaf or cast iron skillet, the cook time may need to be increased an additional 10-15 minutes. (bread is done when the internal temp is 220 degrees).
- Let cool on a wire rack and enjoy.
Notes
- We move this dough from the counter to the pizza stone, but if you don’t feel confident in that transition, flour a piece of parchment paper and shape the dough on that for the second rise. Then move the entire paper with the dough to the oven for baking.
- Vital wheat gluten is optional but helps create a more pliable, softer loaf.
Nutrition
- Serving Size: 1 slice
- Calories: 179

Thank you for sharing your recipe Tiffany. I have just made some. It was so quick and easy ! I have put a photo of it on my Sussexmouse blog with a link back to you. I will be trying more of your recipes.
I’ve tried many bread recipes and this is by far the easiest and the family favourite! I sub the coconut with EVOO and bake it in a loaf pan with no issues! Makes a perfect sandwich loaf that never lasts long in our home.
Thanks for sharing!
I’m so glad you like it Dani!!
This is the BEST bread ever. My kids love it and my husband doesn’t want bread from the store anymore. I have zero experience making bread and this was a piece of cake.
Yay!! Thanks for the rave review Alyssa!
This bread is nothing short of amazing. Honestly, I’m not sure why it came out any different from any other bread (the only substitutions are honey for sugar and coconut oil for oil) but this is a tasty, light, fluffy bread. It tastes exactly like the breads from La Madeleine’s French Country Cafe. Somehow this bread has sour dough flavor and crust without being a sour dough bread. Thank you for the recipe, Mr. Crumbs. This will be a new family favorite.
Yay! So glad you liked it!! 🙂
Fabulous!!! I’ve been making bread for years and it’s been ‘okay’ but this loaf – fabulous!!!! All 4 of us kept raving about it. So easy too! I didn’t have any bread flour left and as I’m. not shopping for another day or so I decided to just use normal plain flour (I live in Australia, so AP flour for the US I think) – I can’t wait to make it with bread flour as it will be even more fabulous!!! Thank you. So pleased I stumbled upon your site xo
This is by far our favourite and easiest bread recipe. We make it all the time. We’ve adapted it a little to suit our tastes as a family, and it is made at least once or twice a week. It’s so easy my 2 and a half year old can make it with me!
Thank you Tiffany!
Claire
This recipe is fantastic! It’s also very adaptable. I have added honey and separated it and made high rise dinner rolls, added crushed garlic and fresh rosemary for focaccia, cinnamon and brown sugar for breakfast bread that also makes incredible French toast. I make at least one loaf a day!! My family won’t eat store bought bread anymore!! And I figured my cost is about $.85 a loaf!! Thank y’all so much for sharing this with us!!
How would rapid rise yeast work with this recipe?
You could swap it out without an issue Jessica. 🙂
I’ve always been nervous to try bread that require kneading. I don’t have a machine so I did it by hand and it turned out great! It was neat to see how the dough transforms as you need it. Thanks for putting together this awesome recipe. My husband and I love it!
I am a member and made the Man Bread. SO yummy. I dont see in the instructions when to put the vital wheat gluten in. I am assuming with flour. thanks
Yes, with the flour!
As to how to transfer the risen dough to the baking stone without losing loft– for the second rise I place mine on a piece of parchment paper then place that on my wooden pizza thingy (what you use to put a pizza in the oven!) then, when you are ready to put the bread in the oven, pull the rack out with the hot stone on it, line up the paper with the stone and slide it right on. Voila! No loss of loft!!! Works perfect for me every time! This is by far our favorite bread!!
That’s a pretty genius method Bronni! Thanks for sharing, and I’m thrilled you love the bread!
New Favorite bread recipe 🙂 Thanks a million! It’s so easy and extremely quick when we’re in a pinch.
We made this with whole wheat flour and it turned out great. I say that because all nine of our children commented on how good the bread was. I still can’t wait to use bread flour and see the difference. Thank you for the wonderful and easy recipe!!
Thanks for sharing this Hope! So great to know it works just as well with whole wheat flour!
Wow! I had to use all purpose flour because it was all I had. Then I ran out and finished with whole wheat. I probably used 25% whole wheat. This was great. I can’t wait to make it again and really follow your directions using bread flour. Thanks!
Glad you enjoyed it Christine!
This was one of my first tries at making bread and sadly after letting it cool and cuttin into i found the middle doughy. but the outside tasted great. I cooked on a cast iron tray
Oh no Ashton! Question – was the oven preheated fully and did it bake for a full 25 min? We’ve only once had a slightly doughy middle, and that was b/c my husband overloaded on the coconut oil, LOL.
Hi, Tiffany. Once again, this bread is making the rotation in our weekly menu. Tonight’s bread was baguette. Was it REAL FRENCH baguette? No. Was it delicious? YES! This recipe, with more flour, maybe 1/2 C, made two baguettes. One is in the freezer for another day. Thanks, Tiffany. I do believe this is our most favorite bread recipe. Simple and delicious. How very kind of you to share! Have a great evening.
Thanks for the raving review M! And I appreciate the tip about turning into 2 baguettes. We’ll try that next time!
Tiffany,
So I am a huge fan of the No-Knead Artisan Overnight Bread and that’s been my go-to recipe for months. I wanted to try this recipe but didn’t have any bread flour… I picked some up the other day, finally, and remembered that I wanted to try this. Man, am I glad I did!
I have made 5 loaves in 3 days because this stuff is so good! (No, we haven’t EATEN that much… I’ve frozen some.) I really want to get away from storebought bread because it’s neither cheap nor nutritious. And at 2 hours from start to finish, this bread is definitely my go to recipe now.
Thanks so much for sharing!
Your Avid Fan,
Sarah
I just pulled my attempt at this recipe out of the oven. It looks and smells so good!!! I can’t wait for it to cool so I can try it.
Ooh – I hope you enjoy it (wit lots of butter!) 😉
Was wondering if this bread could be used as a bread bowl? I have been looking for a recipe for one to use with chili especially or cheddar broccoli-cauliflower soup. Thanks
I don’t think I’d recommend this one for a bread bowl, but my Overnight Artisan bread would work!
https://dontwastethecrumbs.com/2015/02/no-knead-overnight-artisan-bread/
I’ve been baking bread for about 35 years. I have some tips that might be useful to someone just starting out.
If the bread is cracking, the reader may have forgotten to slash the bread on top. That keeps it from cracking as the bread expands. It also may have had too much flour to water. Since most of us use cups instead of weighing the ingredients, there’s a great variation in “1 cup”. Had to do with humidity of the area, the house and where it was made, how long it was stored in a paper bag, etc. I know that when I open 100% whole wheat flour canned in a #10 can in UT, it soaks up a LOT of water and I end up needing to add more water. When I open a bag of flour from the store, I’m having to add more flour (GA is VERY humid), as the flour already has used up some of it’s “soaking” power from the humidity.
When I bring home yeast (I just use regular yeast like Red Star, not a rapid or instant yeast in my baking and everything has turned out fine), I place it in the freezer. I’ve baked wonderful loaves with yeast that had an expiration date FIVE YEARS before I used it. But it has always lived in my freezer. It was bulk yeast that was vacuum-sealed. Once opened, I kept it in the original Mylar bag and put that bag in a zip bag, rolled down the Mylar, squeezed the air out of the zip bag and sealed it and back into the freezer it went.
Because I know my yeast is good, I don’t “proof” the yeast. I simply mix it in with the flour, sugar (if not using honey) and salt. Add the liquid ingredients and Bob’s your uncle.
I make a similar recipe to this (I’ll have to try the coconut oil, I’ve been using olive oil in mine, but this sound delicious!). I’ve used everything from AP to 100% whole wheat and it’s come out fine. I did learn a trick with whole wheat flour. My recipe calls for 4 cups of flour. So I add 1 Tbs of the vital wheat gluten in with the wet ingredients (I usually use my bread machine for making bread). I have also added bran and wheat germ to AP flour to add some more goodness to the white flour (If I used 1/2 cup of each, I’d leave out 1 cup of flour). Both ways give me a foldable sandwich bread.
If you have an oven that has a window, be VERY careful adding water to your preheated skillet (or broiler pan that I use). If you spill it on the glass, it will probably crack the glass. You can just lay a towel on the window while you fill it, though I’m just extra careful and use a glass measuring cup with a spout and pull the rack with the pan on it out so it’s easier to pour the water into (you can do it more quickly, with tends to alleviate the running down the side of the container you can get if you’re pouring slowly.)
You can add garlic, cheese, onion/garlic powder or any other add in’s you’d like. It will work. Add it in after you’ve kneaded it for a while and it’s almost ready for shaping.
You can also add more sweetener to this and make cinnamon rolls, sticky buns or pecan rolls, etc with this dough.
You can use this dough as Mr. Crumb has written it for hamburger buns, hotdog buns, dinner rolls, pizza dough, calzone dough, bread sticks, hot pockets, and any other shapes/recipes that are bread based. Shape, fill (if you’re adding filling) let rise, slash breads, buns, rolls calzone/hot pockets. Don’t slash pizza, bread sticks, etc. Sprinkle any toppings (seeds, cheeses, onion, garlic salt,) you want and bake.
You can divide it into smaller loaves – just use mini loaf pans, cupcake pans, or mini-muffin tins. Only fill 1/2 of the way and let rise until doubled. (whole wheat will not double, but it will expand just over 1/3, so fill pans 2/3 full). Or divide dough, separate and put on parchment on a baking tray, let rise, slash and bake for rolls/buns.
I have found that when my dough is too wet (it needed just a bit more flour) that it will rise sideways, but not rise up higher. I tend to have a bit of a problem with that the AB in 5 recipe as I don’t get enough flour in initially. (I REALLY should start weighing my flour as the humidity can vary greatly here!)
Hth
Really helpful tips, Darlene. Thanks!